If you have any questions that are beyond the scope of this help file, please feel free to email via my user page contact form here.
Thanks so much!
Getting started
Before installing Reales WP theme, you need to install the latest version of WordPress. You can download it from here. Once you downloaded and set it up, you are ready to install the theme.
Installation
In order to install the Reales WP theme, you need to follow the next steps:
1. Login in WordPress admin area
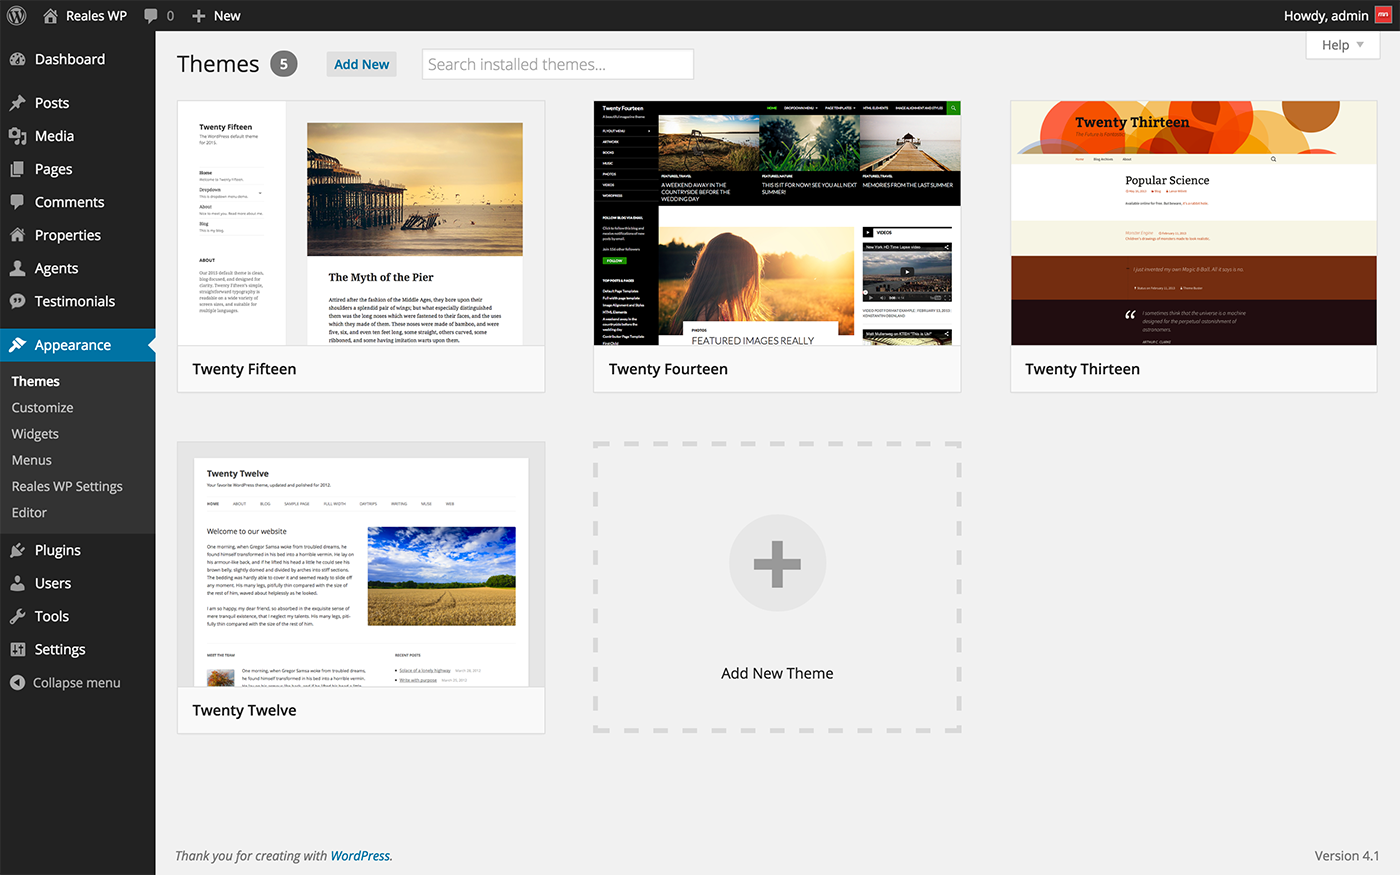
2. Choose Appearance > Themes from the left menu of the admin panel.
3. Click on Add New.
4. After Add Themes section opens, click on Upload Theme.
5. Choose the realeswp.zip from your computer (you find the .zip file inside the package from ThemeForest) and click Install Now and wait until the theme is uploaded.
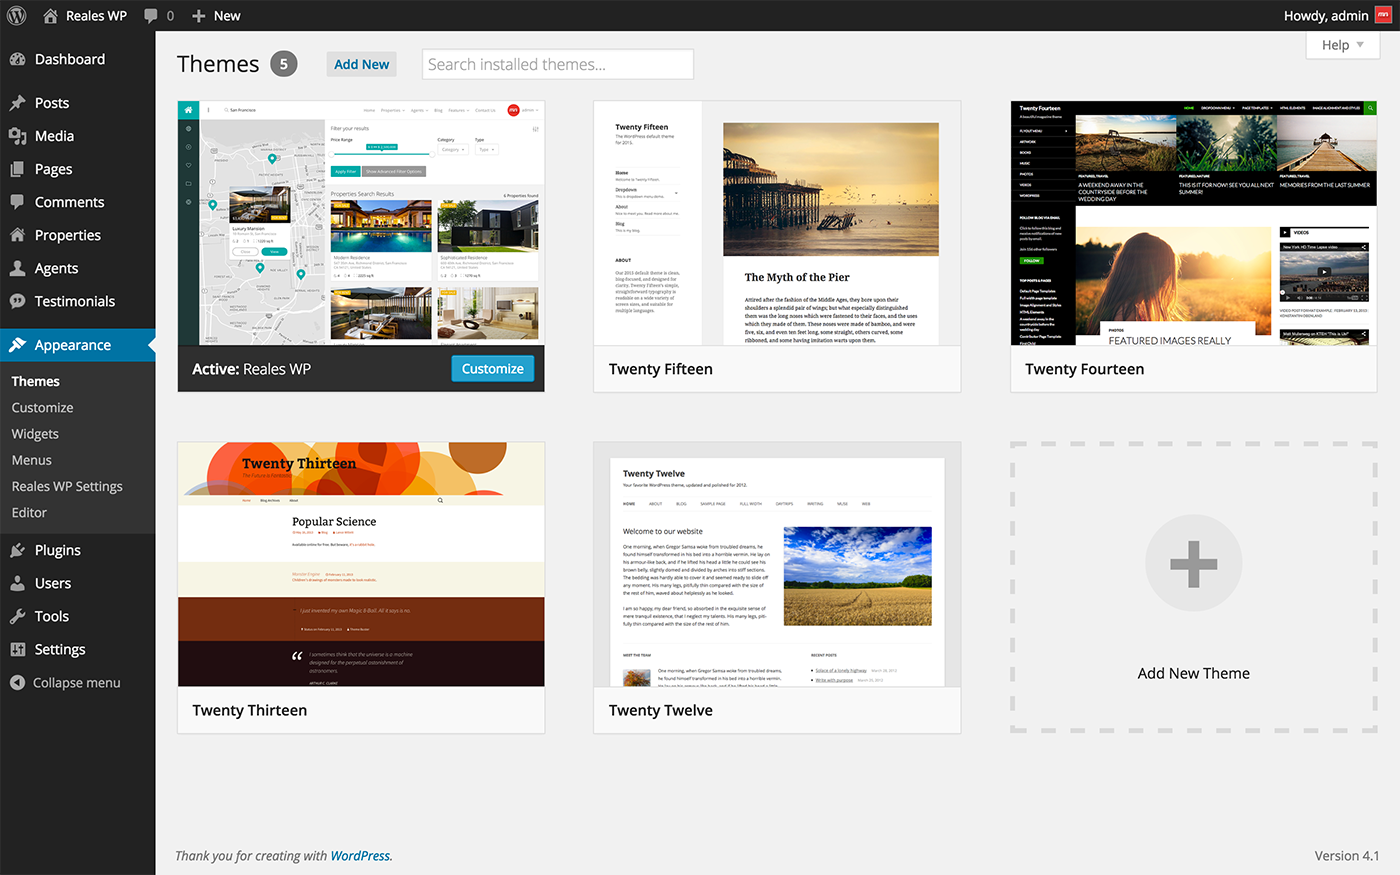
6. Activate the theme by clicking Activate.
7. You will be able to see the theme installed in the themes section, as seen in the image below:
8. Reales WP requires a plugin called Reales WP STPT developed for this theme. The plugin contains the shortcodes and custom post types like Property and Agent. After the theme installation, the following message will be displyed:

9. Click on Begin installing plugin, then click Install and wait until the following messages will be displyed:
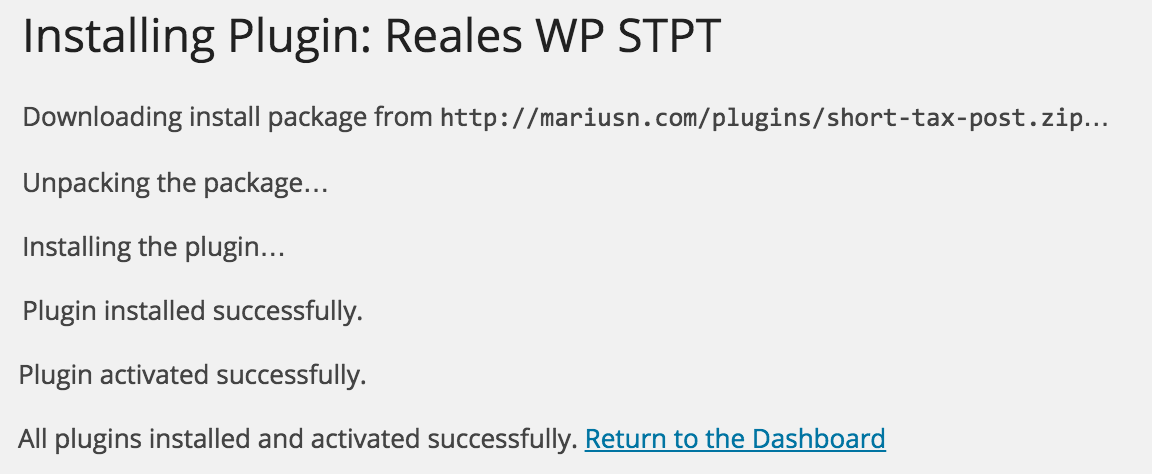
10. Click on Return to the Dashboard
Demo import
Inside the package that you received from themeforest there is a folder called Demo that contains several xml demo files. You can import a demo by going to Tools > Import > WordPress.
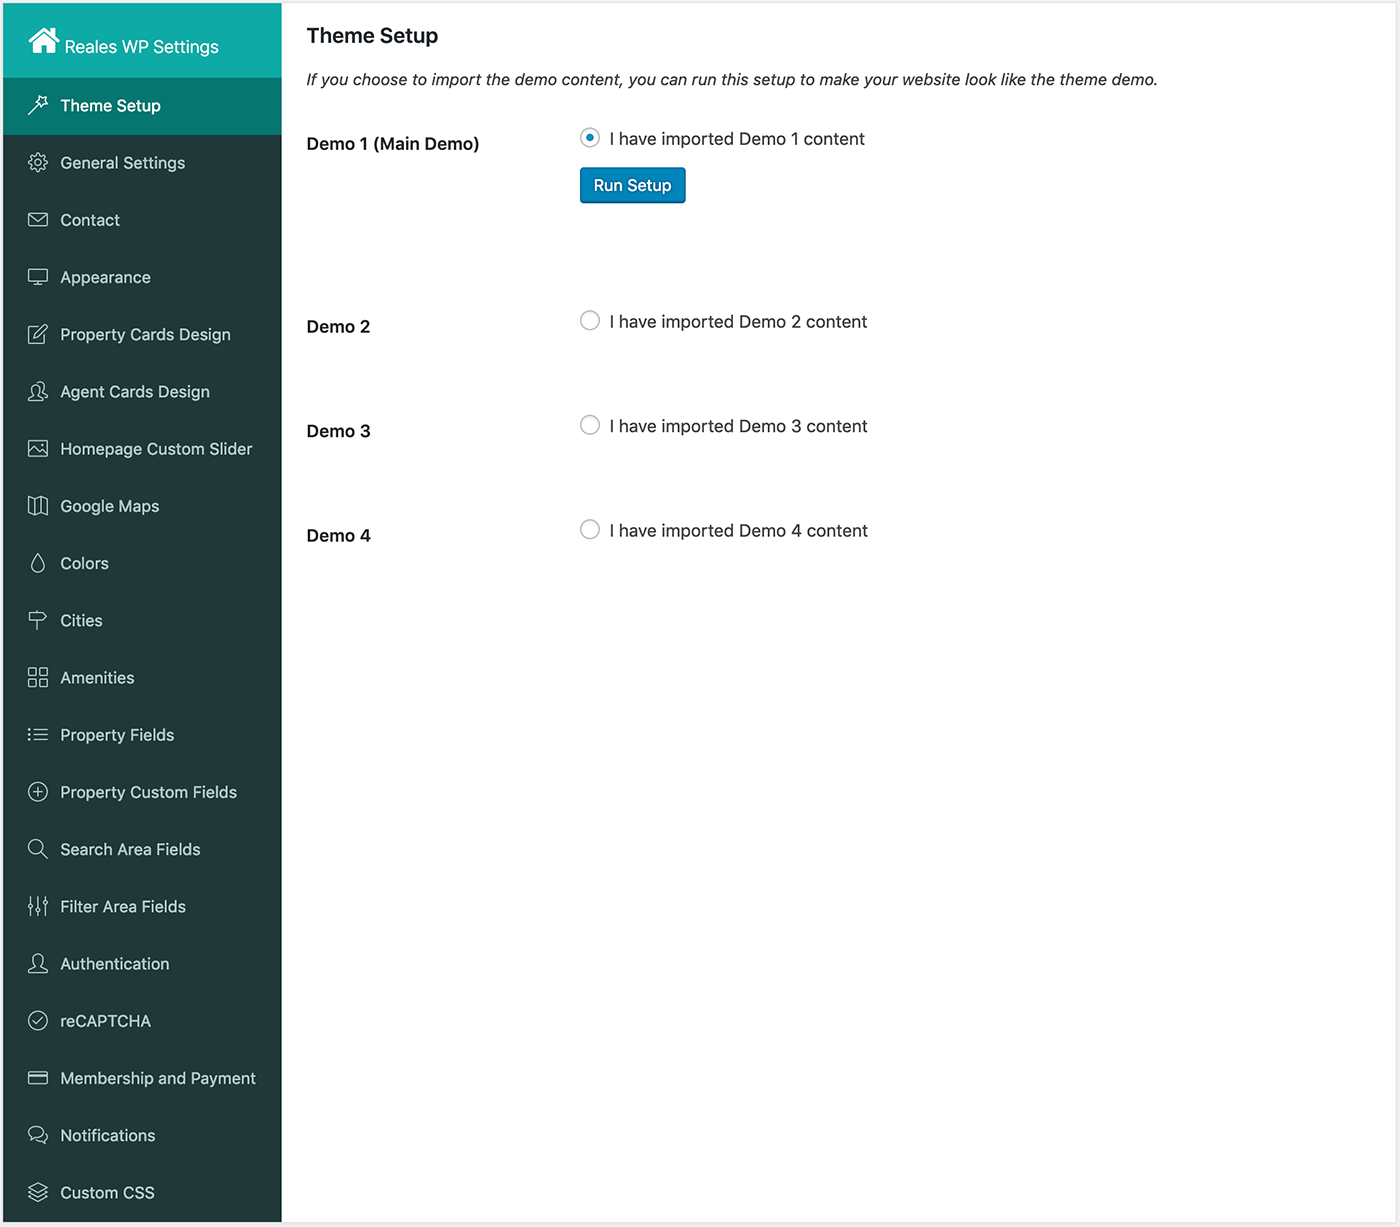
After importing the demo, you'll need to setup the Permalinks, Homepage, Menus, Widgets, and Theme Settings. You can follow the Setup section to do it manaually, or by a single click going to Appearance > Reales WP Settings > Theme Setup, choose the demo that you imported and click on Run Setup button, as seen below:
Setup
Before setting up the theme, you need to make some basic WordPress setup:
1. Go to Settings > General and change Site Title, Tagline, WordPress Address (URL), and Site Address (URL) with your own personal data, as seen in the image bellow:
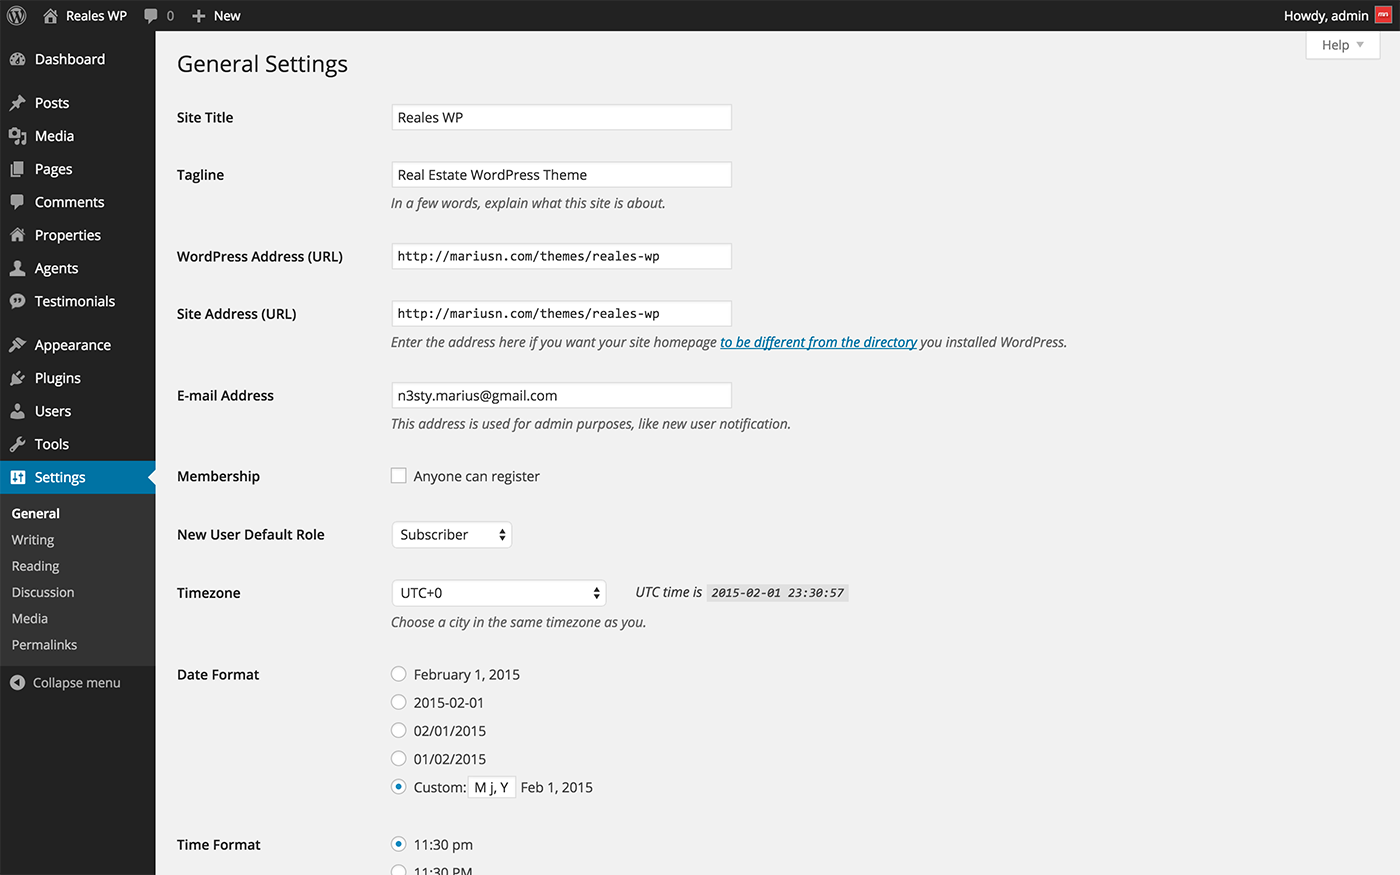
2. Click Save Changes.
3. Go to Settings > Permalinks and change Common Settings to Post name, as seen in the image below:
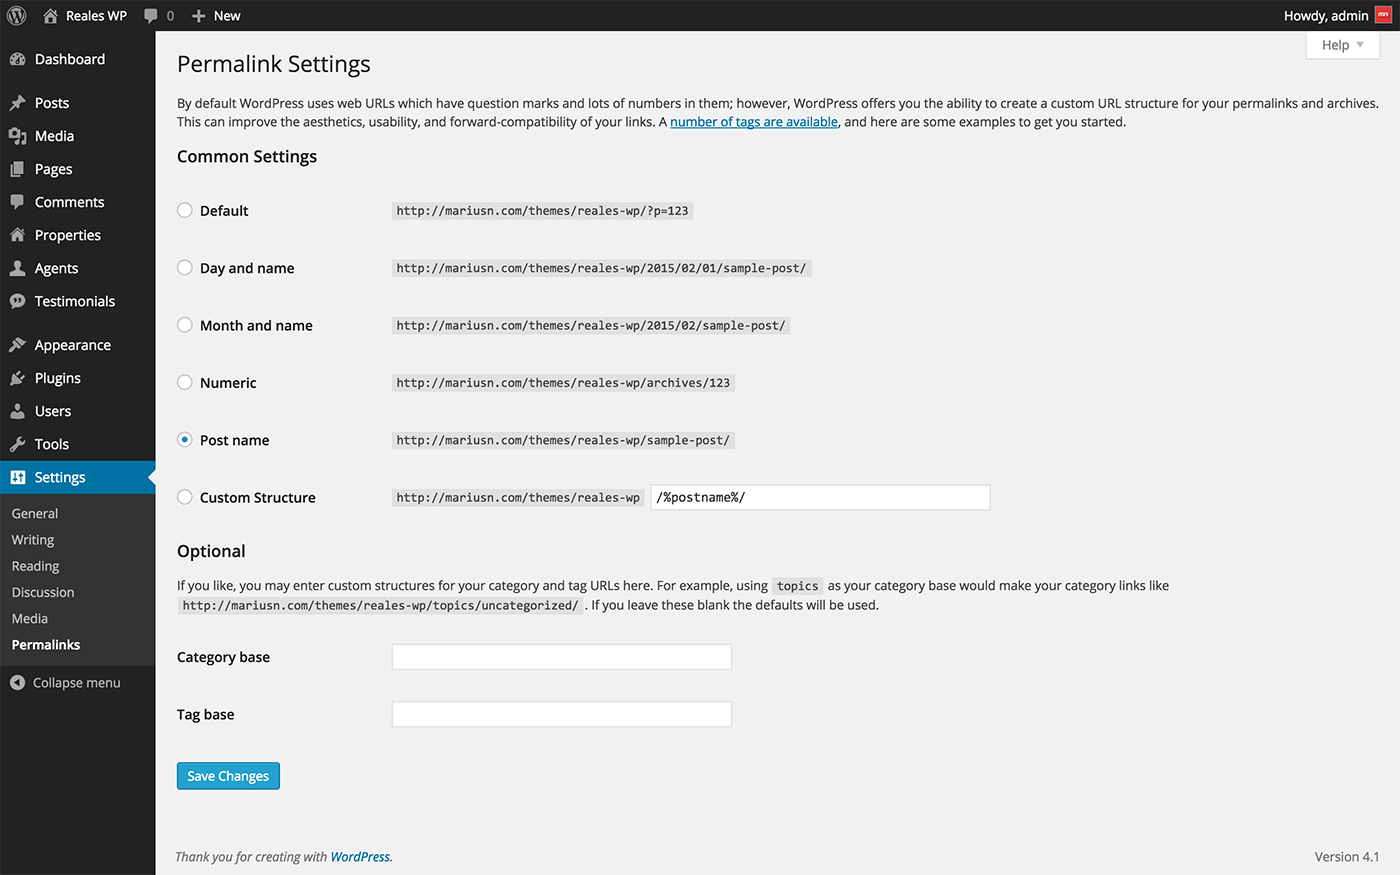
4. Click Save Changes.
Homepage setup
For homepage setup, please follow the steps below:
1. Go to Pages > Add New.
2. Title the page Home or choose some other name. Make sure to uncheck Allow comments option. If you cannot see this option inside the page section, click Screen Options (you find this at the top/right side of the section) and check Discussion option.
3. Write your homepage content inside the page editor. You can use the shortcodes I used in the demo, or you can write your own content. More about shortcodes here.
4. Set the Template (see the right side of the section under Page Attributes) to Fullwidth.
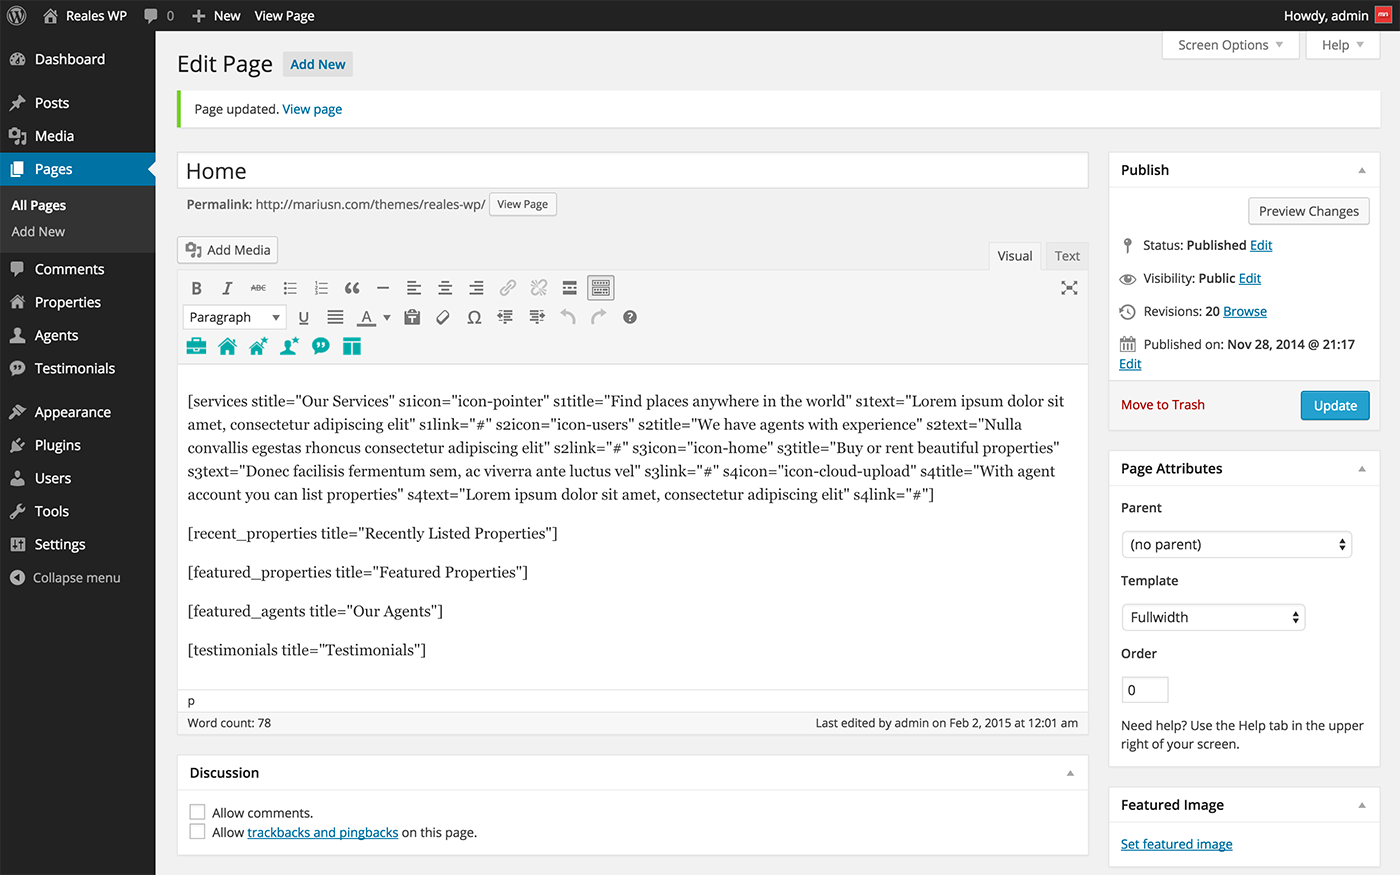
5. Click Publish.
6. Go to Settings > Reading and change Front page displays to A static page and select from the Front page dropdown list the page you just created above - Home.
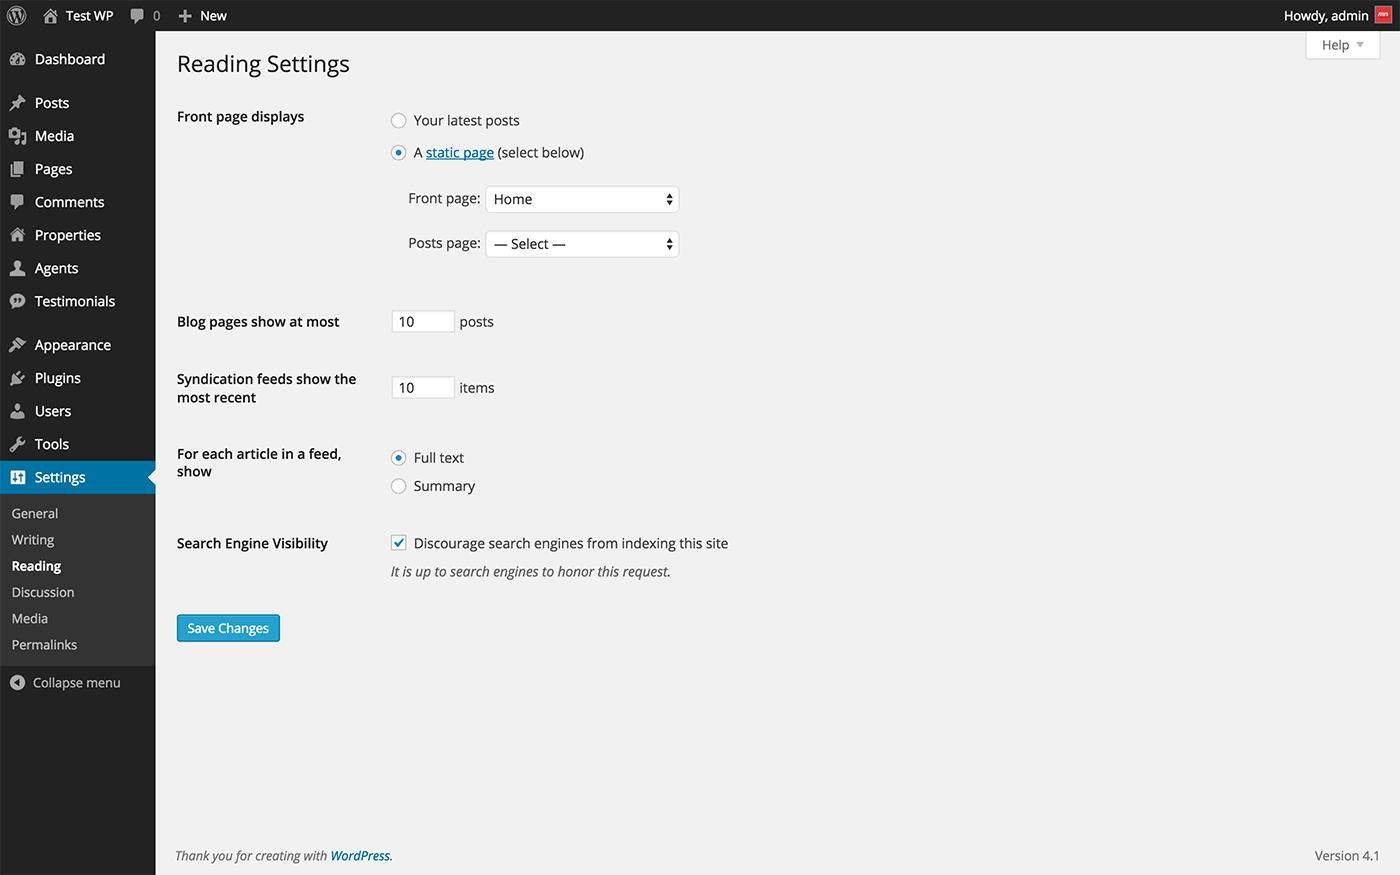
7. Click Save Changes.
Blog setup
For blog setup, please follow the steps below:
1. Go to Pages > Add New.
2. Title the page Blog or choose some other name. Make sure to uncheck Allow comments option. If you cannot see this option inside the page section, click Screen Options (you find this at the top/right side of the section) and check Discussion option.
3. You don't need to write anthing inside the page editor.
4. Set the Template (see the right side of the section under Page Attributes) to Default Template
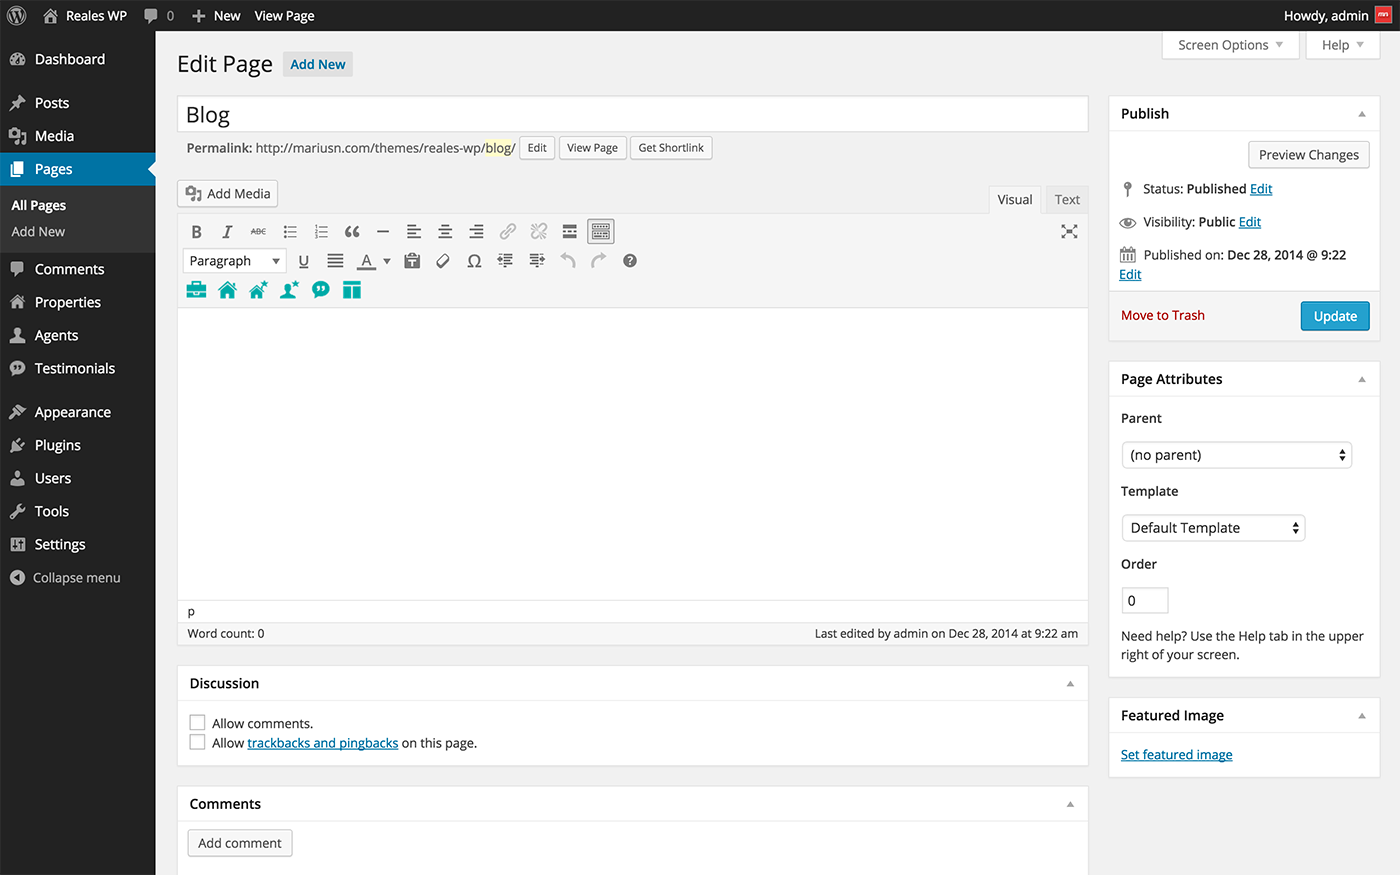
5. Click Publish.
6. Go to Settings > Reading and change Front page displays to A static page and select from the Posts page dropdown list the page you just created above - Blog.

7. Click Save Changes.
Menus setup
For menus setup, please follow the steps below:
1. Go to Appearance > Menus.
2. First let's create the top menu. Type the name of the menu (you can name it Top menu) inside the Menu Name field and click Create Menu button.
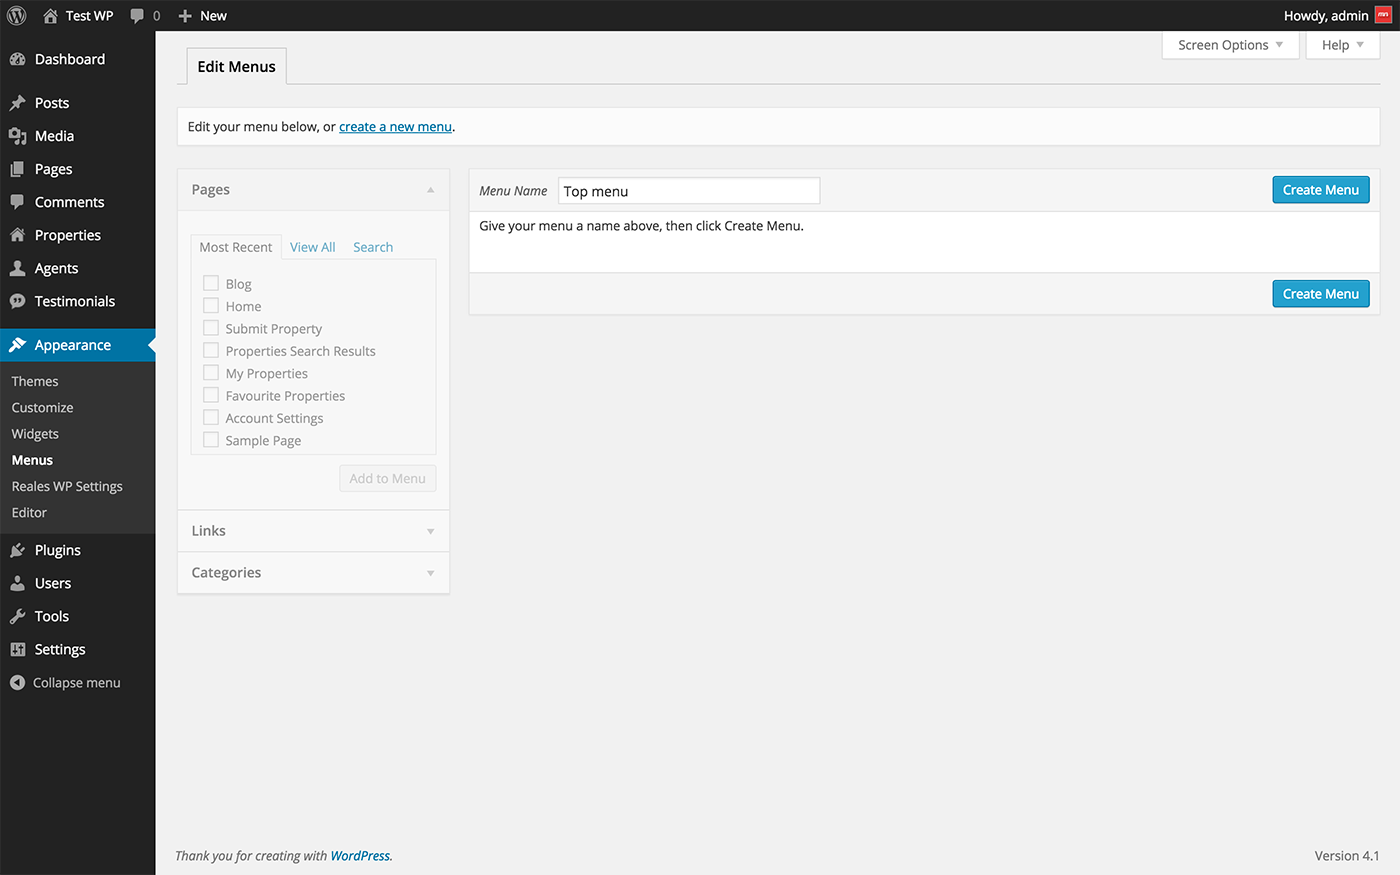
3. Check Top primary menu option under Menu Settings > Theme locations.
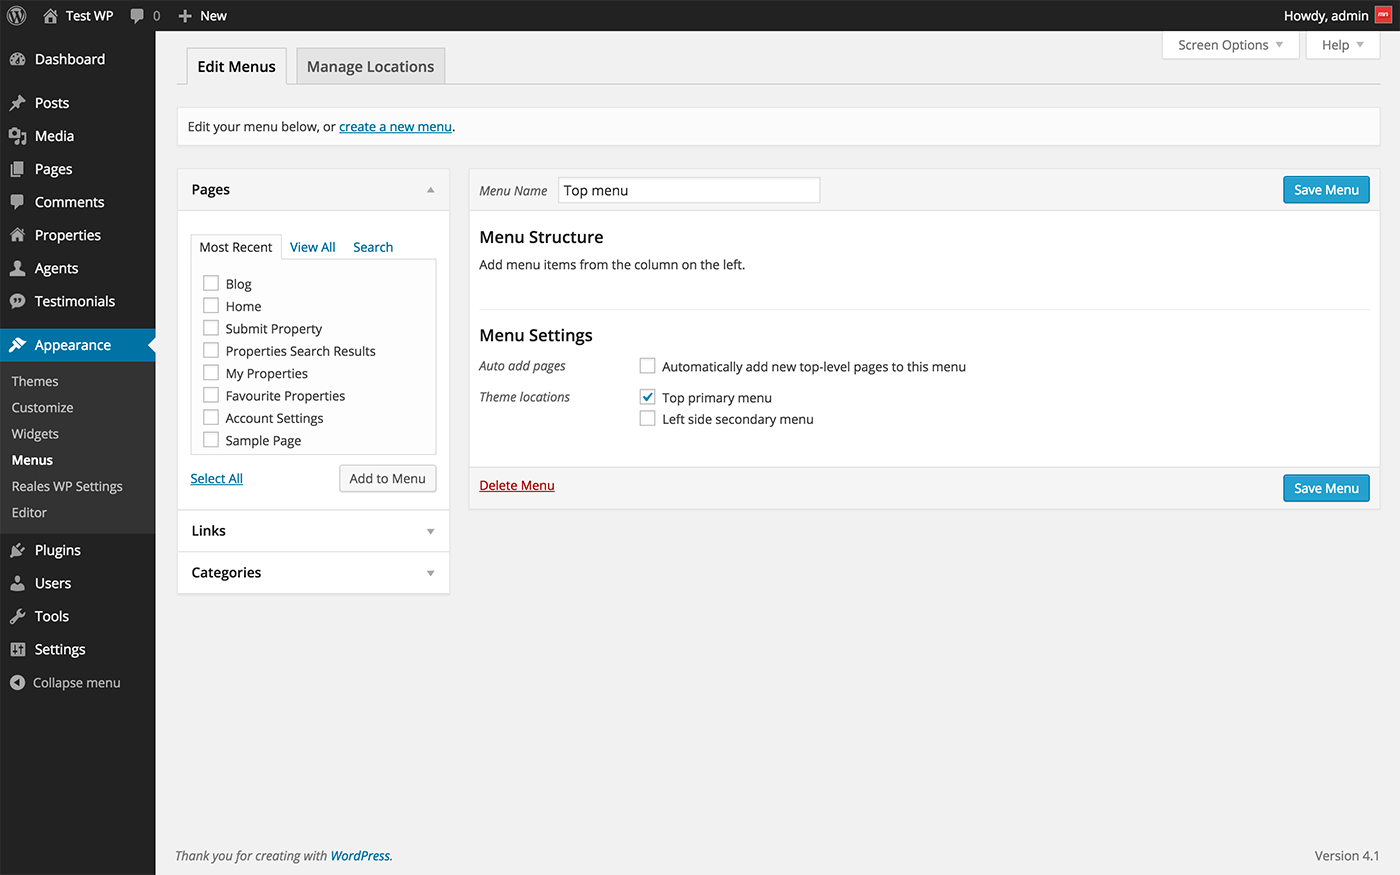
4. Click Save menu.
5. Now you can add pages and links from the left side panel to the newly created menu.
6. The theme offers a secondary menu located on the left side of the app view (half map, half content view). You have the option to turn off this menu. This option can be found here. In order to create the secondary menu, repeat the above steps, only this time you check Left side secondary menu option under Menu Settings > Theme locations.
7. The secondary menu items are represented with icons. The available icon sets are Simple Line Icons and Font Awesome Icons. You can see the list here. In order to add an icon to a menu item do this: add a menu item from the left panel, a page or a link; set the menu item URL and Link text; click Screen Options from the top of the section and check CSS Classes; you'll see that the Menu item form displays a new field called CSS Classes; here you put the css class name of the icon; the icon names are found in the provided list above; note that if you want to use font awesome icons you need to put fa in front of the class name, like this: fa fa-cloud.
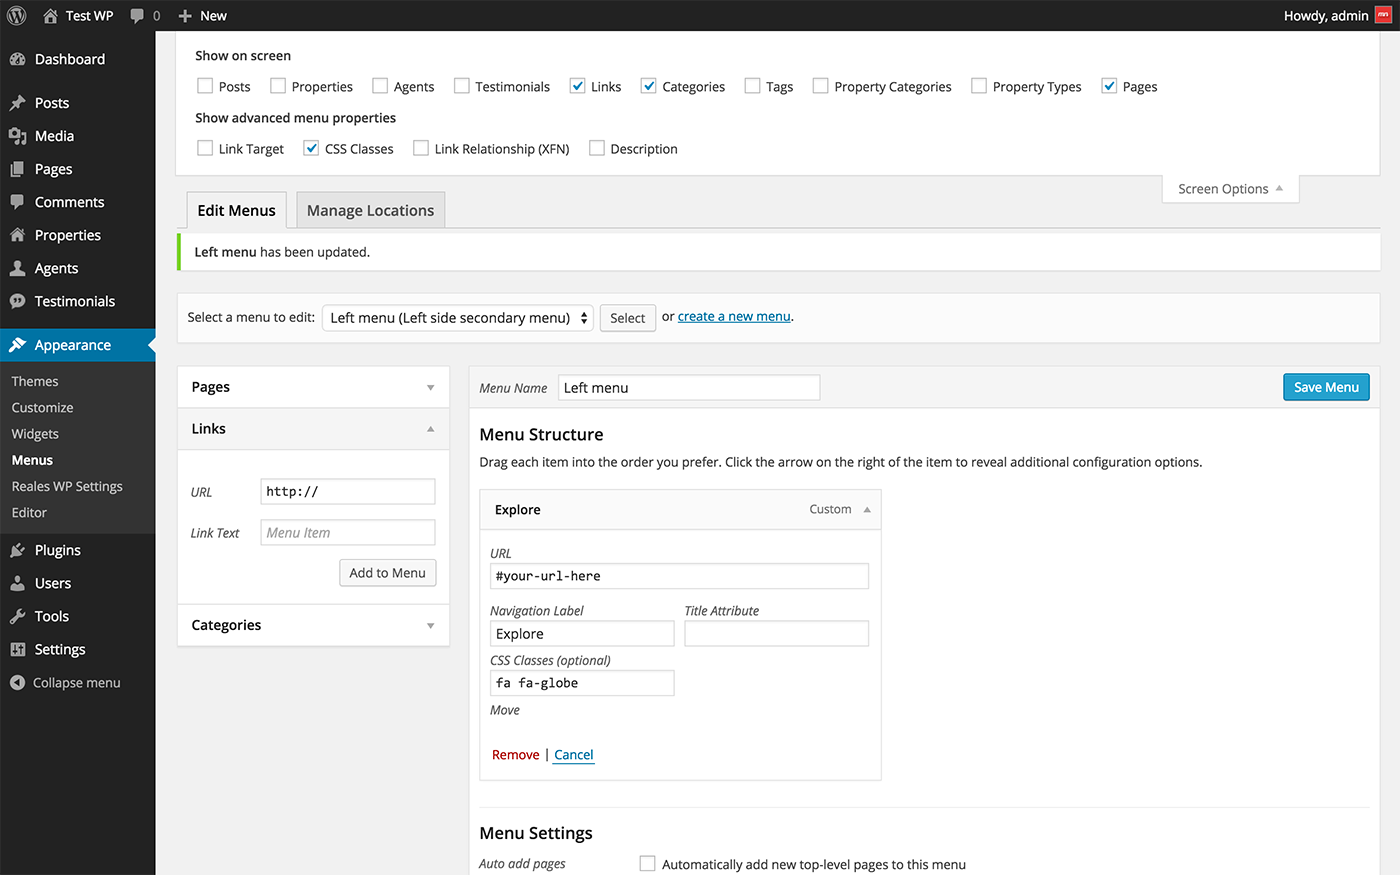
8. Click Save Menu.
Other pages
In order for the theme to function properly, it requires a list of pages having the following templates: Account Settings, Favourite Properties, My Properties, Properties Search Results, Submit Property, and PayPal Processor.
All the pages from the list are included in the theme demo. If you choose to import the demo, ignore this step.
If you choose not to import a demo, create the mentioned pages going to Pages > Add New for each page and select the Template from the right side panel named Page Attributes.
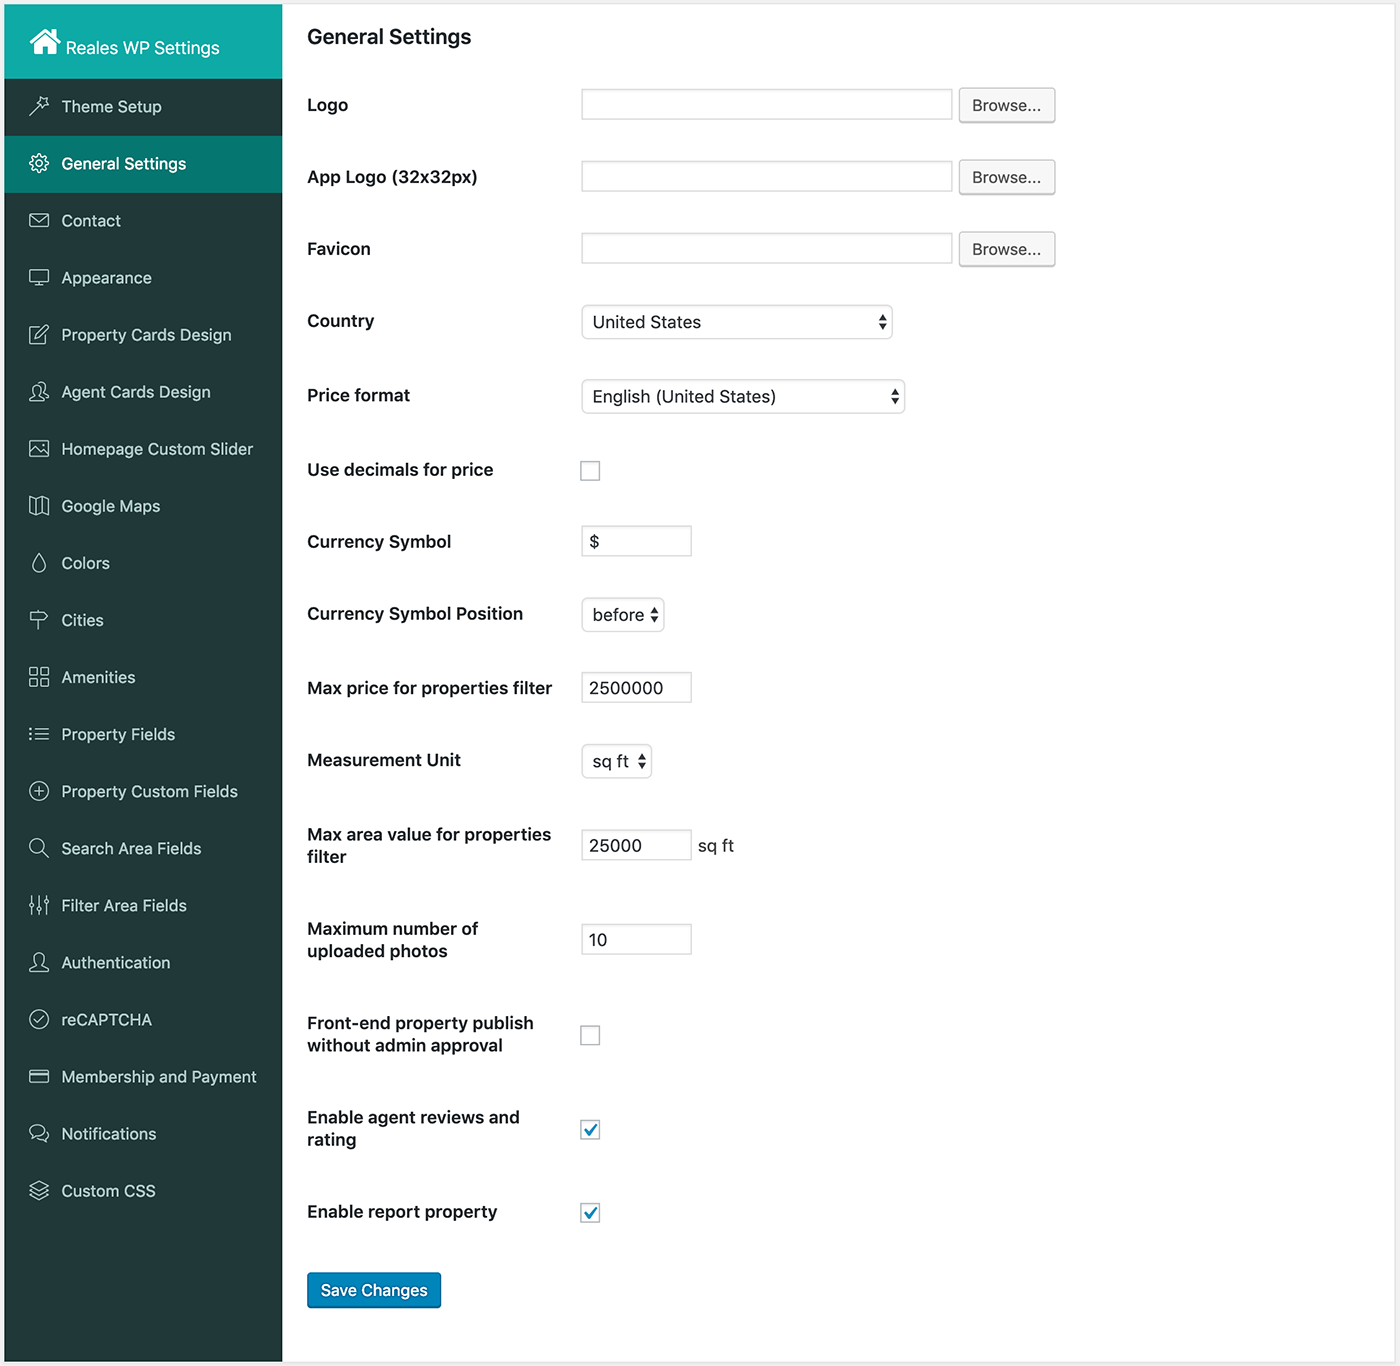
General settings
Reales WP offers a set of custom settings.
Go to Appearance > Reales WP Settings. The first displayed section is General Settings. Here you can set the website and application view logo, the country, the currency symbol, the currency symbol position, the maximum price displayed on the price filter slider, the measurement unit for area, and the maximum value displayed on the area filter slider. Go ahead and set them. Click Save Changes.
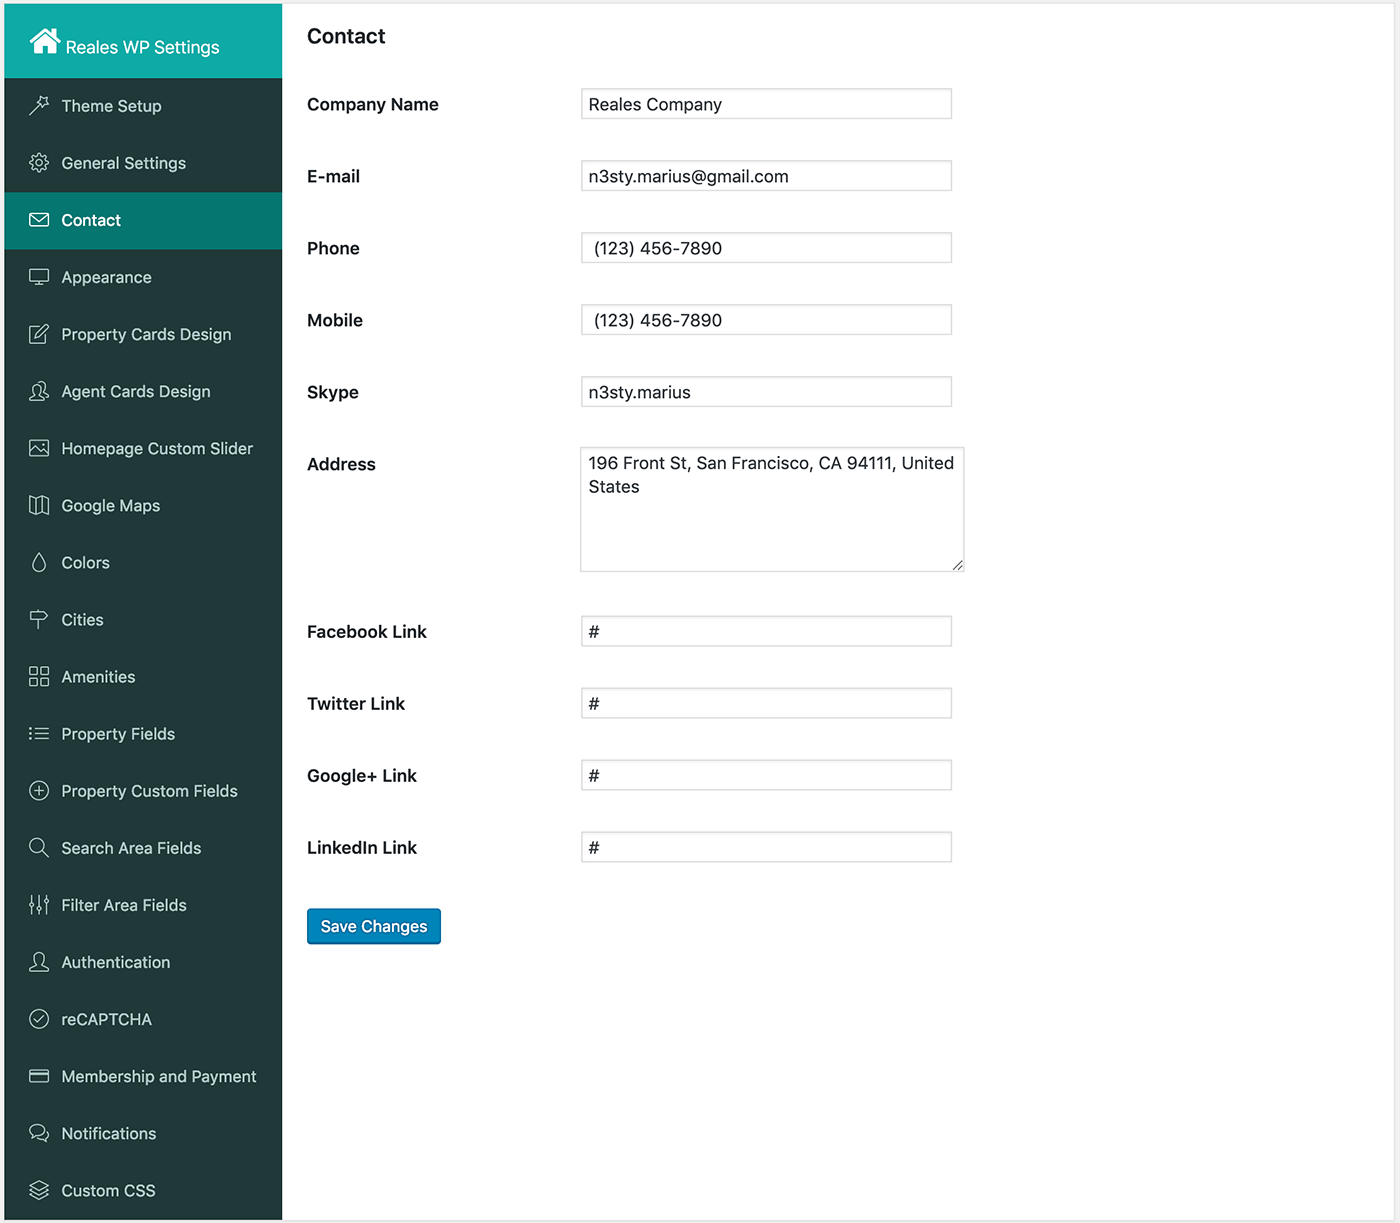
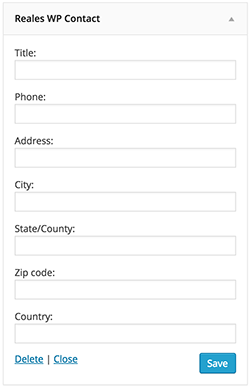
Contact settings
In this section you set the contact information that is displayed on the contact page. The contact page can be created by adding a new page like we did above with the homepage and blog, only this time you set the Template - Contact Page. You also can set a featured image that will appear in the header.
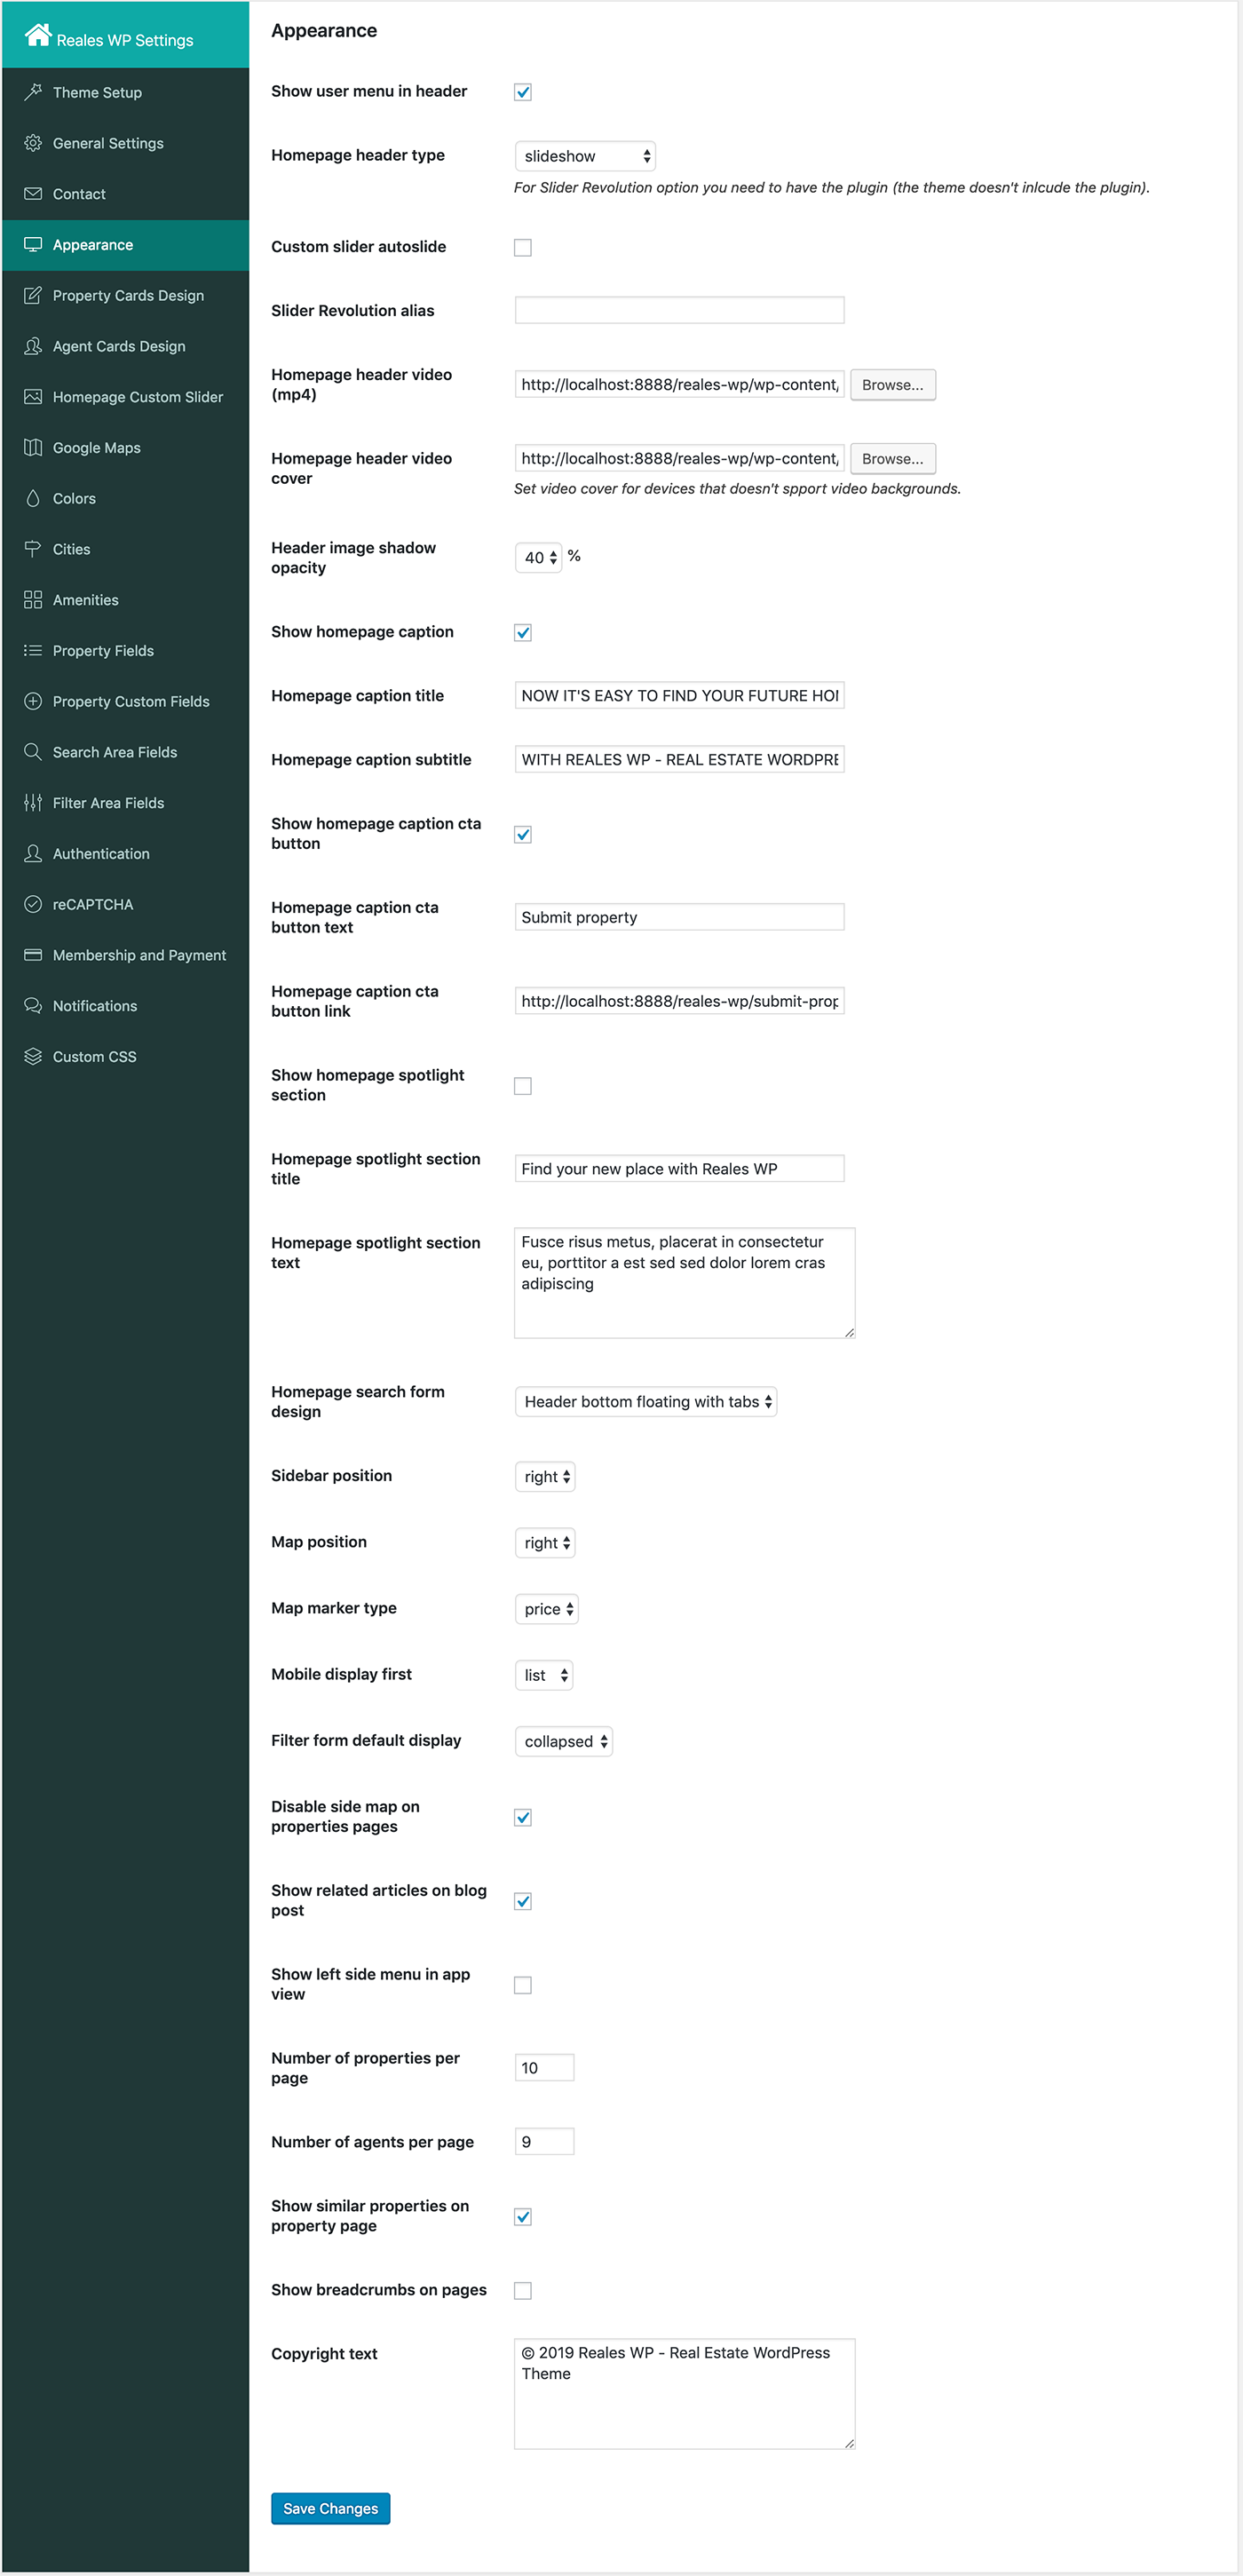
Appearance settings
Here you have several settings for different areas of the theme, like Number of properties per page, Show left side menu in application view and so on. In this section, a very important setting is Show user menu in header. If this option is set, you offer users the posibility of register an login from front-end.
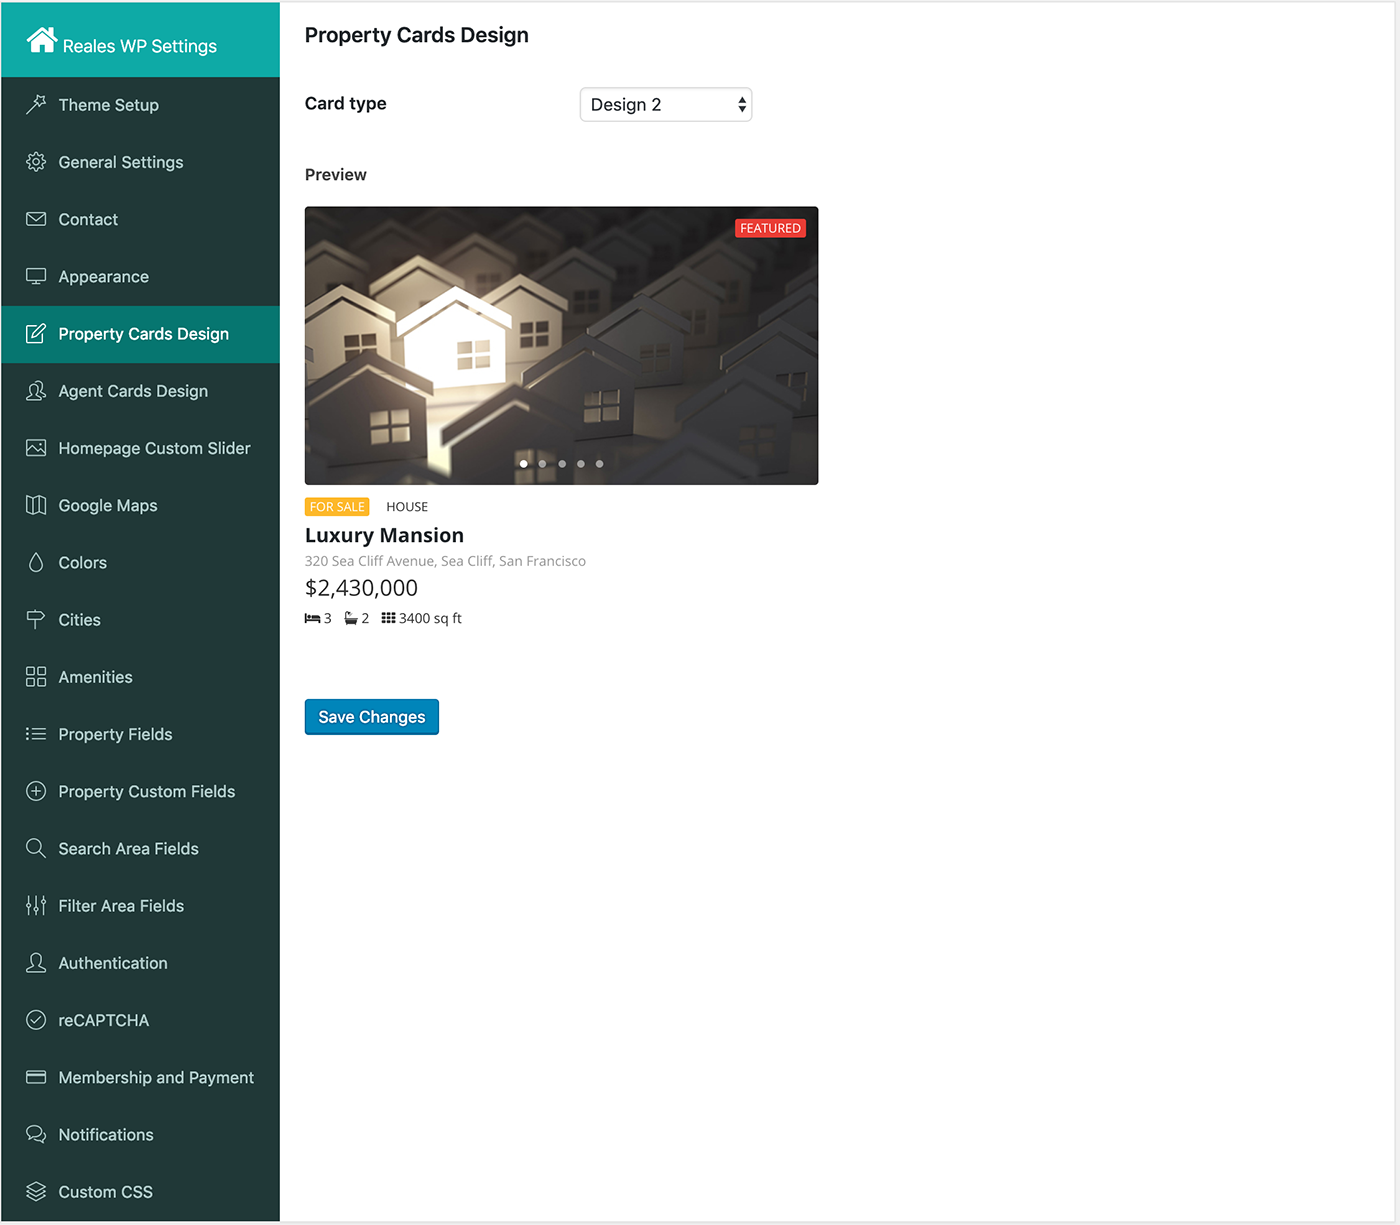
Property Cards Design settings
In this section you can choose the cards design for the properties list.
Agent Cards Design settings
In this section you can choose the cards design for the agents list.

Homepage Custom Slider settings
Here you have set a custom slider that you can use in homepage header.

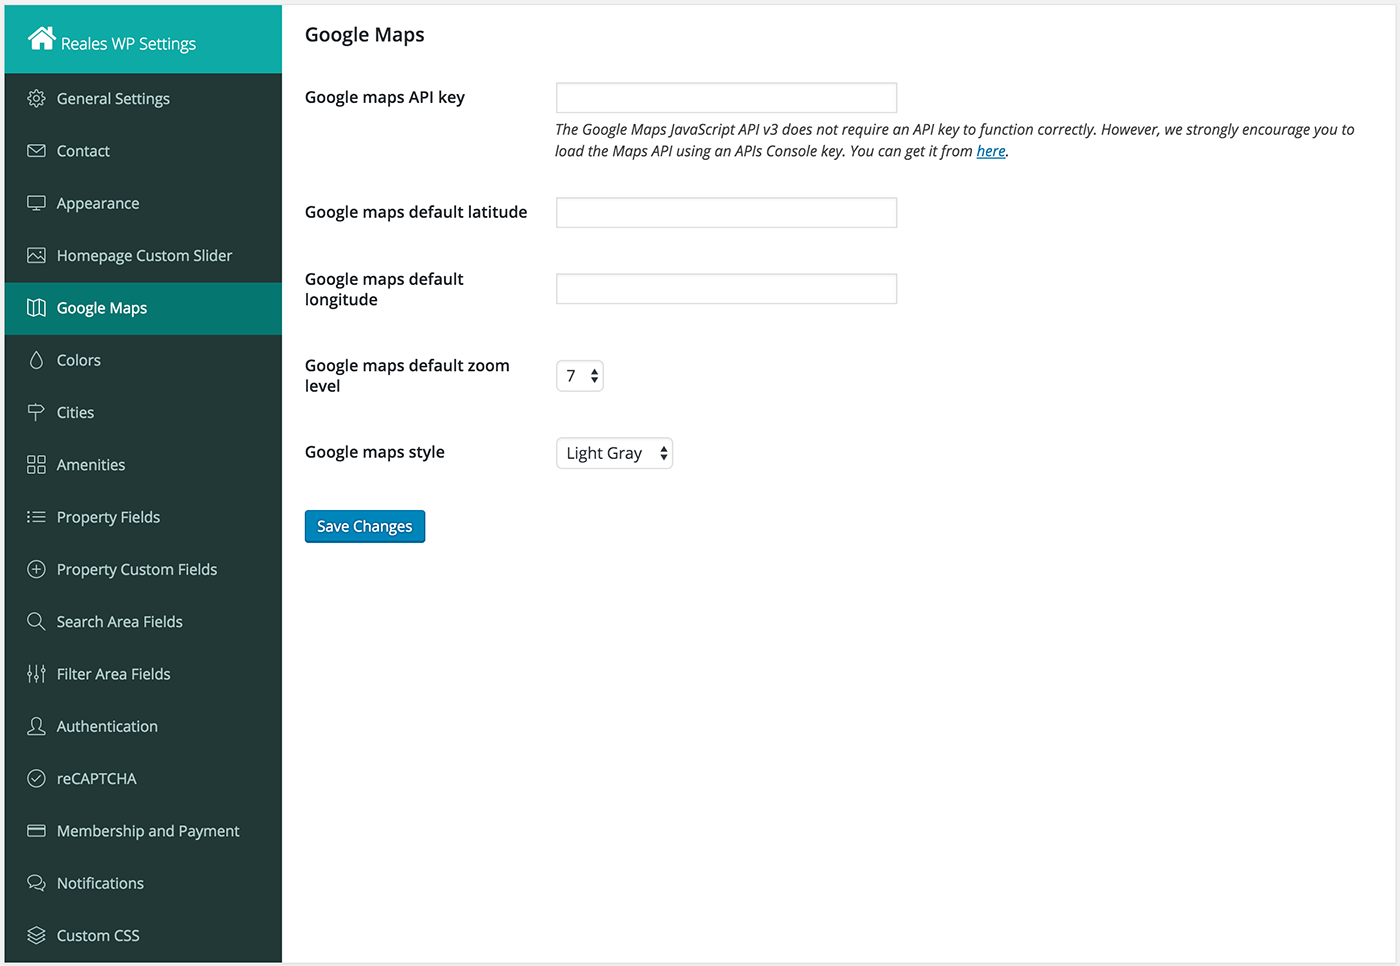
Google Maps settings
Here you set the Google maps API key. The Google Maps JavaScript API v3 does not require an API key to function correctly. However, we strongly encourage you to load the Maps API using an APIs Console key. You can get it from here.
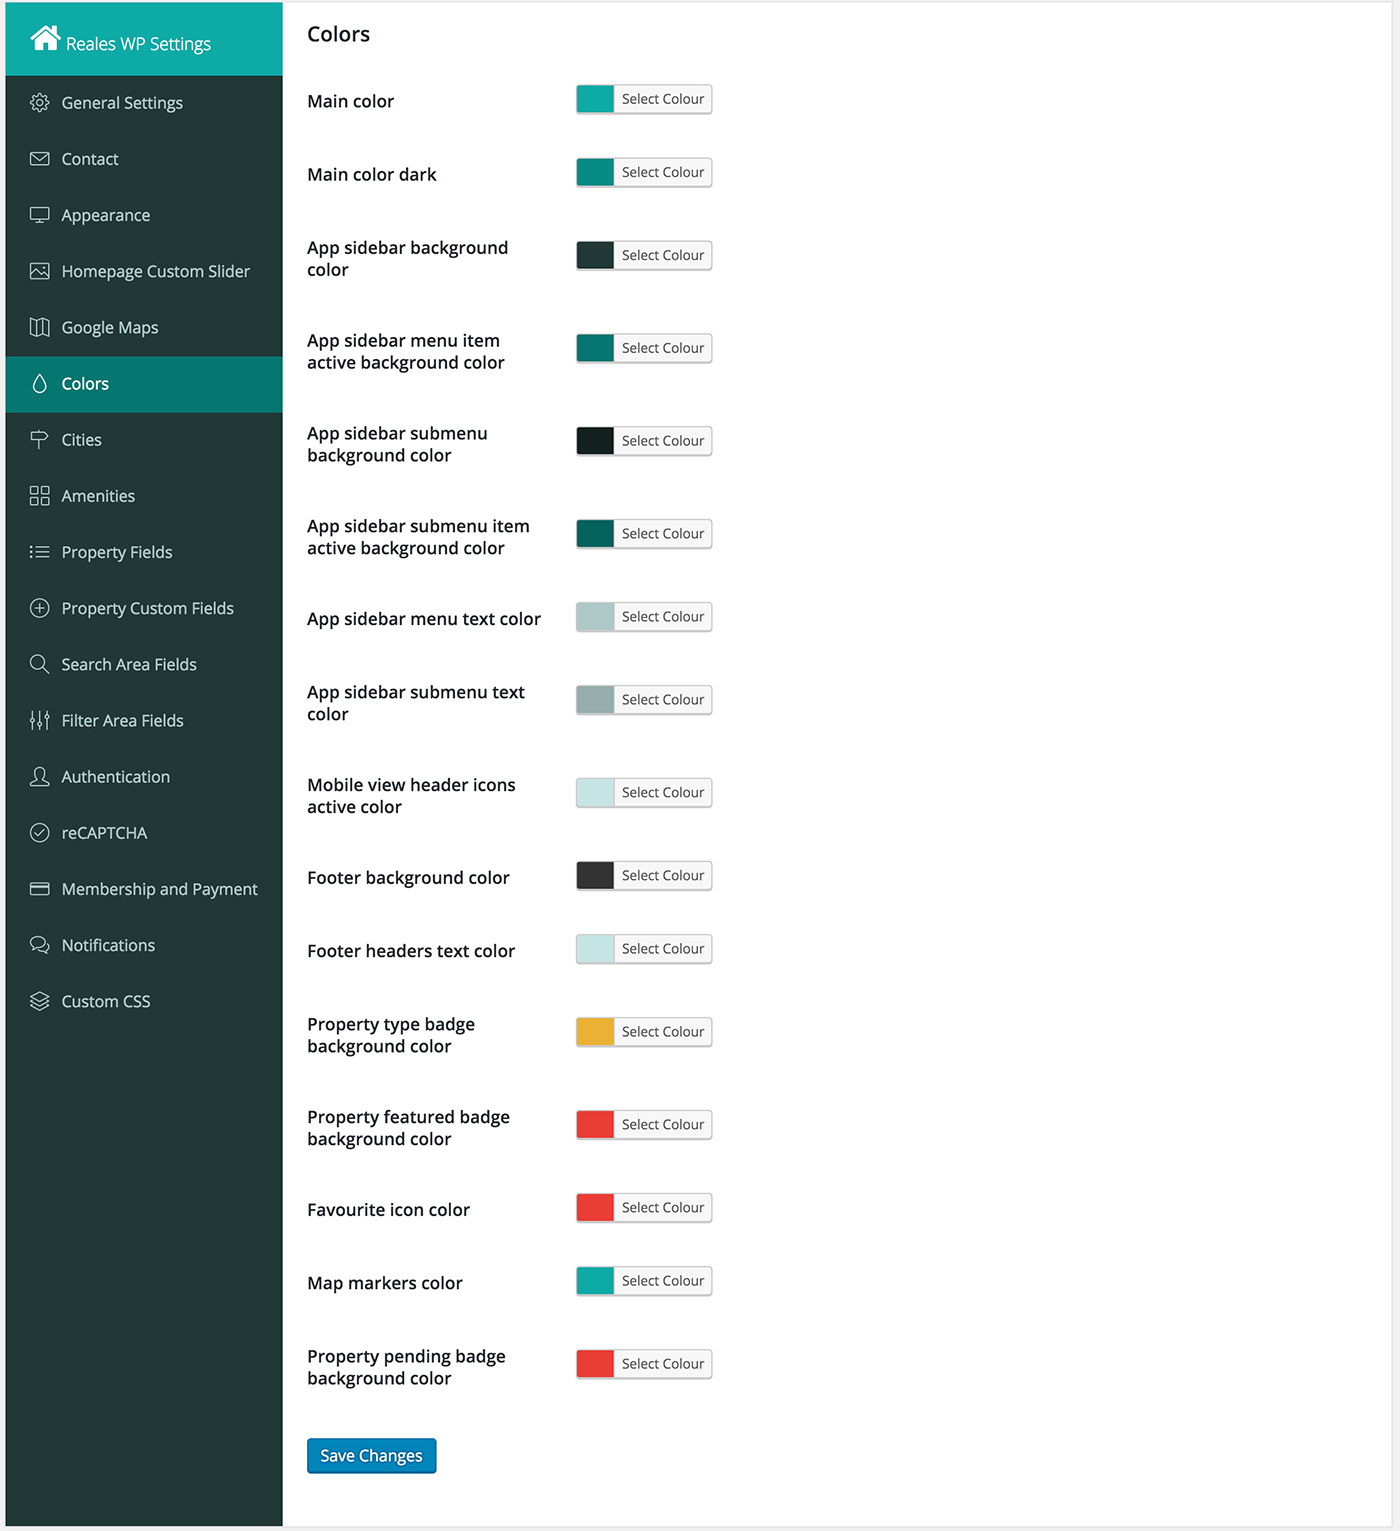
Colors settings
In this section you can set/change the color scheme of the theme.
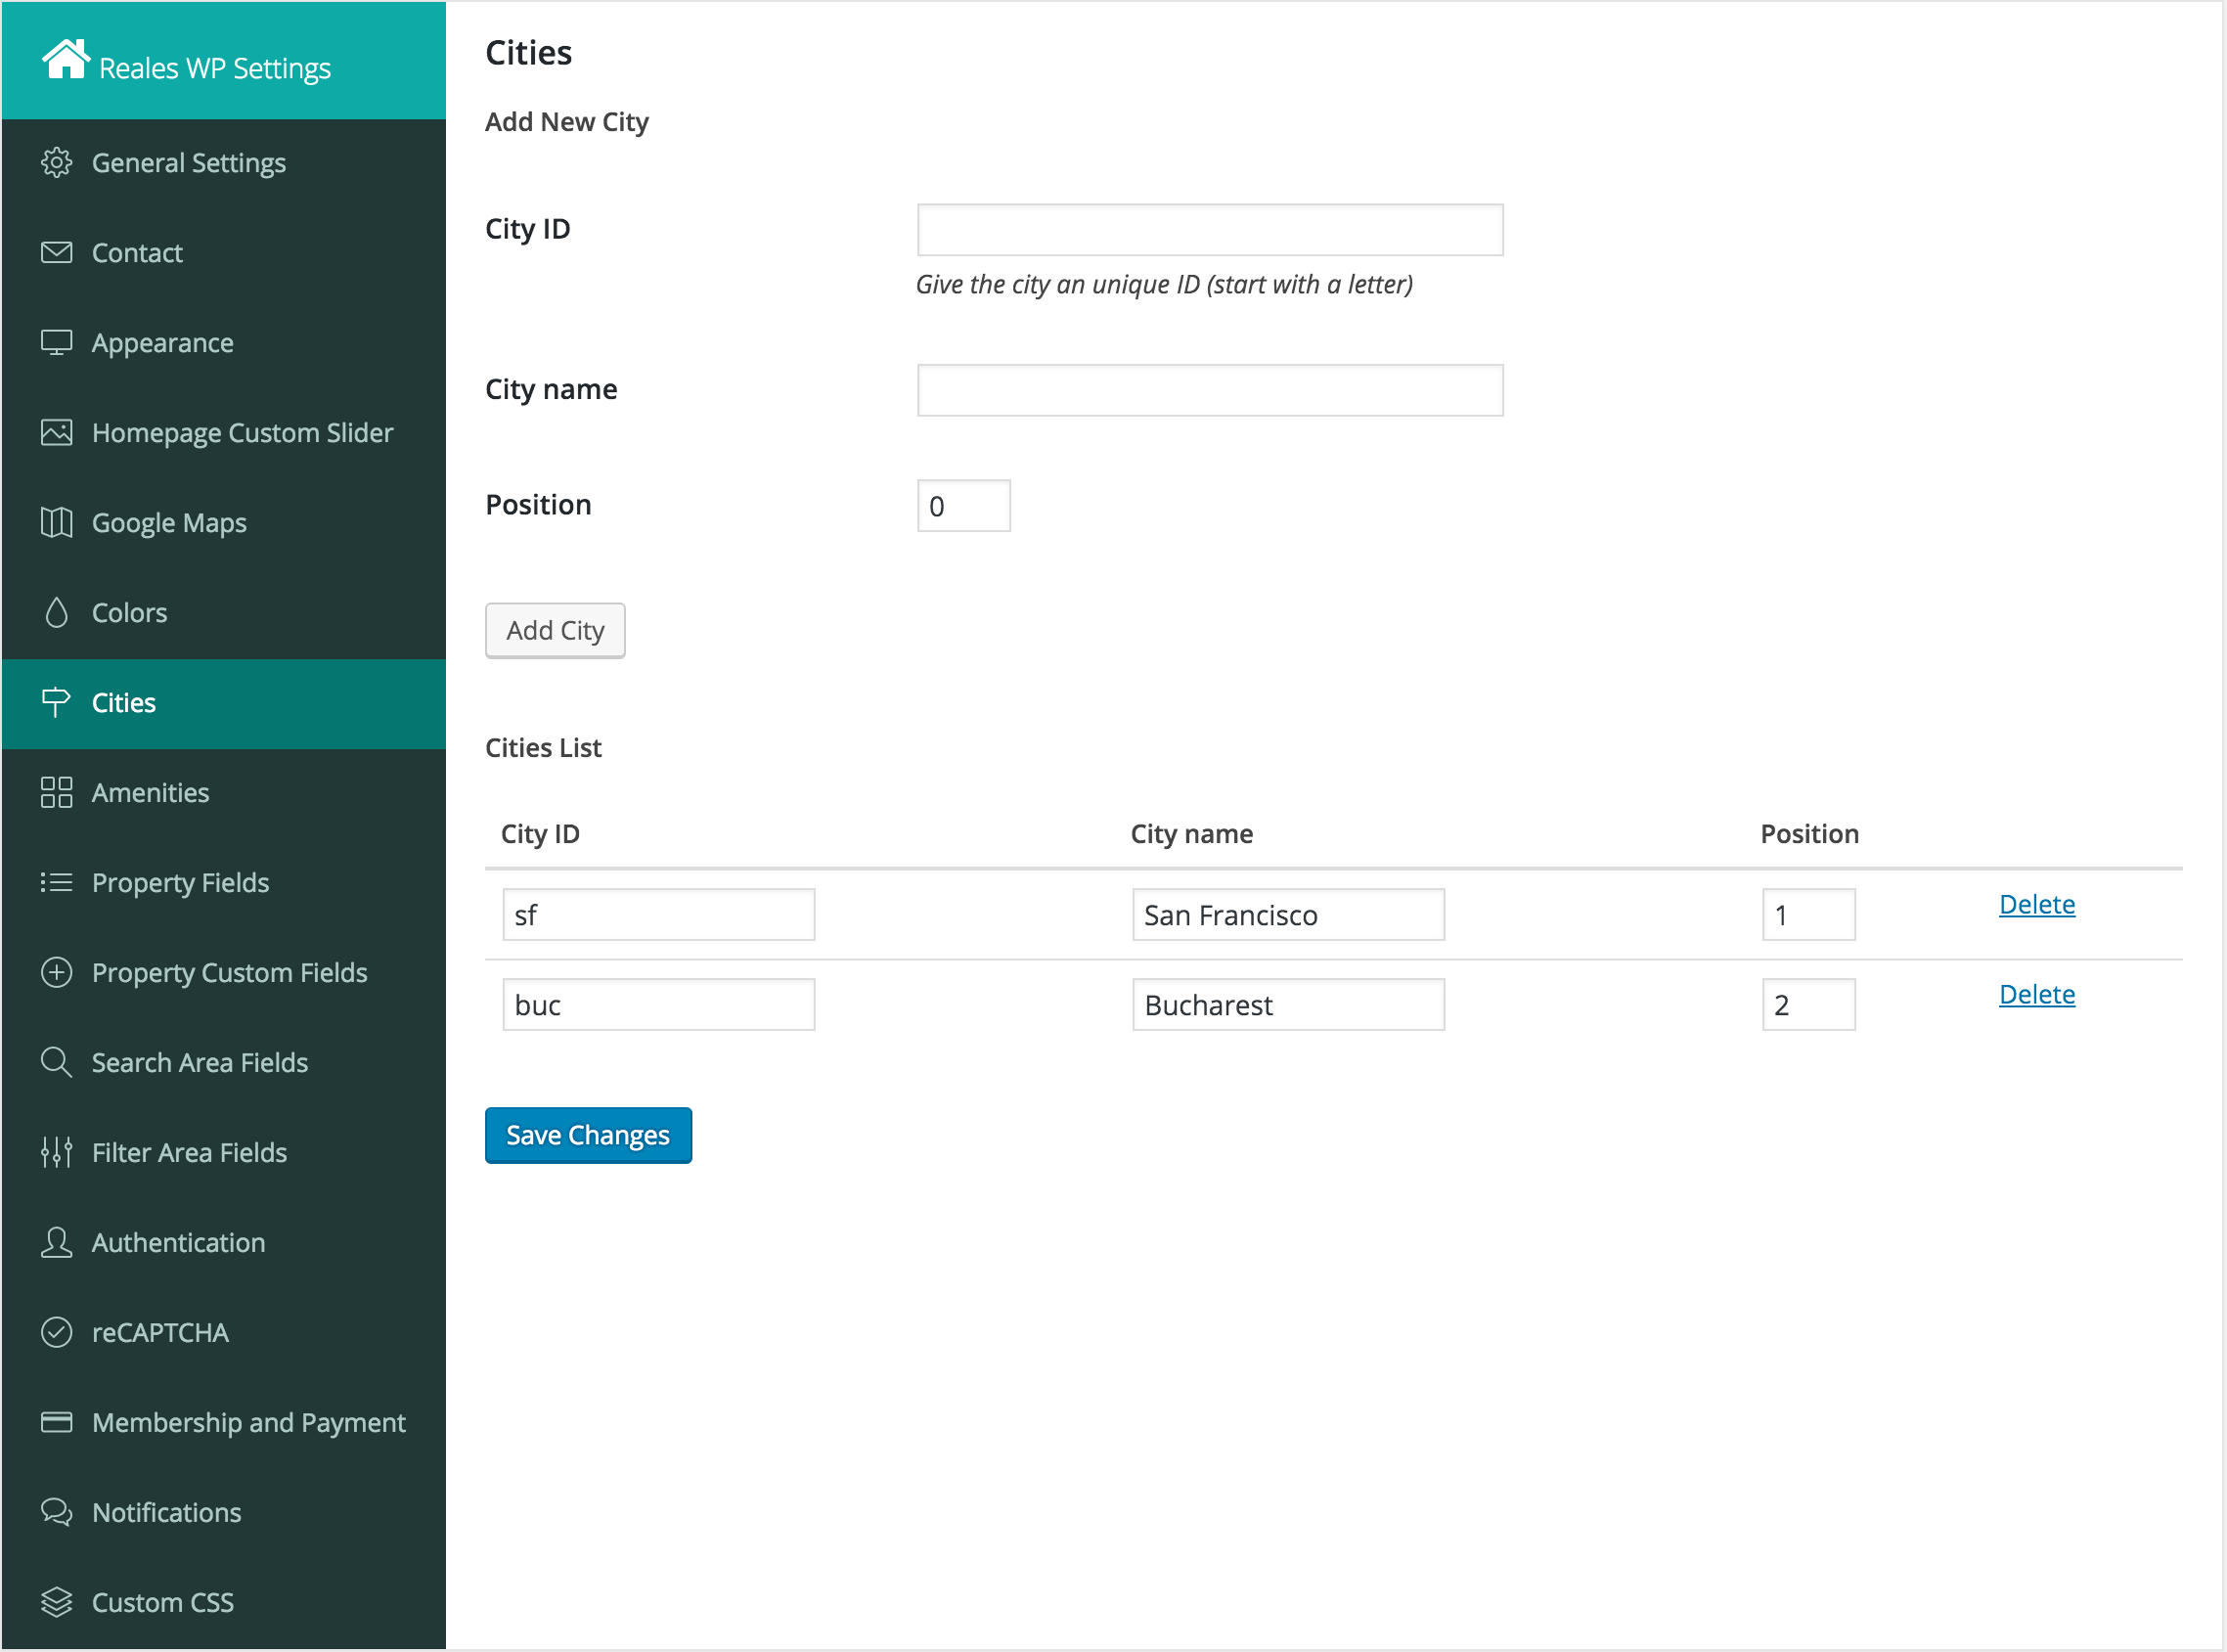
Cities settings
In this section you can define a list of cities which you can use for properties.
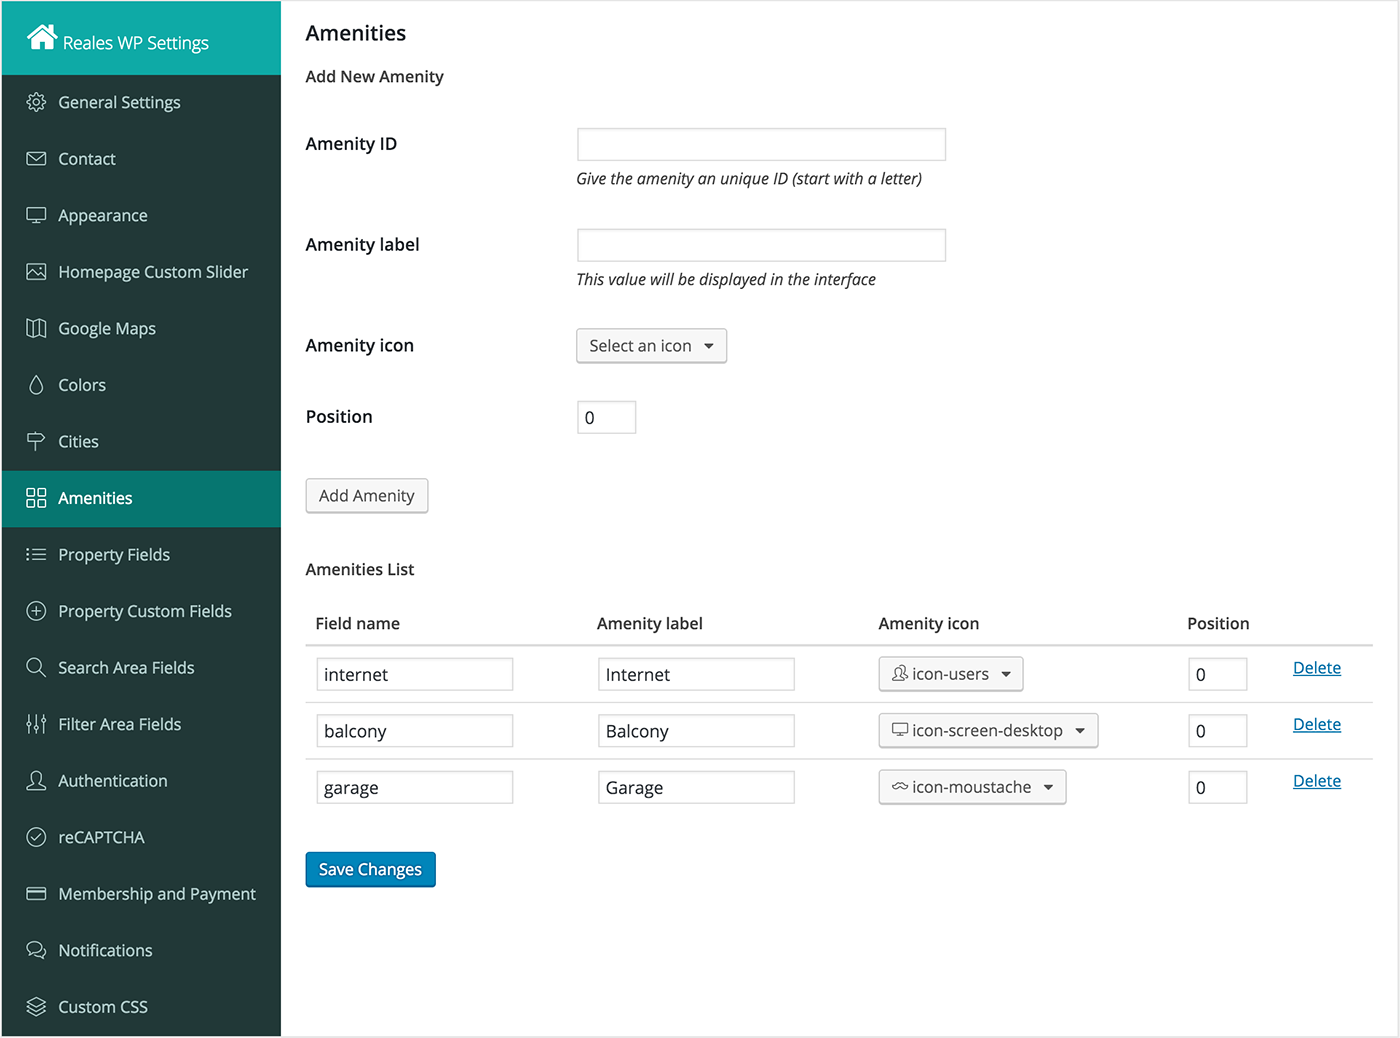
Amenities settings
In this section you can set the default list of amenities that will be available when adding new properties.
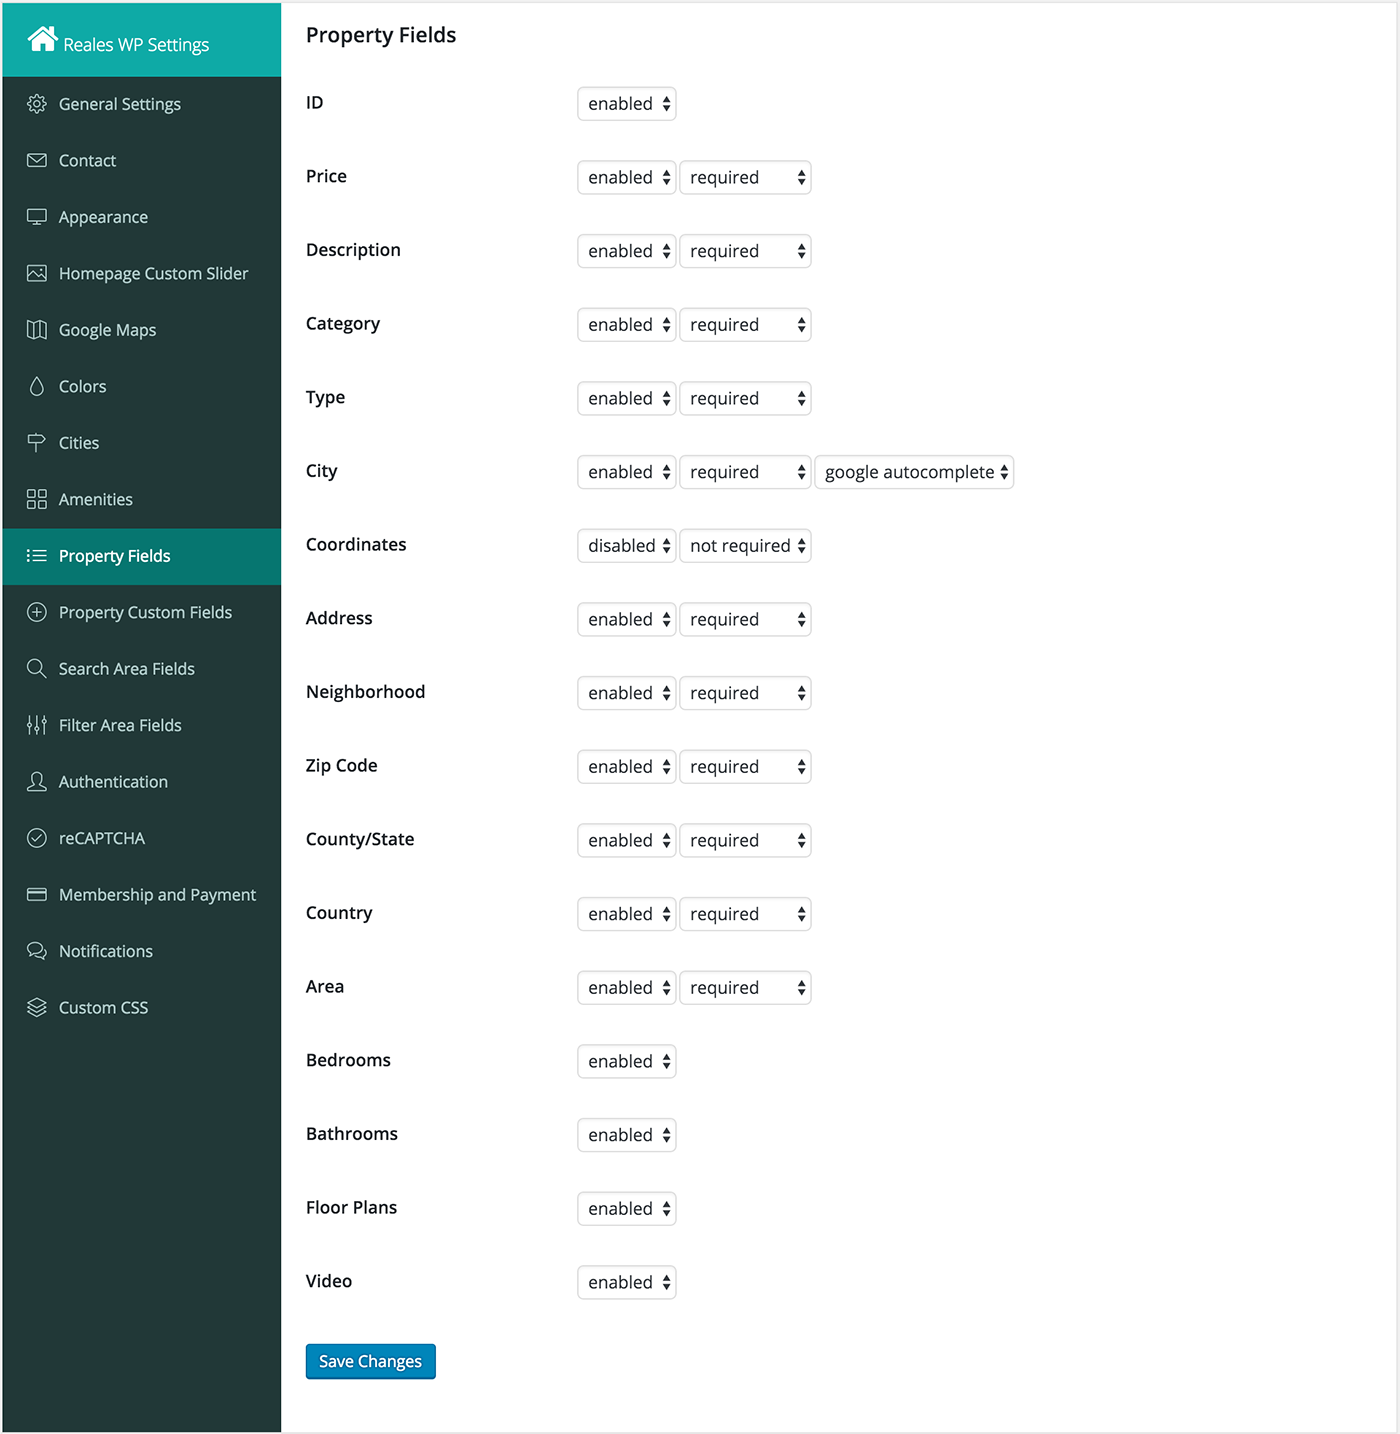
Property Fields settings
In this section you can set the list of the available fields of a property.
Property Custom Fields settings
In this section you can define a list of custom fields of a property like 'Parking spaces', 'Built in year'.

NOTE: If you want to use the WPML plugin, this is how to translate property custom fields:
1. Add a custom field, for example Test Field
2. Go to WPML > String Translation > Translate texts in admin screens
3. Look for reales_fields_settings as shown in the screenshot below:
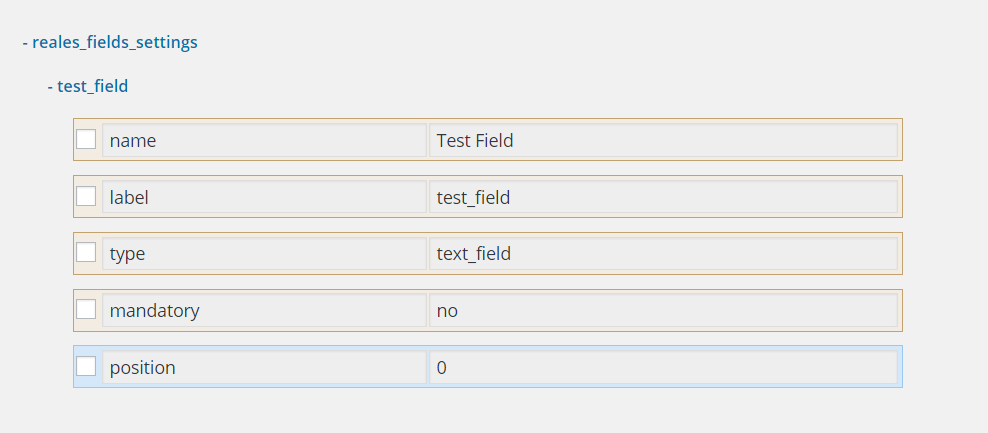
4. Select Name and Label and then click Apply.
6. Return back to String Translation page and translate the fields to your language.
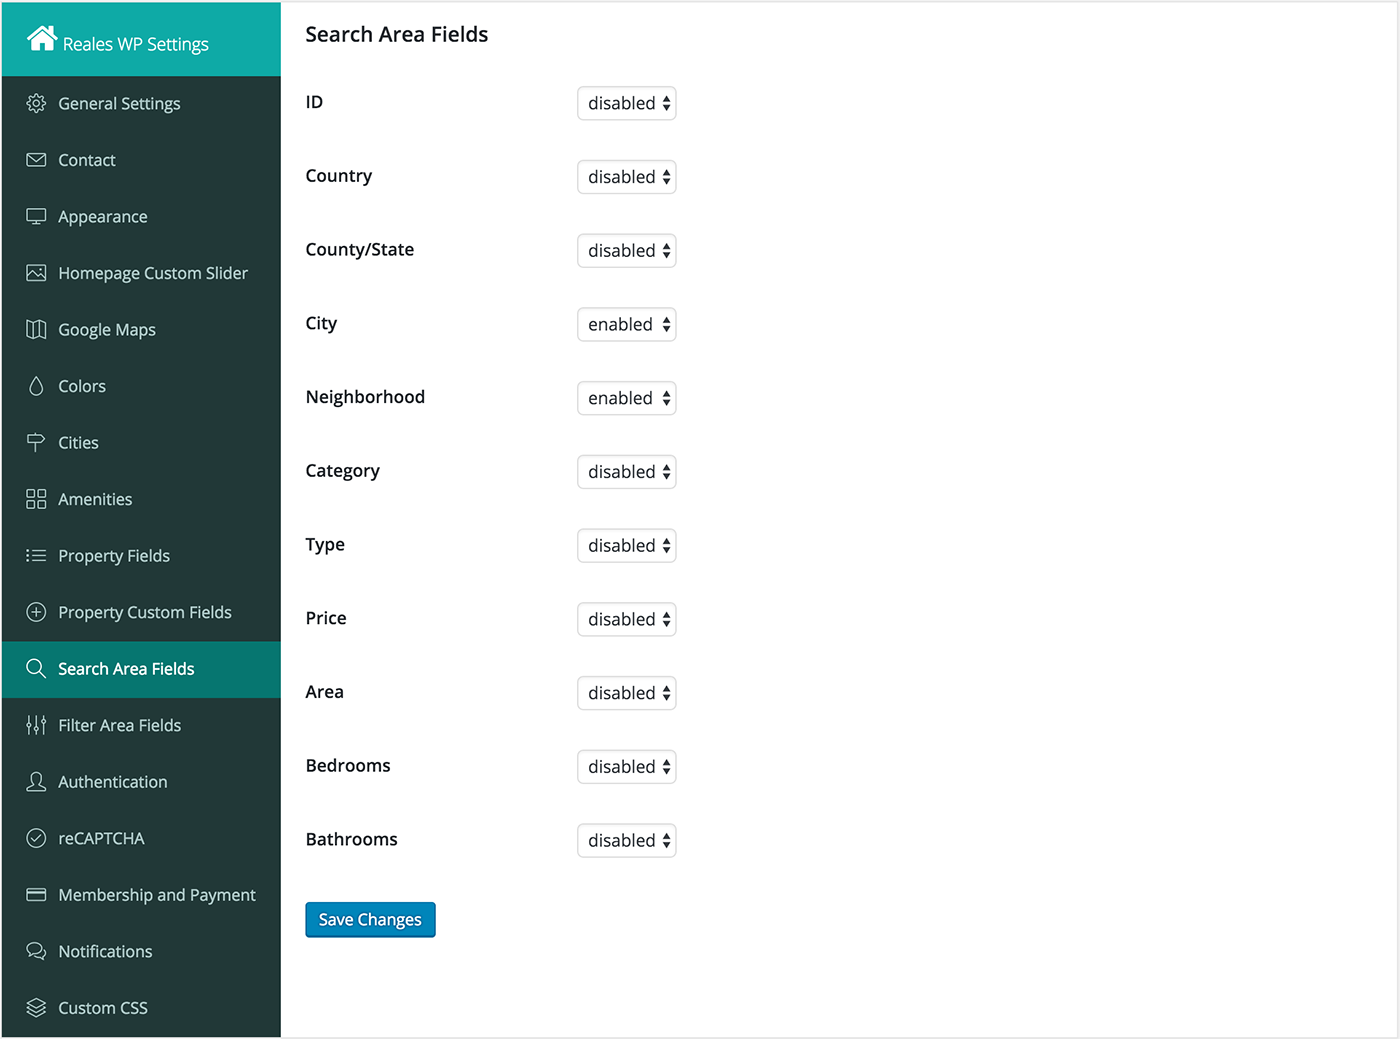
Search Area Fields settings
In this section you can set which fields are displayed inside the search form used on the homepage.
Filter Area Fields settings
In this section you can set which fields are displayed inside the filter form used on the search results page.

Authentication settings
Here you have several authentication settings like Allow Facebook Login, Allow Google Signin, Allow users to register as agents. Note that if you want to allow users to login with facebook and google accounts, you need to provide Facebook App ID, Facebook App Secret and Google Client ID, Google Client Secret.
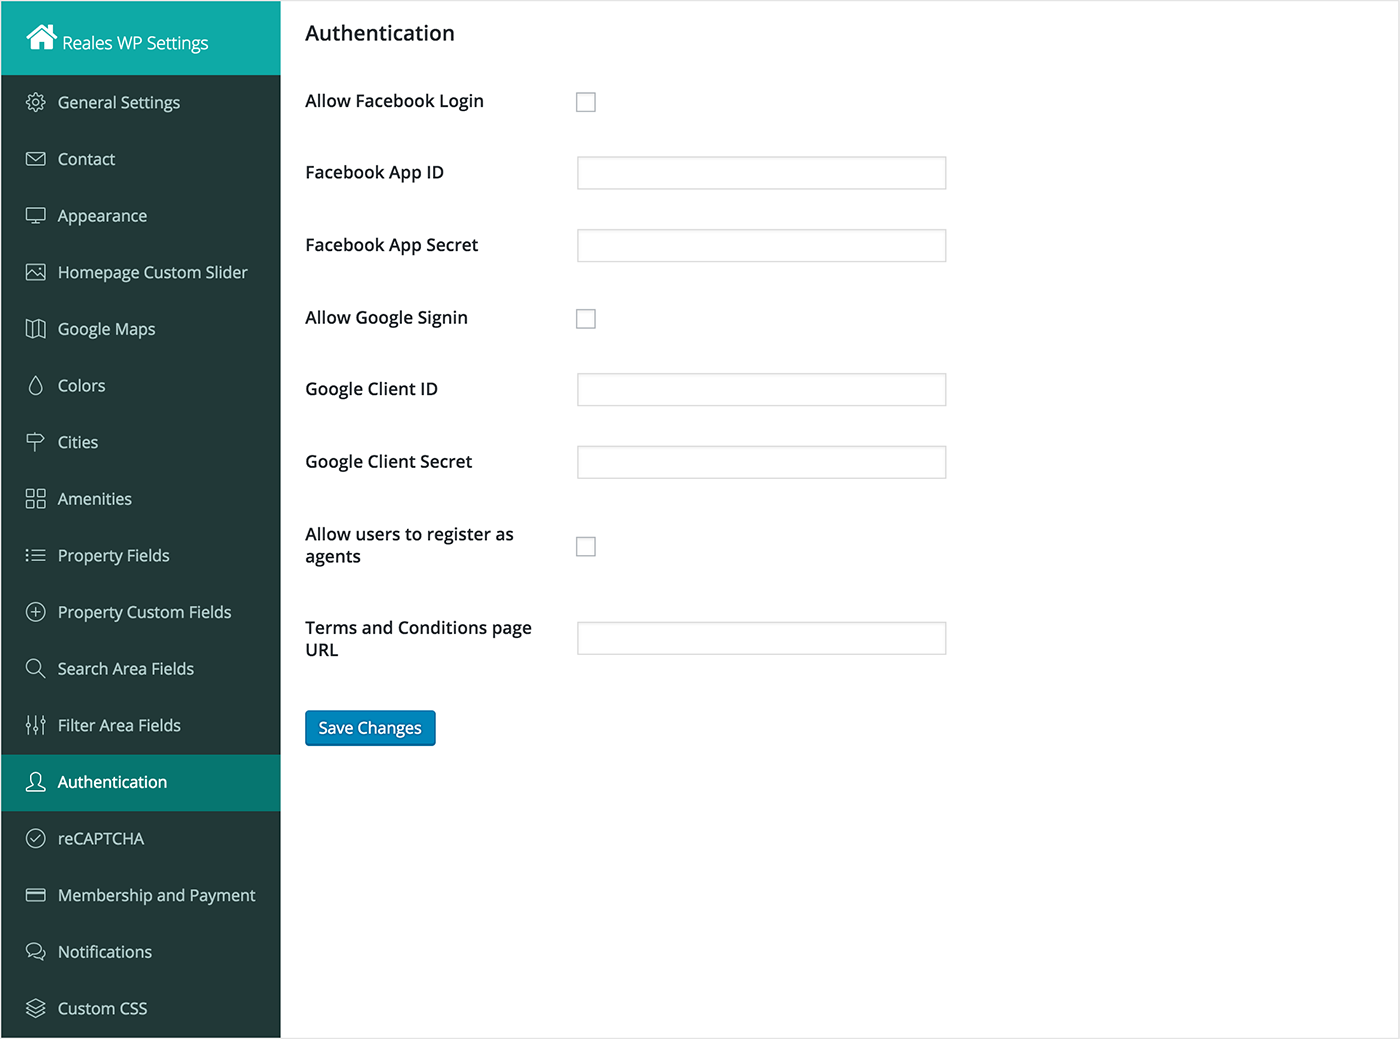
1. Facebook App ID and Facebook App Secret can be generated by adding a Facebook App here
2. For Google Client ID and Google Client Secret you can read this article on how to obtain them.
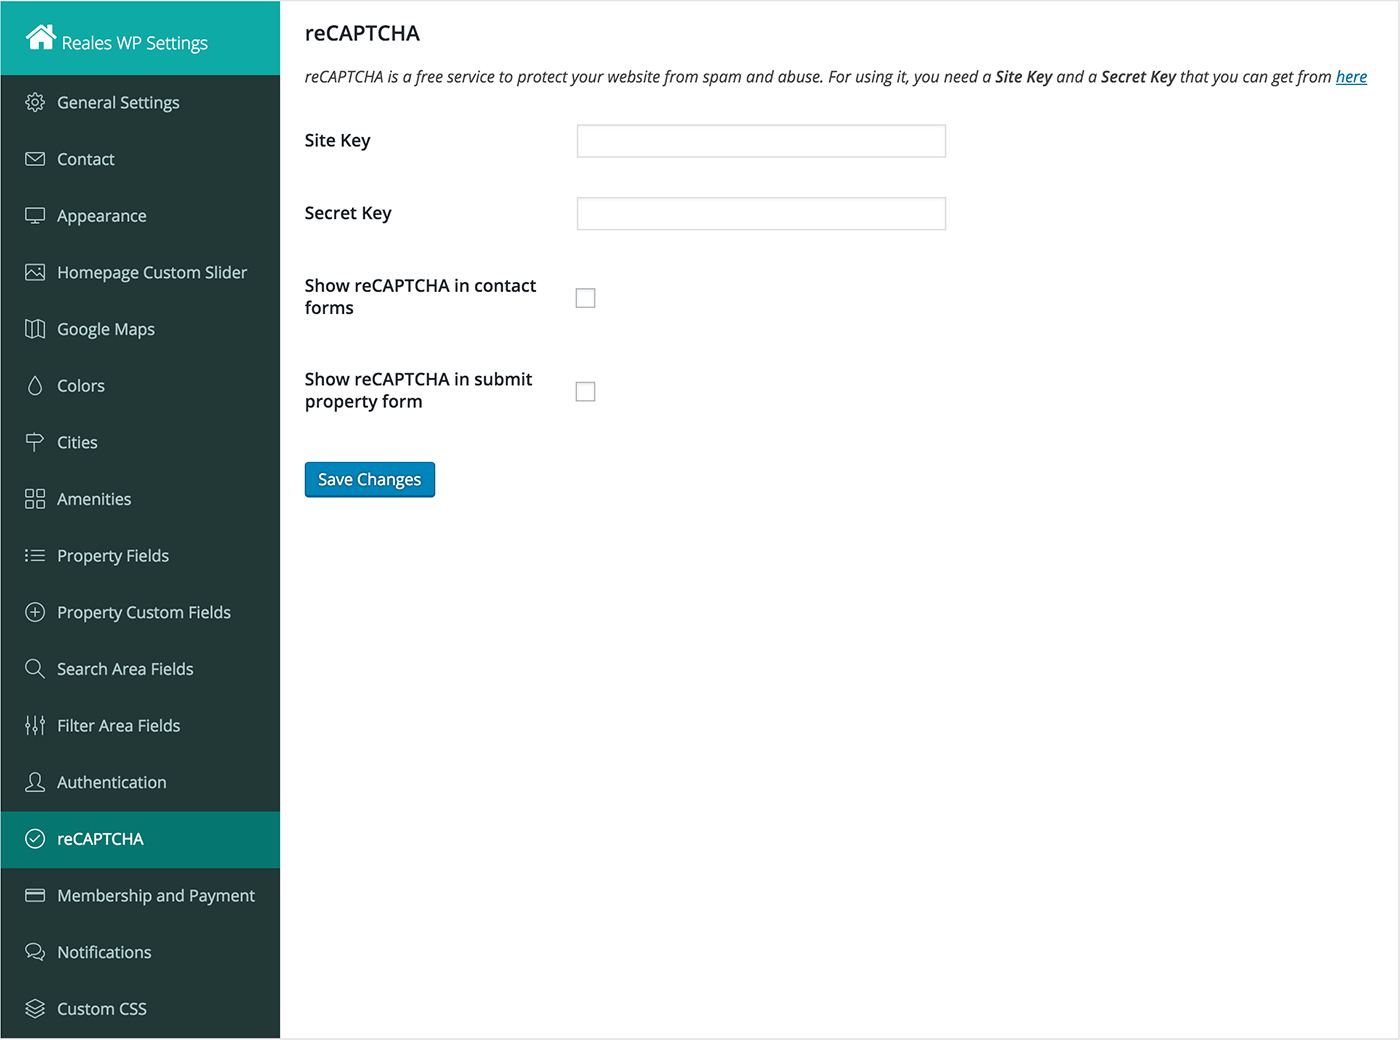
reCAPTCHA settings
In this section you can activate the Google reCAPTCHA verifier for the contact forms that can protect you from receiving spams.
Membership and Payment settings
In this section you can set the option to use a pay per listing solution or membership plans. Both options work with PayPal. More about. More about how you create Membership Plans here.
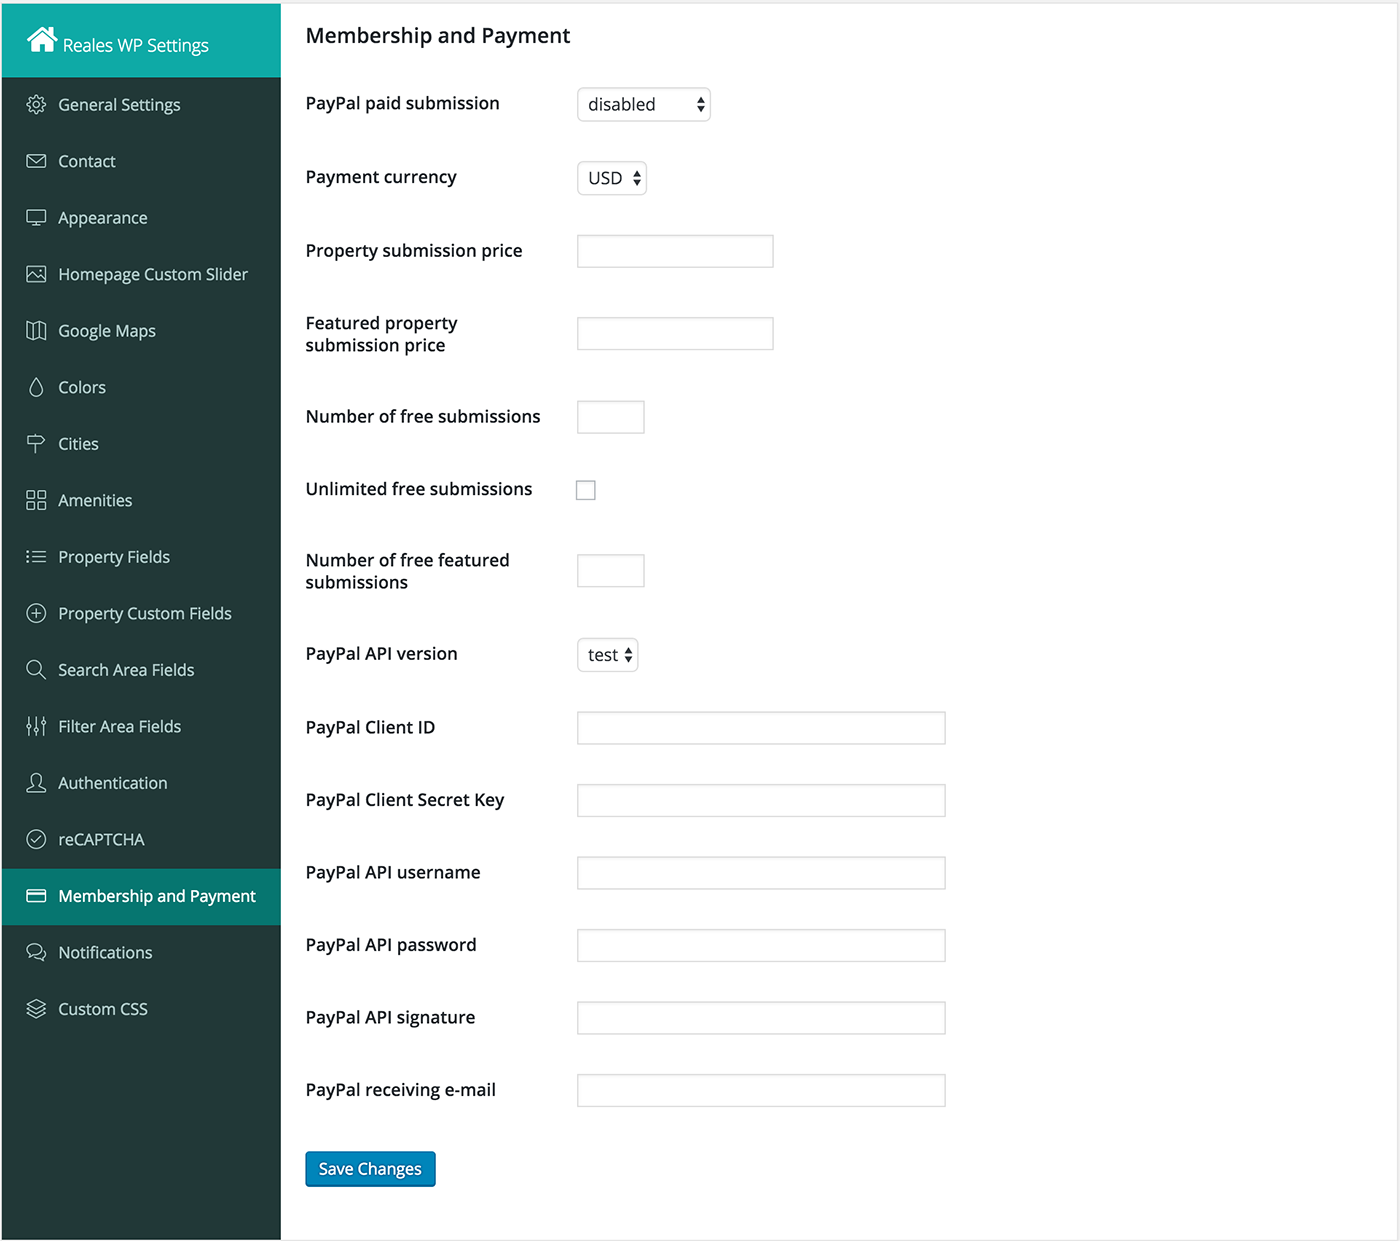
In order to have pay per listing or membership plans features using PayPal you need to fill in the above fields related to PayPal API. This information you'll get from PayPal website. First you need to have a PayPal Business account. Then follow these steps:
1. Create a PayPal Application here

2. Click on Create App button and enter the app name. Notice that you have a Sandbox version (for test purpose) and a Live version of the app.

3. Fill in the Return URL field. This is how you obtain the return URL: Go in wordpress admin to Pages > PayPal Processor page and copy the page URL (this is the return URL). In this section you also have the Client ID and the Secret.
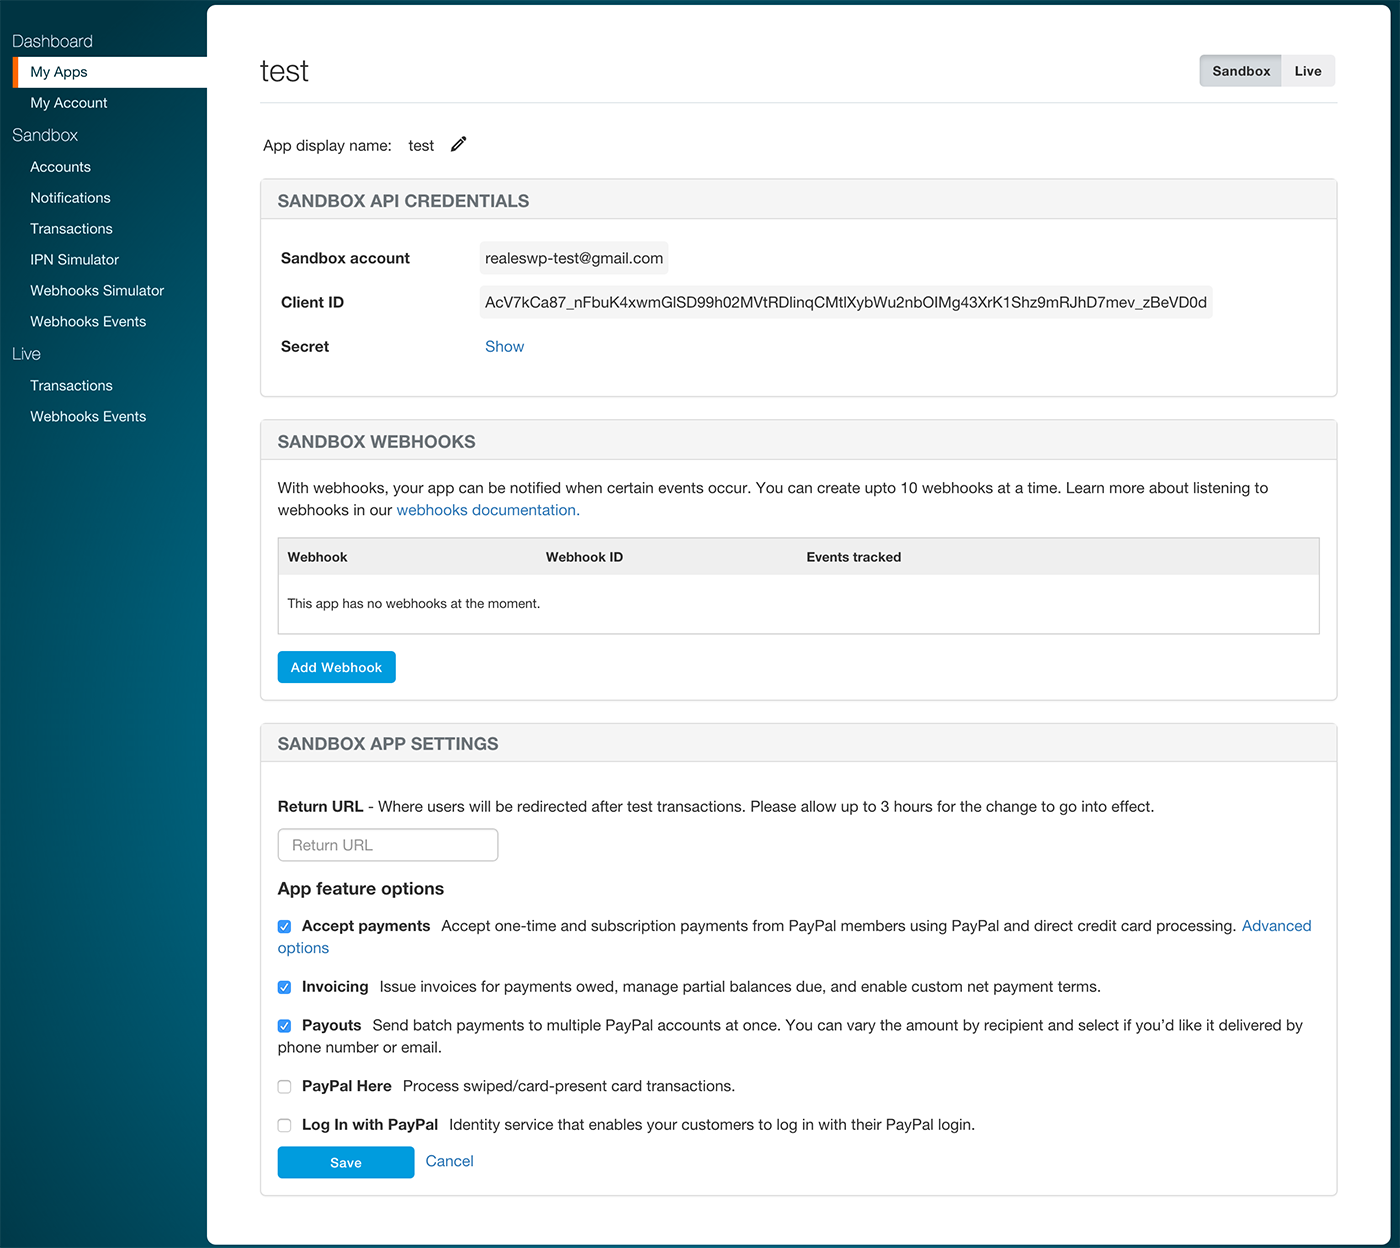
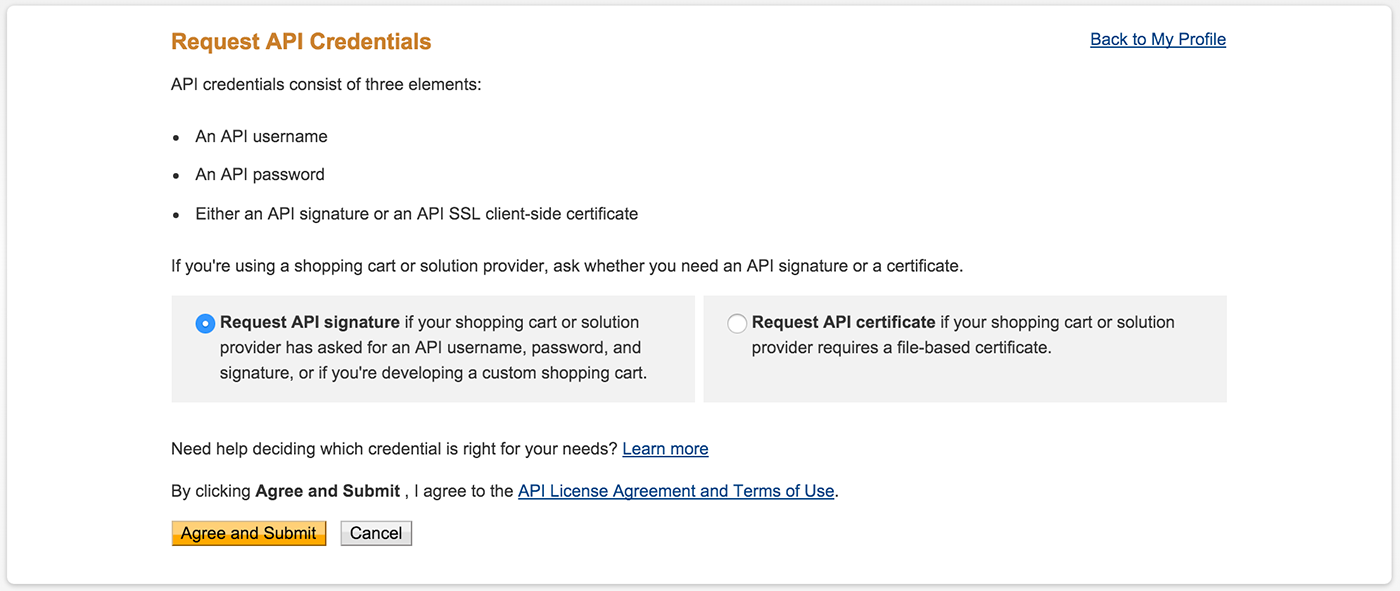
4. For API fields, if you want to use the test account, go in PayPal to Sandbox > Accounts. For the Live version, you'll get the API fields from here: My Profile > My selling tools > API access (click on Update). Please make sure you are on www.paypal.com and not on developer.paypal.com for the Live version. Then click on Request API credentials (see the screenshot below).
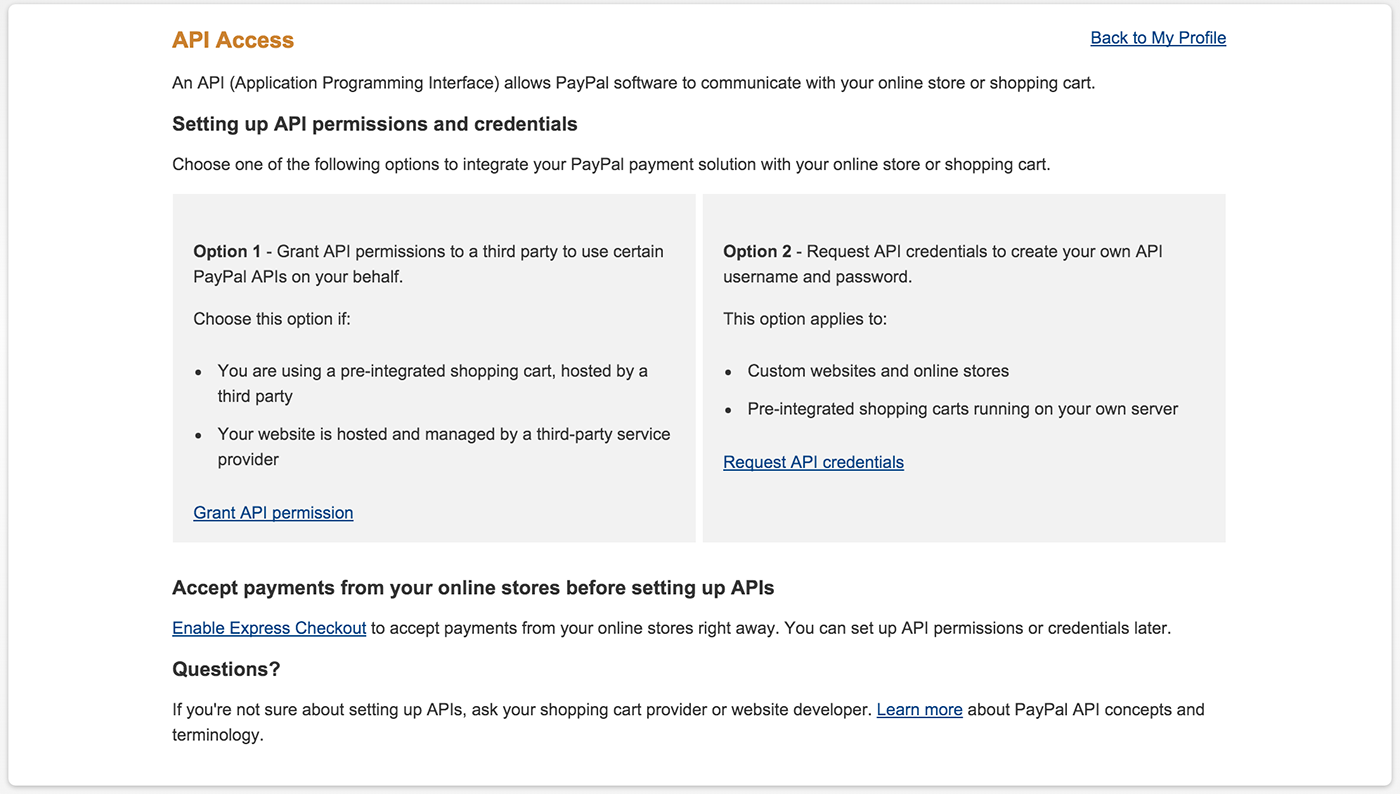
Check Request API signature option and click Agree and Submit button.
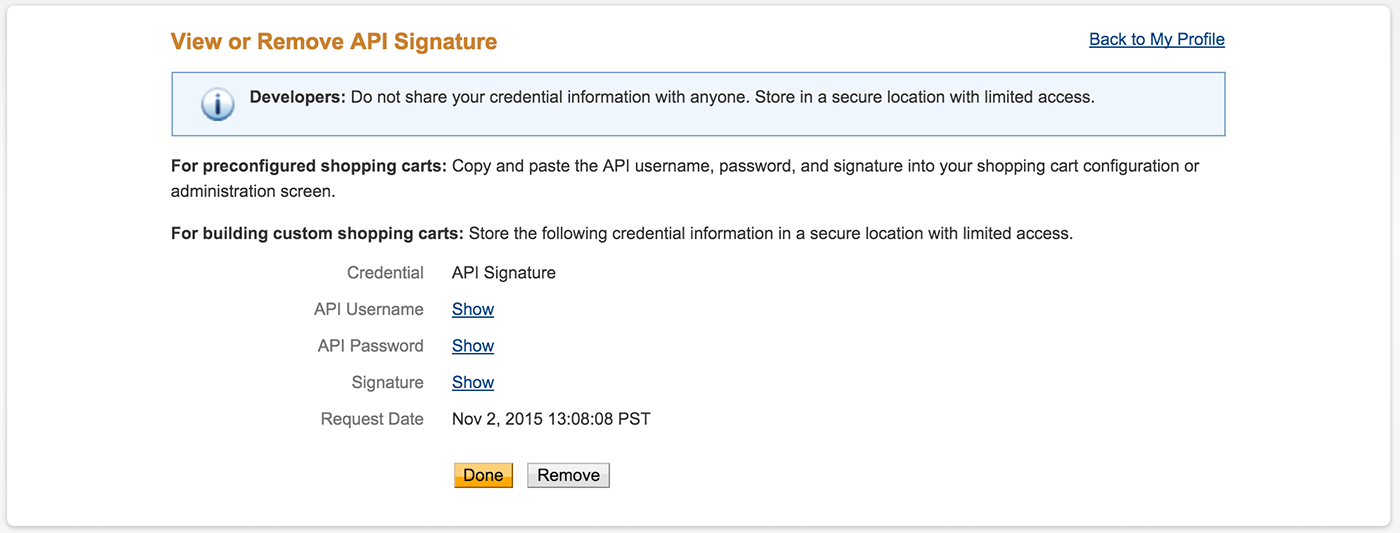
Then you'll be able to see the page with your API information that you'll be using inside the theme settings panel.
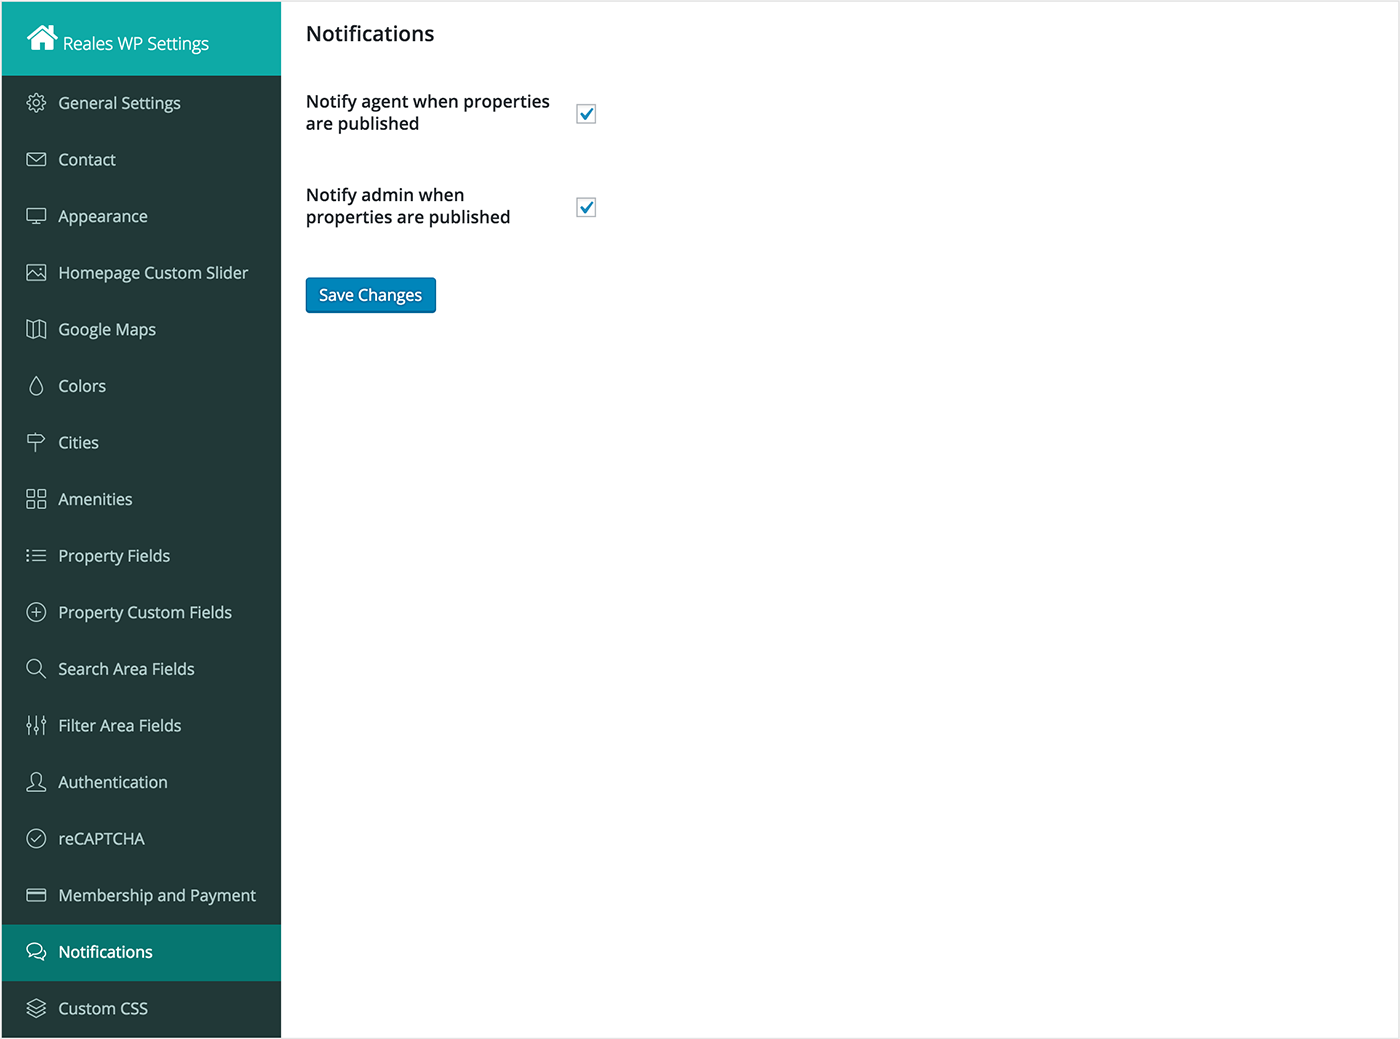
Notifications settings
In this section you can activate/deactivate the email notifications received by agents and admin when a property is listed or updated.
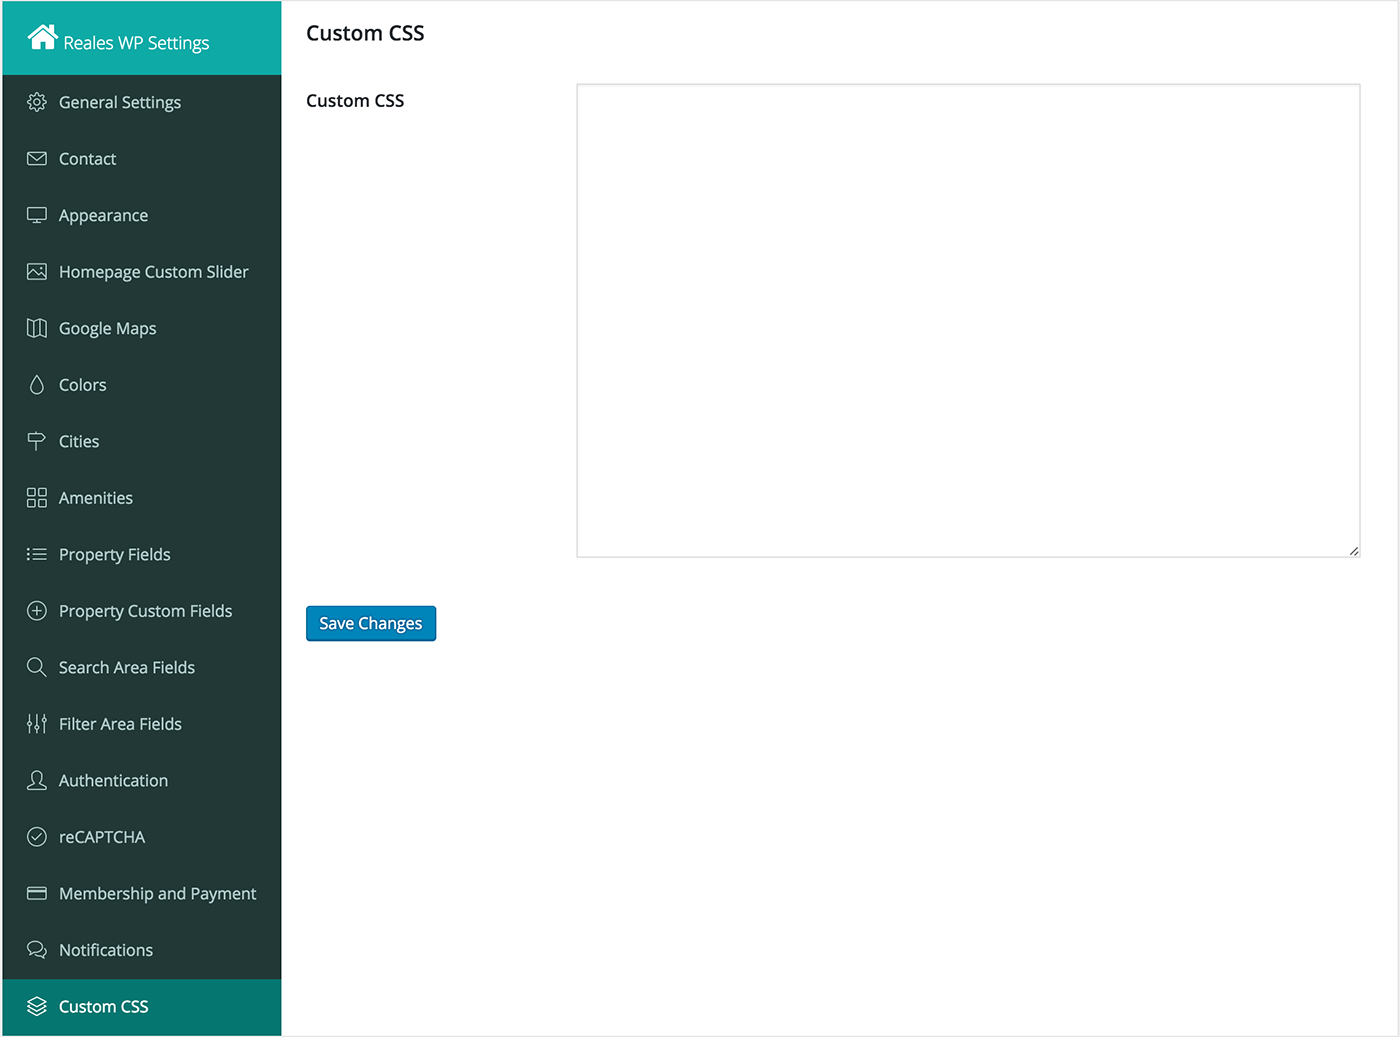
Custom CSS settings
In this section you can add custom CSS styles.
Agents
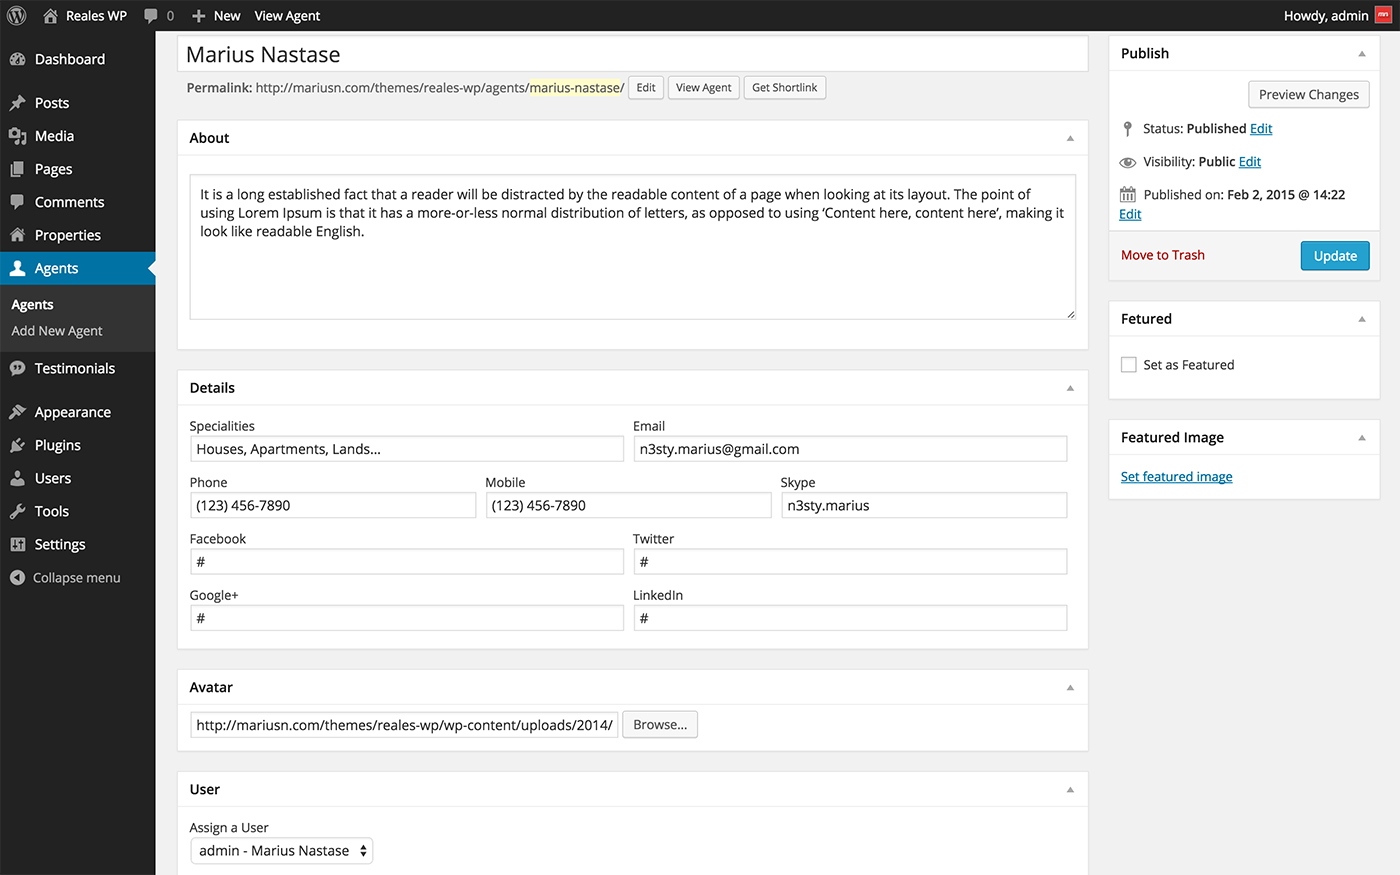
Reales WP theme offers the posibility of adding agents as custom post types. In order to add an agent, follow the next steps:
1. Go to Agents > Add New Agent from admin main menu.
2. Enter agent name, about information, details
3. Add an avatar image by clicking Browse... button in Avatar section. In the popup window upload an image from your computer, check Full Size option and click Insert into Post.
4. Assign a user from the dropdown menu in User section.
5. If you want the agent to be set as featured, check Set as Featured option from the right side panel called Featured.
6. Click Publish.
Properties
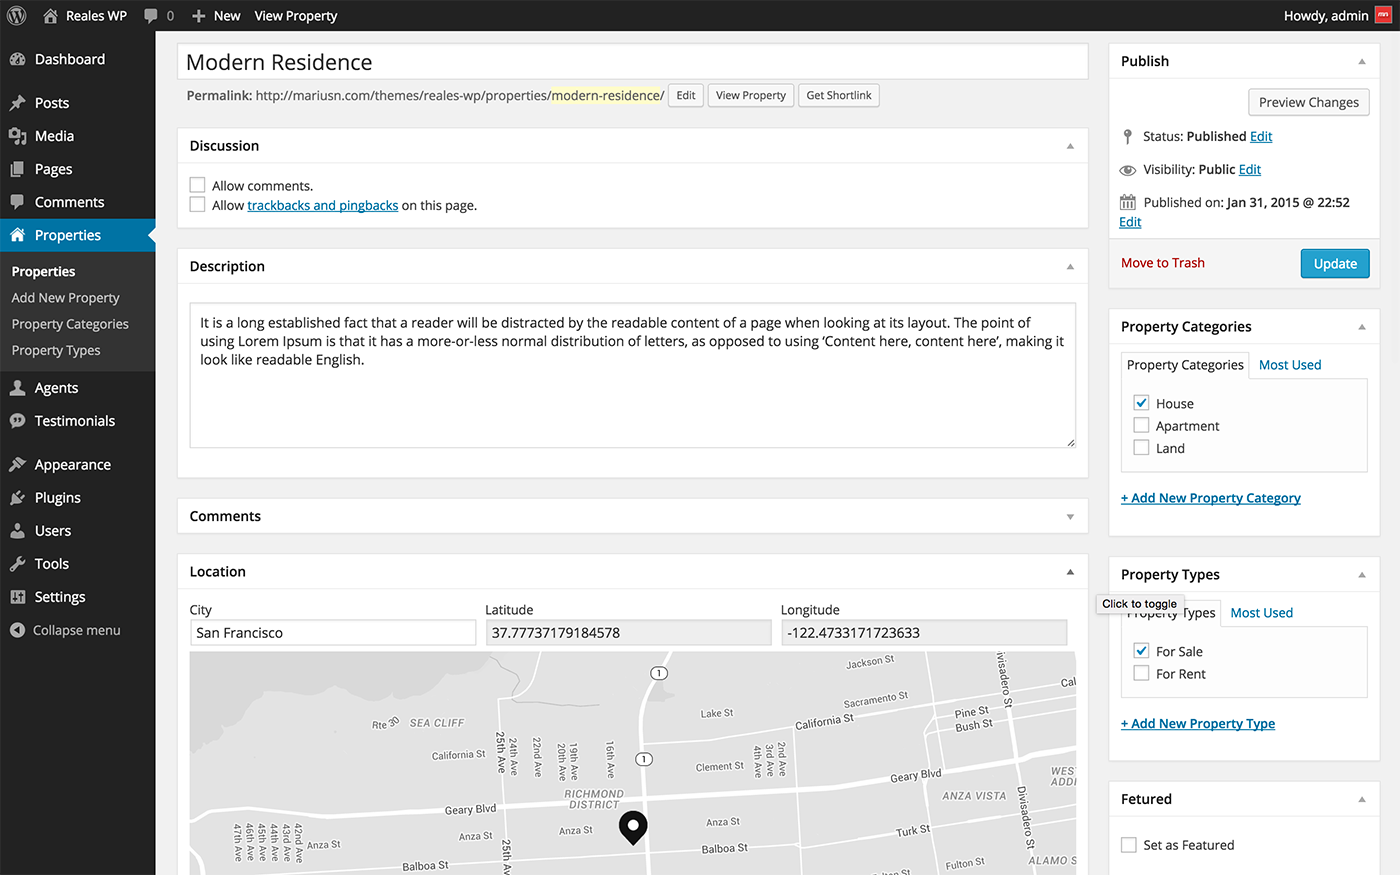
Reales WP theme offers the posibility of adding properties as custom post types. In order to add a property, follow the next steps:
1. Go to Properties > Add New Property from admin main menu.
2. Enter the property title, description, choose a city and drag the pin on the map in order to set a precise position, fill in the rest of the location details.
3. Fill in the price, price label, area, number of bedrooms, number of bathrooms.
4. Check the amenities. Note that the amenities list is the one you set here.
5. Assign an agent from the dropdown menu in Agent section.
6. Add photos to the photo gallery like you did with the agent's avatar photo.
7. Check a category from Property Categories section. You can also add other categories by clicking Add New Property Category. The categories can also be managed by going to Properties > Property Categories from the admin main menu.
8. Check a type from Property Types section. You can also add other types by clicking Add New Property Type. The types can also be managed by going to Properties > Property Types from the admin main menu.
9. If you want the property to be set as featured, check Set as Featured option from the right side panel called Featured.
10. Click Publish.
Testimonials
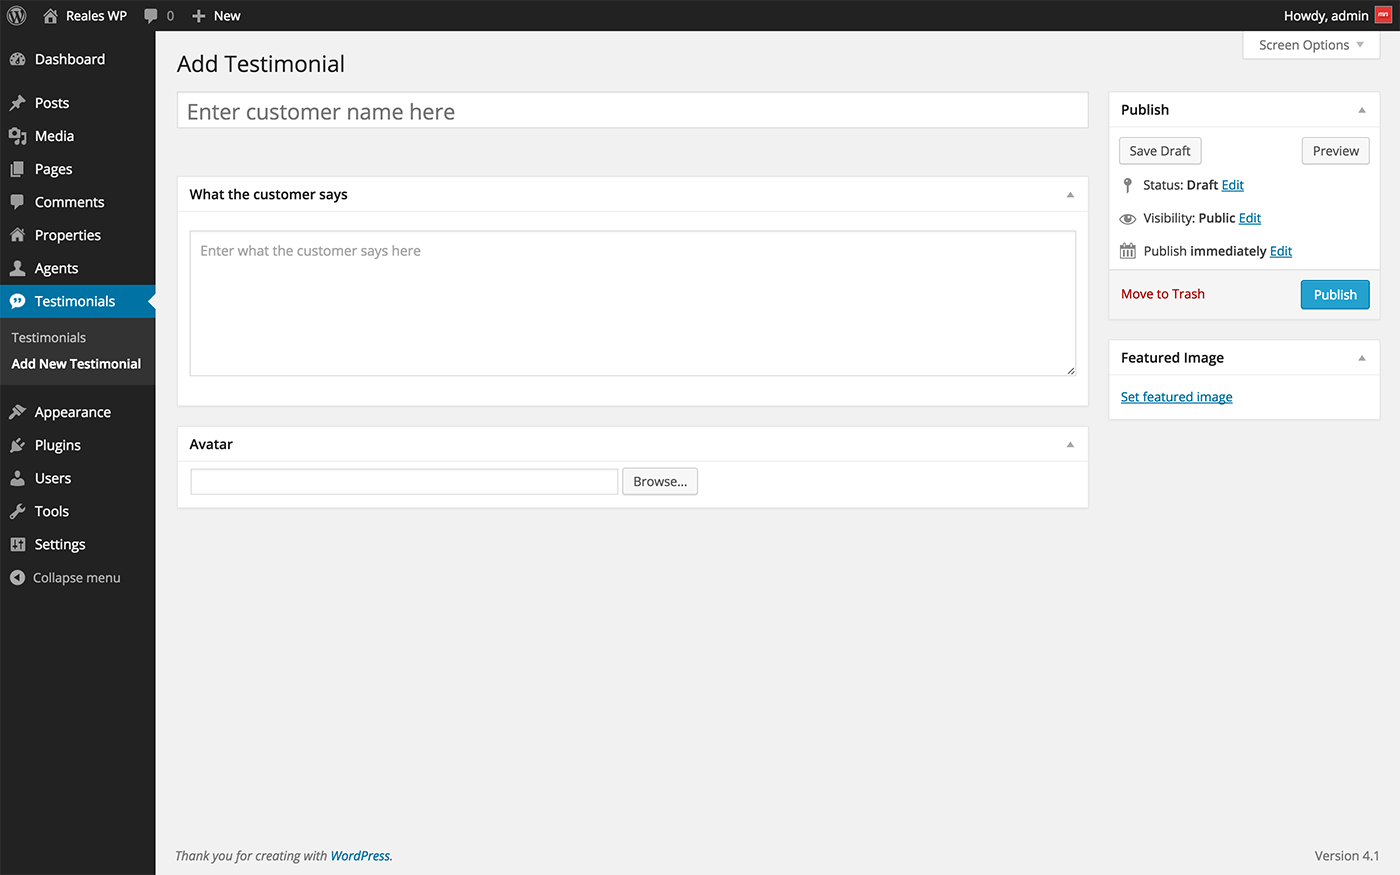
Reales WP theme offers the posibility of adding testimonials as custom post types that can be used in pages as shortcode. In order to add a testimonial, follow the next steps:
1. Go to Testimonials > Add New Testimonial from admin main menu.
2. Enter customer name, the quoted text lines.
3. Add a customer avatar image like you did with the agent's avatar photo.
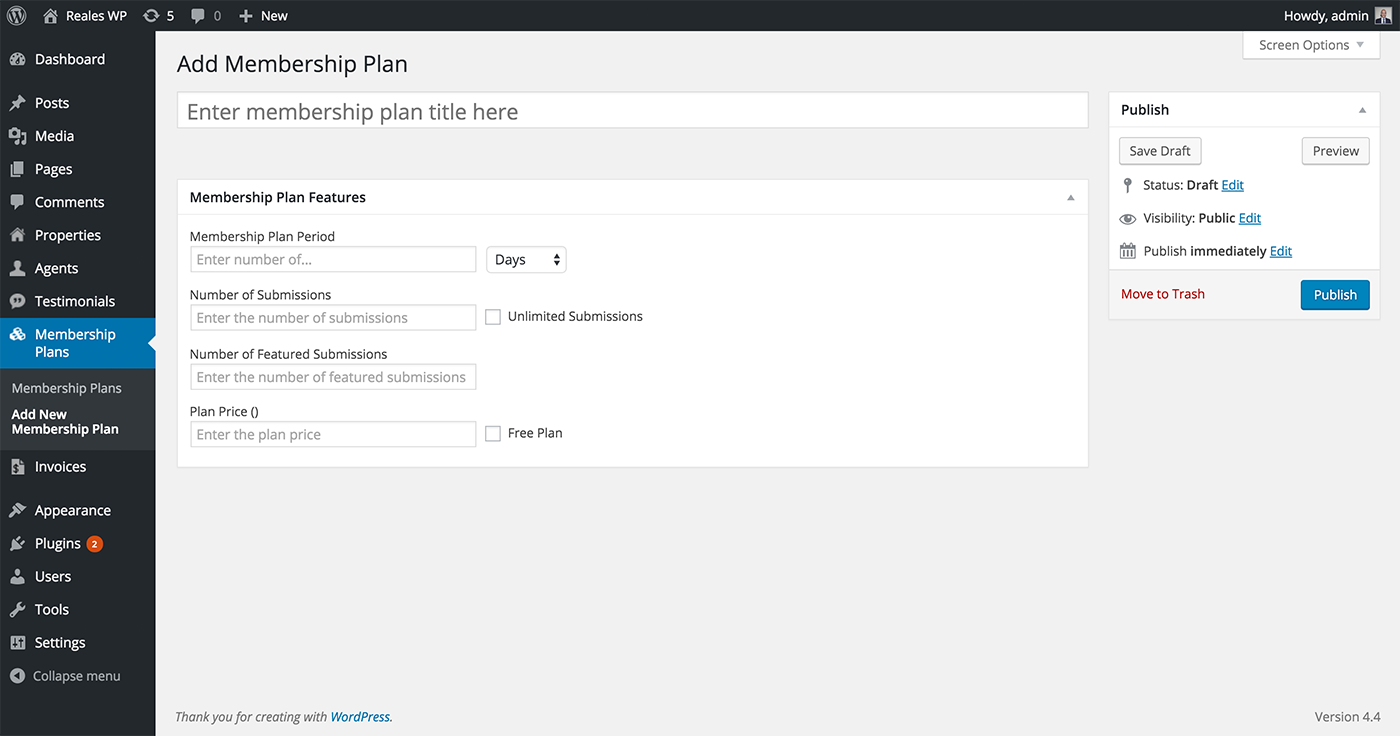
Membership Plans
Reales WP theme offers the posibility of adding membership plans as custom post types that can be used when you have set the PayPal paid submission option to membership. In order to add a membership plan, do the following:
Go to Membership Plans > Add New Membership Plan from admin main menu.
Shortcodes
Shortcodes are pieces of information that you can insert into pages.
The available shortcodes are: Services, Recent Properties, Featured Properties, Featured Agents, Testimonials, and Column
Here is how you can use the shortcodes:
1. Open the home page Home created here by going to Pages > All Pages from the admin main menu.
2. Shortcodes are visually represented by a set of turquoise icons displayed in the content editor toolbar of a Page or Post. If you cannot see them, you'll have to click on the last toolbar button called Toolbar Toggle.
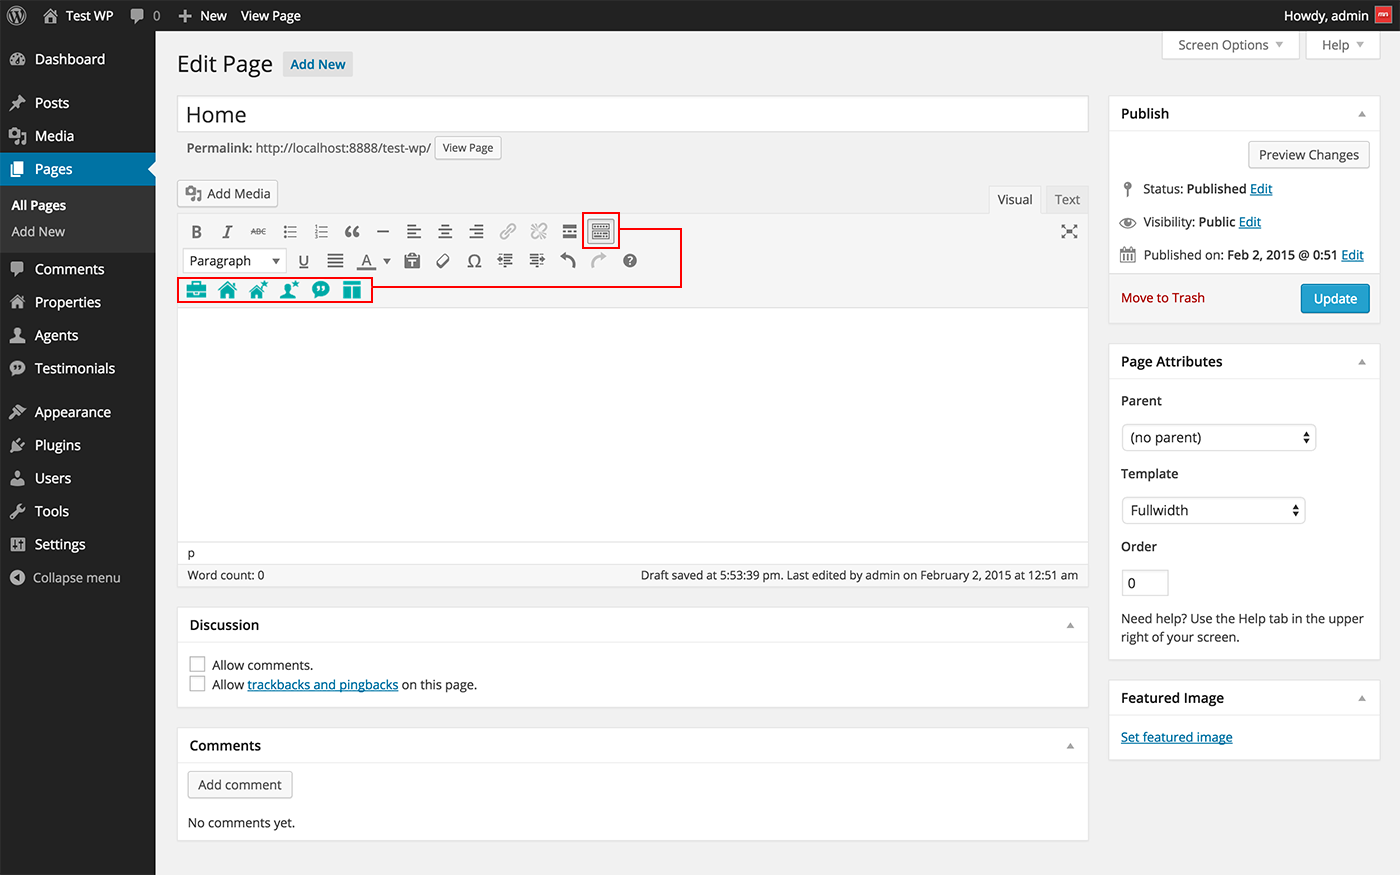
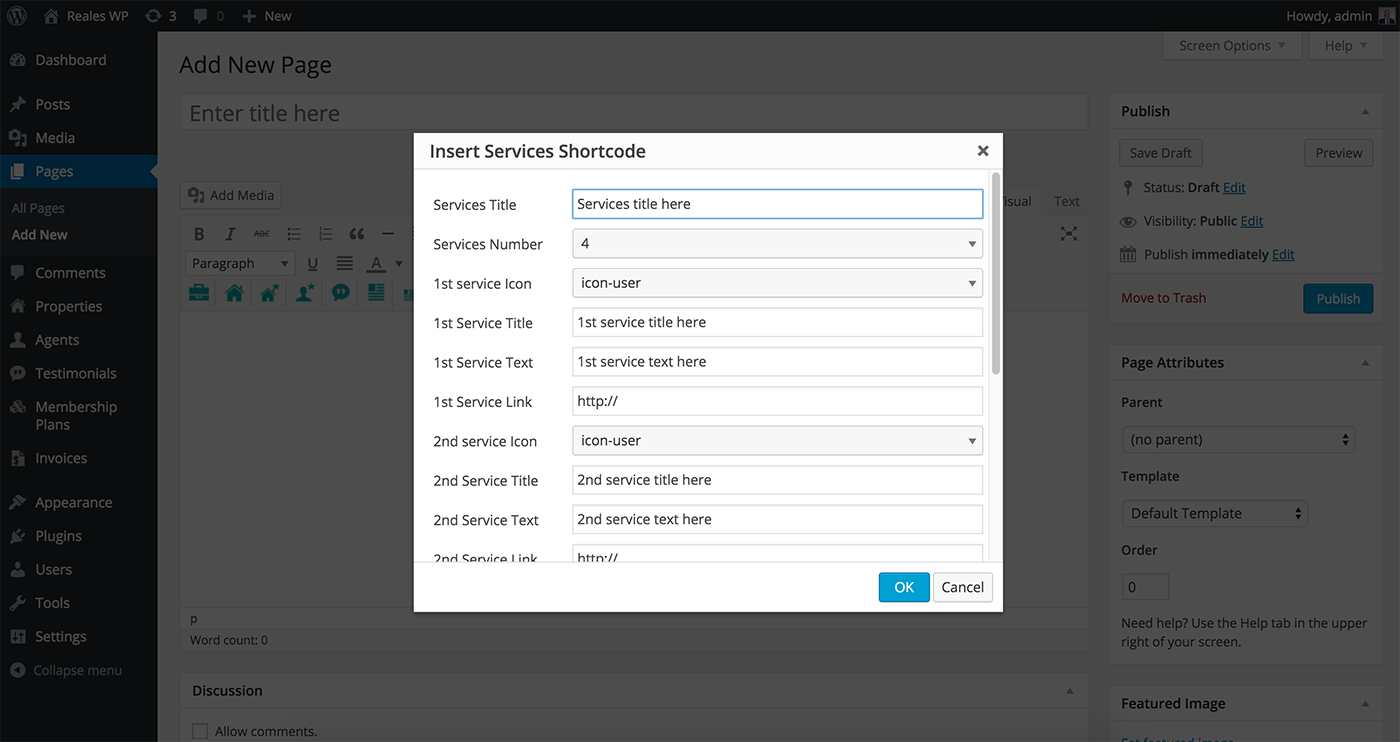
3. The 1st shortcode is called Services. If you click on the 1st icon, a dialog window pops up where you can set your company's services list information. Click OK and the shortcode will appear inside the content editor.
4. The 2nd shortcode is called Recent Properties. If you click on the 2nd icon, a dialog window pops up where you can set the title of the shortcode, the number of displayed properties, the type and category. Click OK and the shortcode will appear inside the content editor.

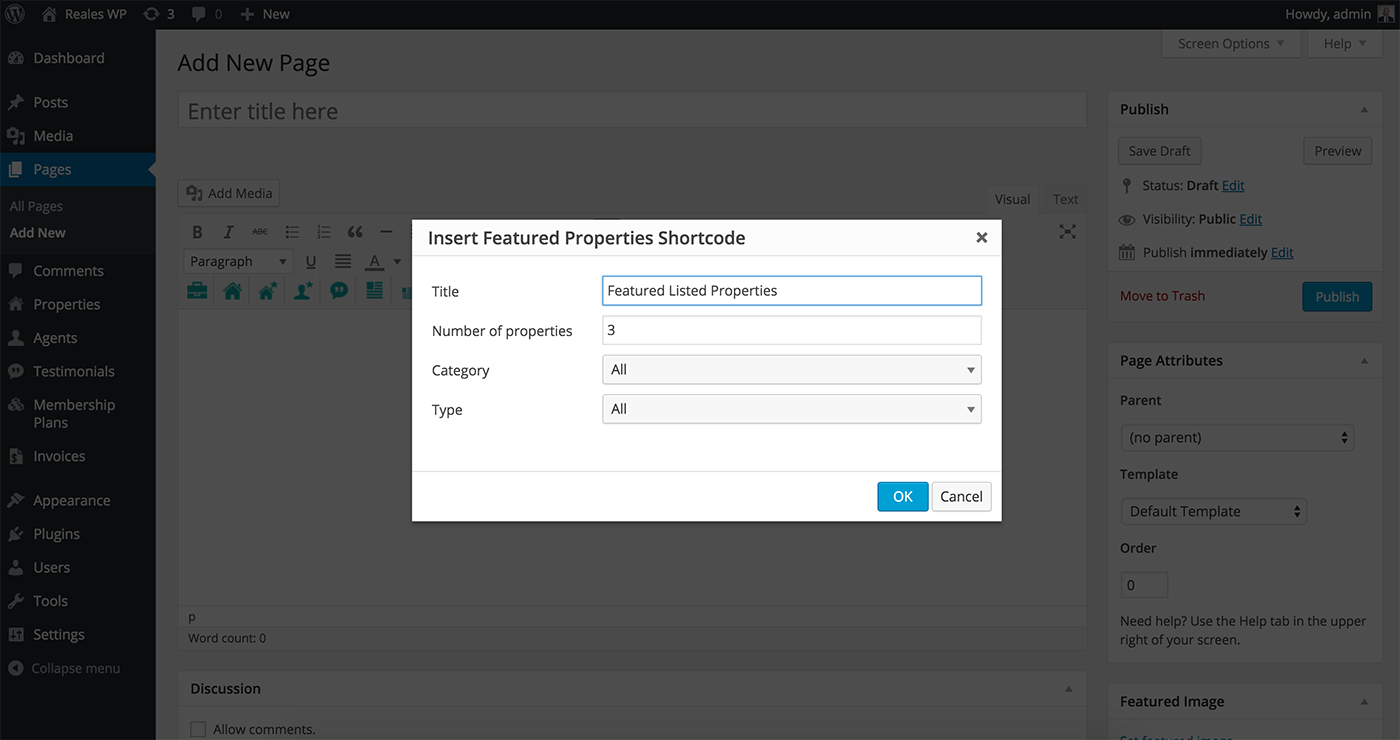
5. The 3rd shortcode is called Featured Properties. If you click on the 3rd icon, a dialog window pops up where you can set the title of the shortcode, the number of displayed properties, the type and category. Click OK and the shortcode will appear inside the content editor.
6. The 4th shortcode is called Single Property. If you click on the 4th icon, a dialog window pops up where you can set the title of the shortcode, the property ID, and the image position. Click OK and the shortcode will appear inside the content editor.
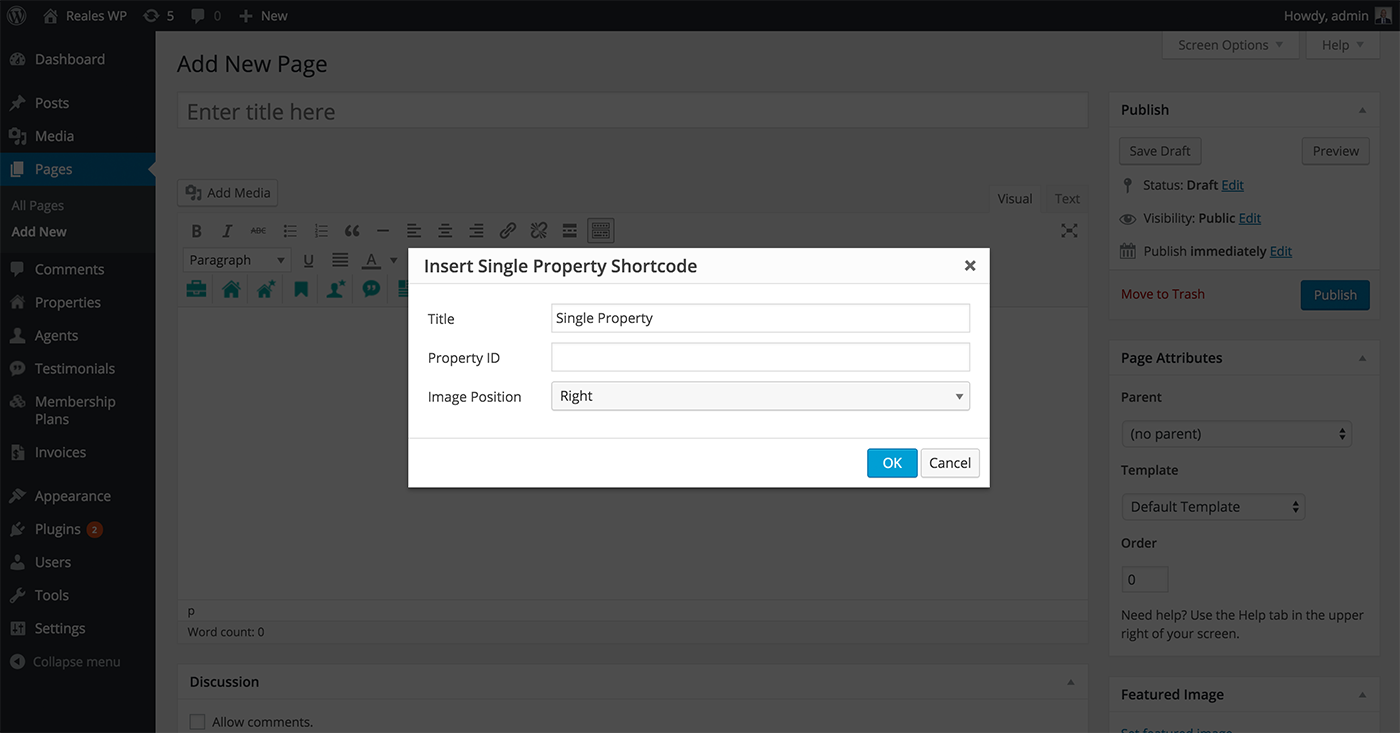
You can get the property ID by opening a property for edit in admin and you find the ID in the address bar. See the below screenshot:

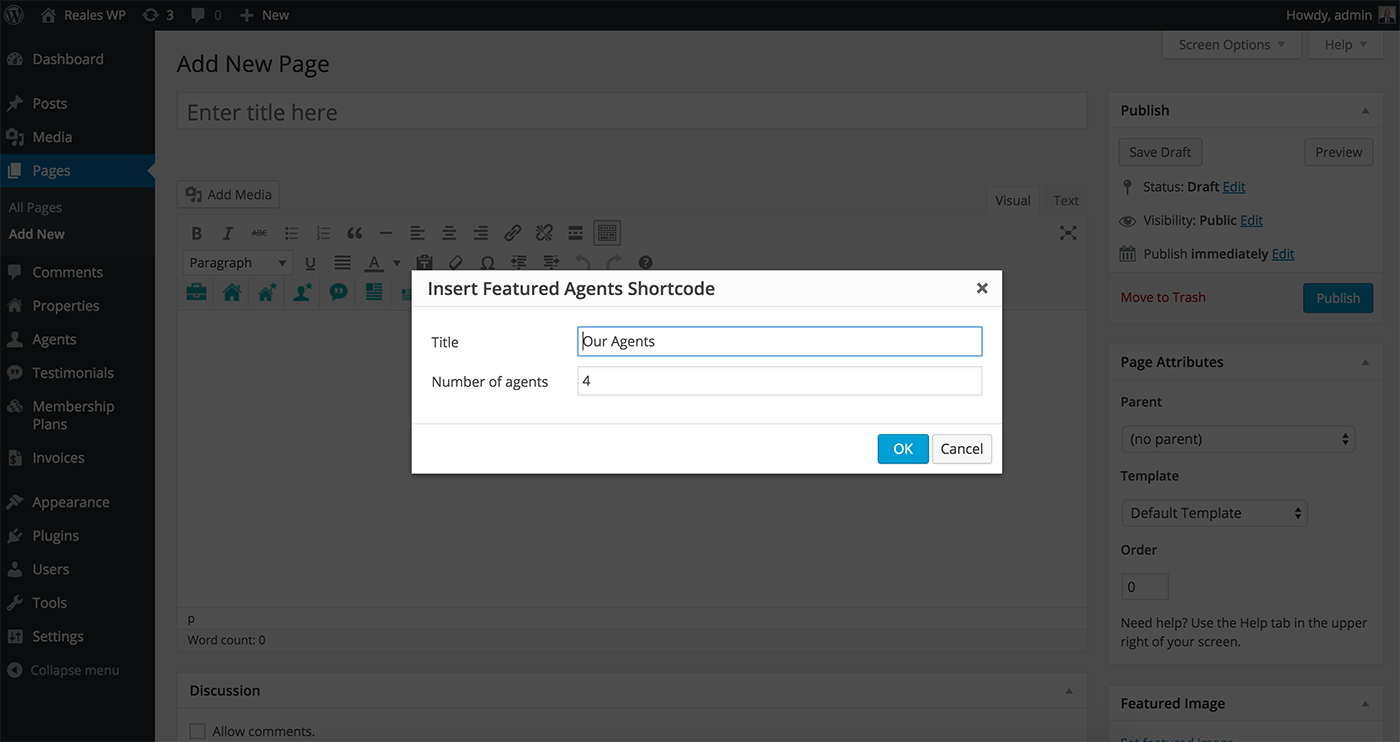
7. The 5th shortcode is called Featured Agents. If you click on the 4th icon, a dialog window pops up where you can set the title of the shortcode and the number of the featured agents. Click OK and the shortcode will appear inside the content editor.
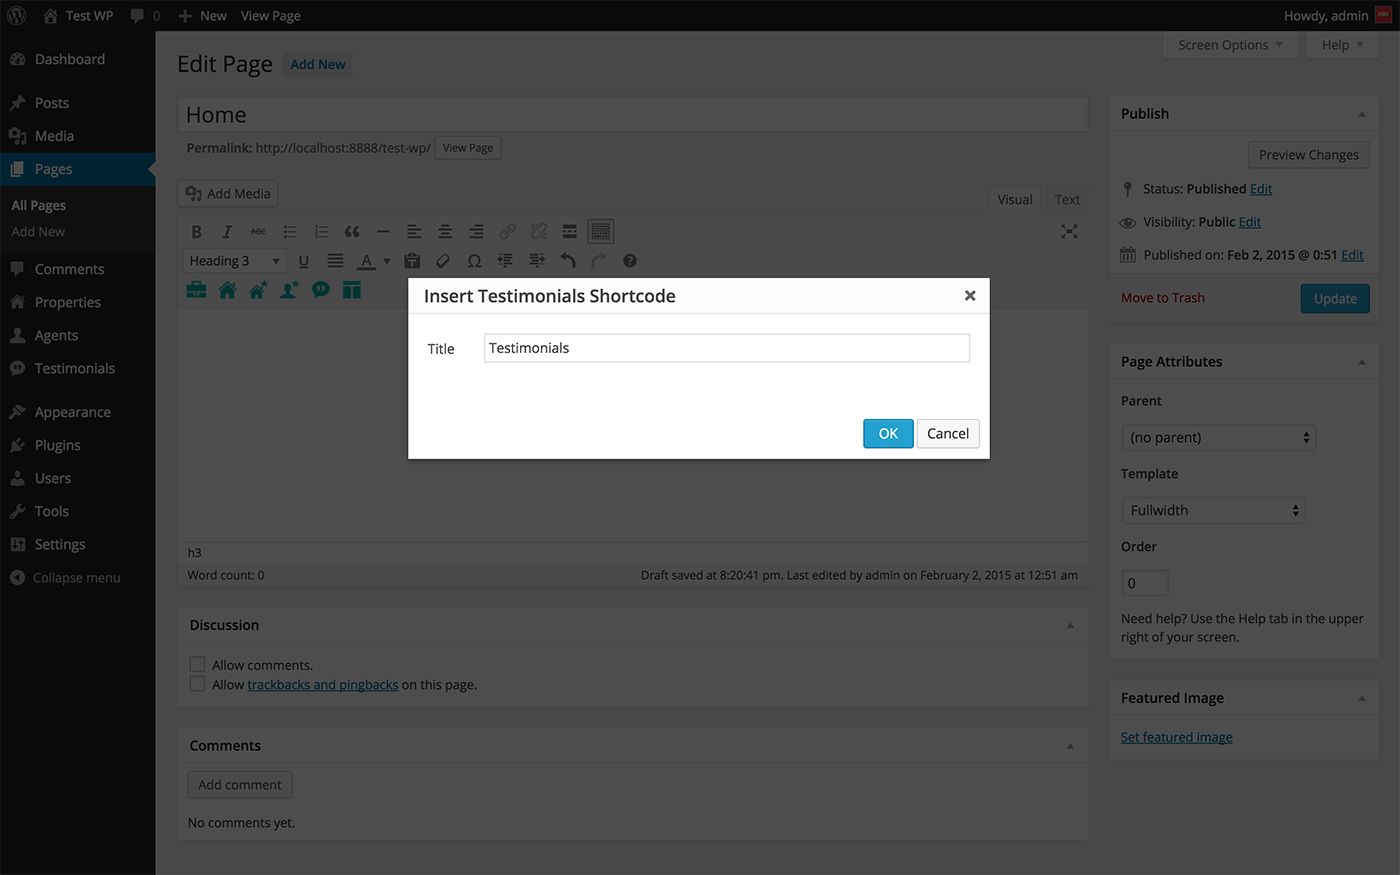
8. The 6th shortcode is called Testimonials. If you click on the 5th icon, a dialog window pops up where you can set the title of the shortcode. Click OK and the shortcode will appear inside the content editor.
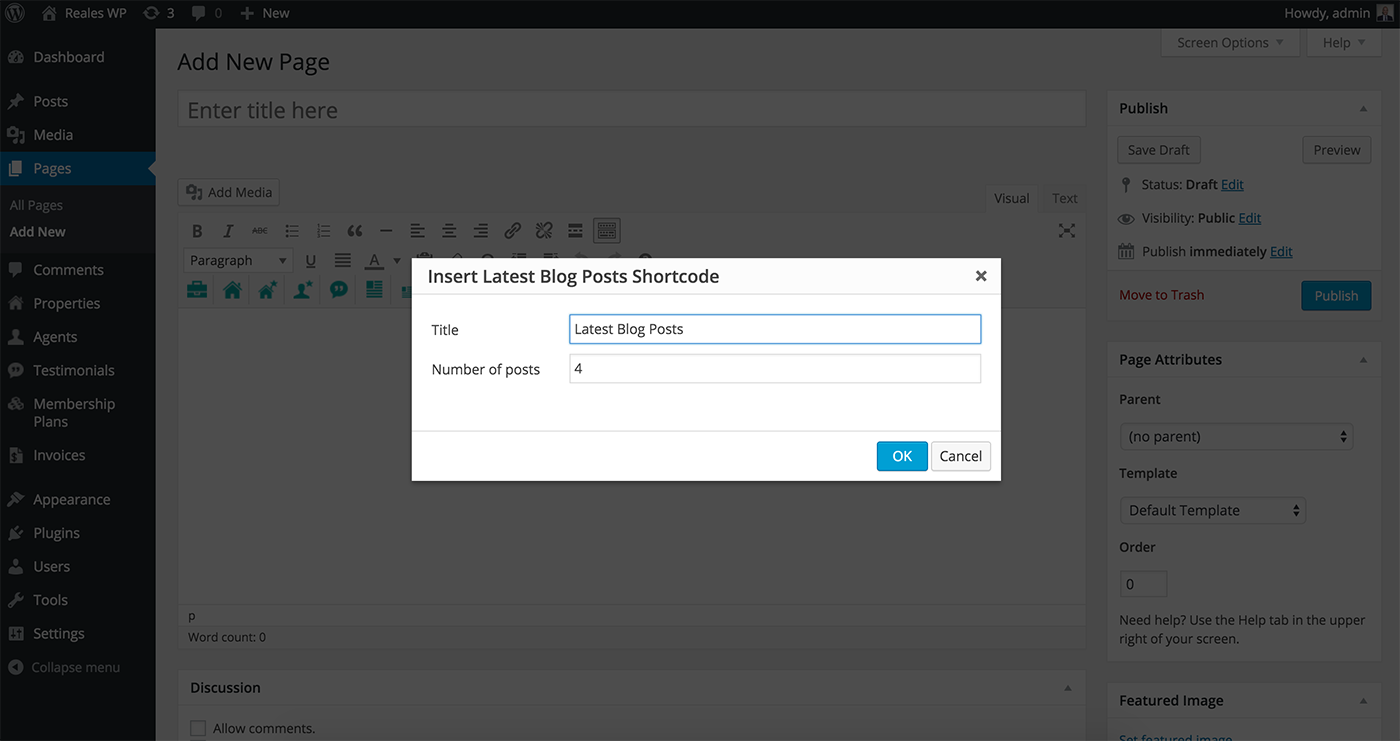
9. The 7th shortcode is called Latest Blog Posts. If you click on the 6th icon, a dialog window pops up where you can set the title and the number of blog posts that will be displayed. Click OK and the shortcode will appear inside the content editor.
10. The 8th shortcode is called Featured Blog Posts. If you click on the 7th icon, a dialog window pops up where you can set the title and the number of blog posts that will be displayed. The blog posts displayed by this shortcode are those that have the Set as Featured checked. Click OK and the shortcode will appear inside the content editor.

11. The 9th shortcode is called Membership Plans. If you click on the 8th icon, a dialog window pops up where you can set the title of the shortcode. More on how you can add membership plans here. Click OK and the shortcode will appear inside the content editor.

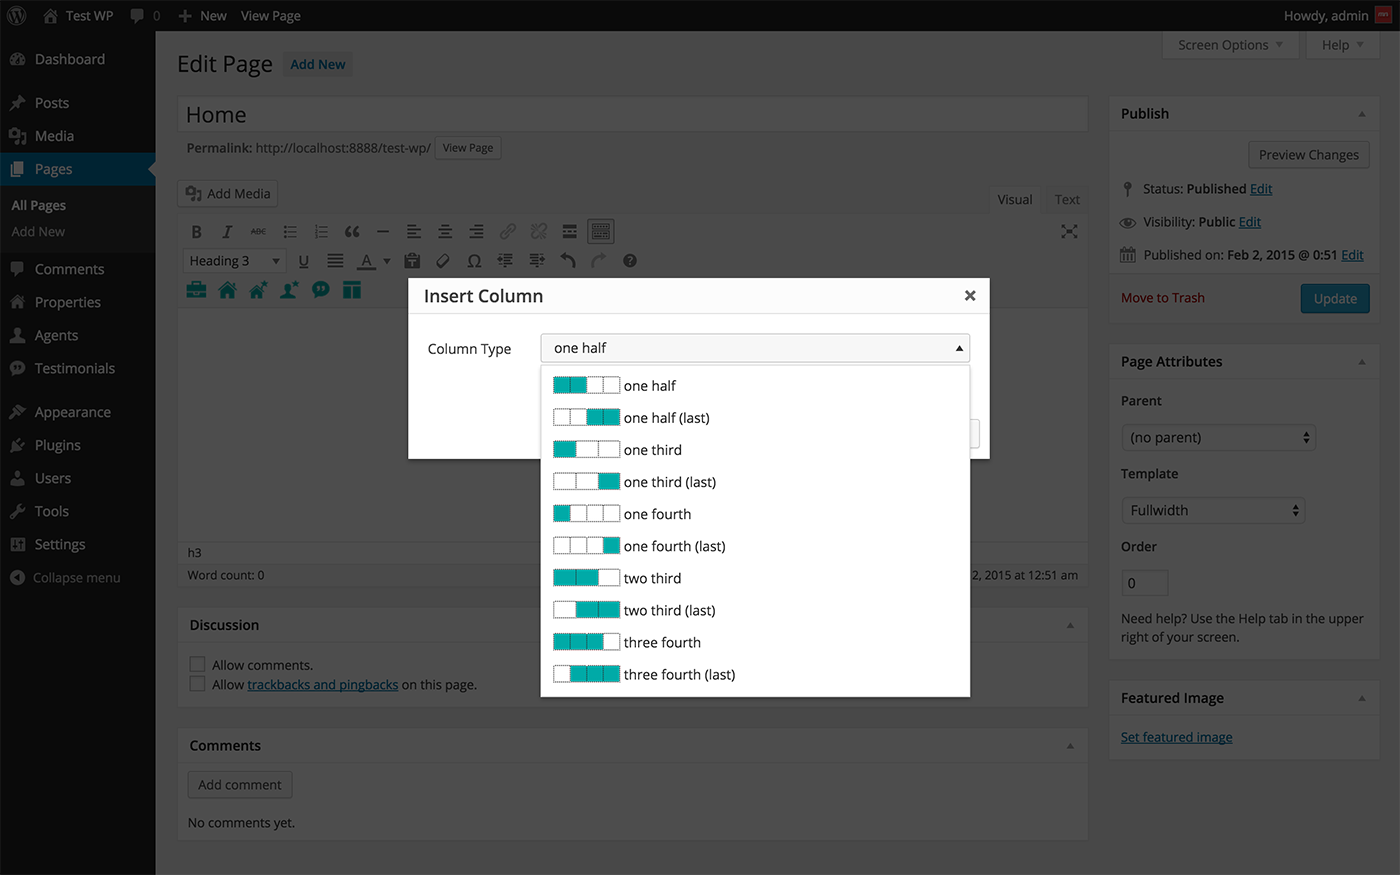
12. The 10th shortcode is called Column. If you click on the 6th icon, a dialog window pops up where you can set the type of content column. Click OK and the shortcode will appear inside the content editor. The shortcode creates a content column.
Custom widgets
The theme provides 5 widget areas (1 for the sidebar and 4 for the footer) and 6 custom widgets:
You can add widgets by going to Appearance > Widgets
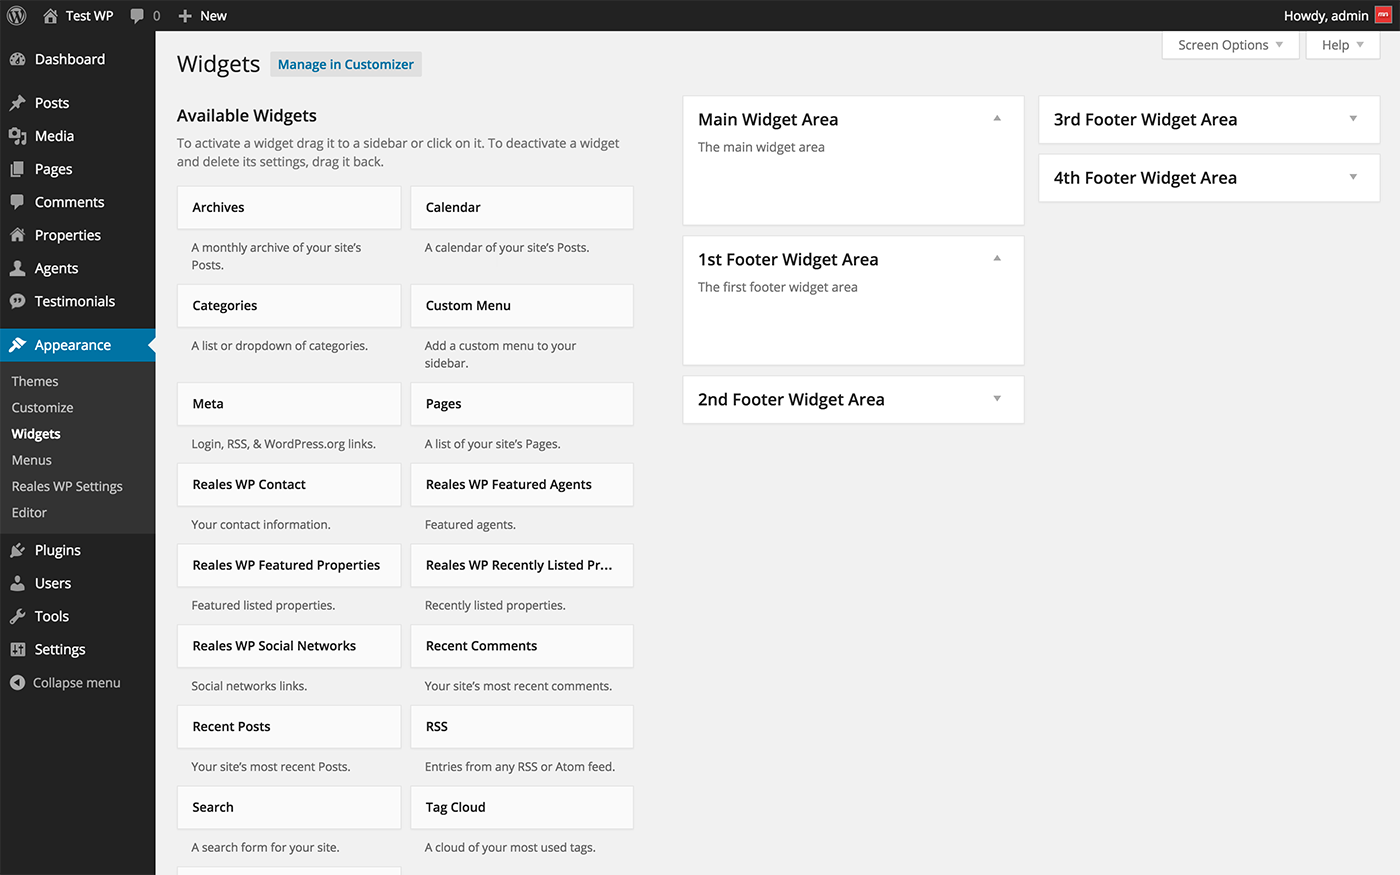
1. Reales WP Contact allows you to display your contact information on the sidebar or in one of the footer columns.
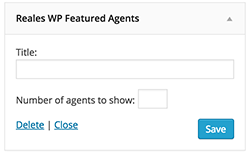
2. Reales WP Featured Agents allows you to display the featured agents list on the sidebar or in one of the footer columns.
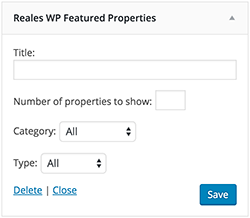
3. Reales WP Featured Properties allows you to display the featured properties list on the sidebar or in one of the footer columns.
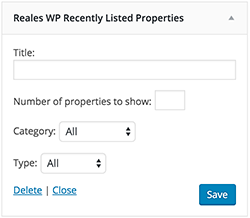
4. Reales WP Recently Listed Properties allows you to display the latest added properties list on the sidebar or in one of the footer columns.
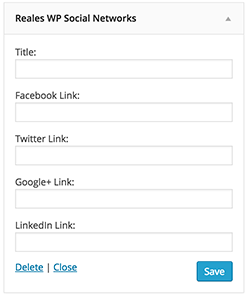
5. Reales WP Social Networks allows you to display your social networks links list on the sidebar or in one of the footer columns.
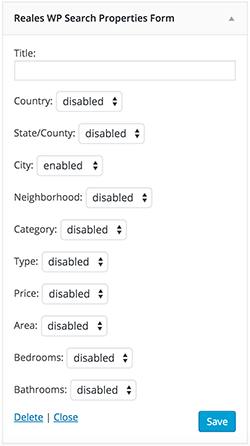
6. Reales WP Search Properties Form allows you to display the properties search form on the sidebar or in one of the footer columns.
Homepage slideshow
In order to add images to the homepage slideshow follow the next steps:
1. Go to Media > Add New from admin main menu.
2. Upload an image from your computer.
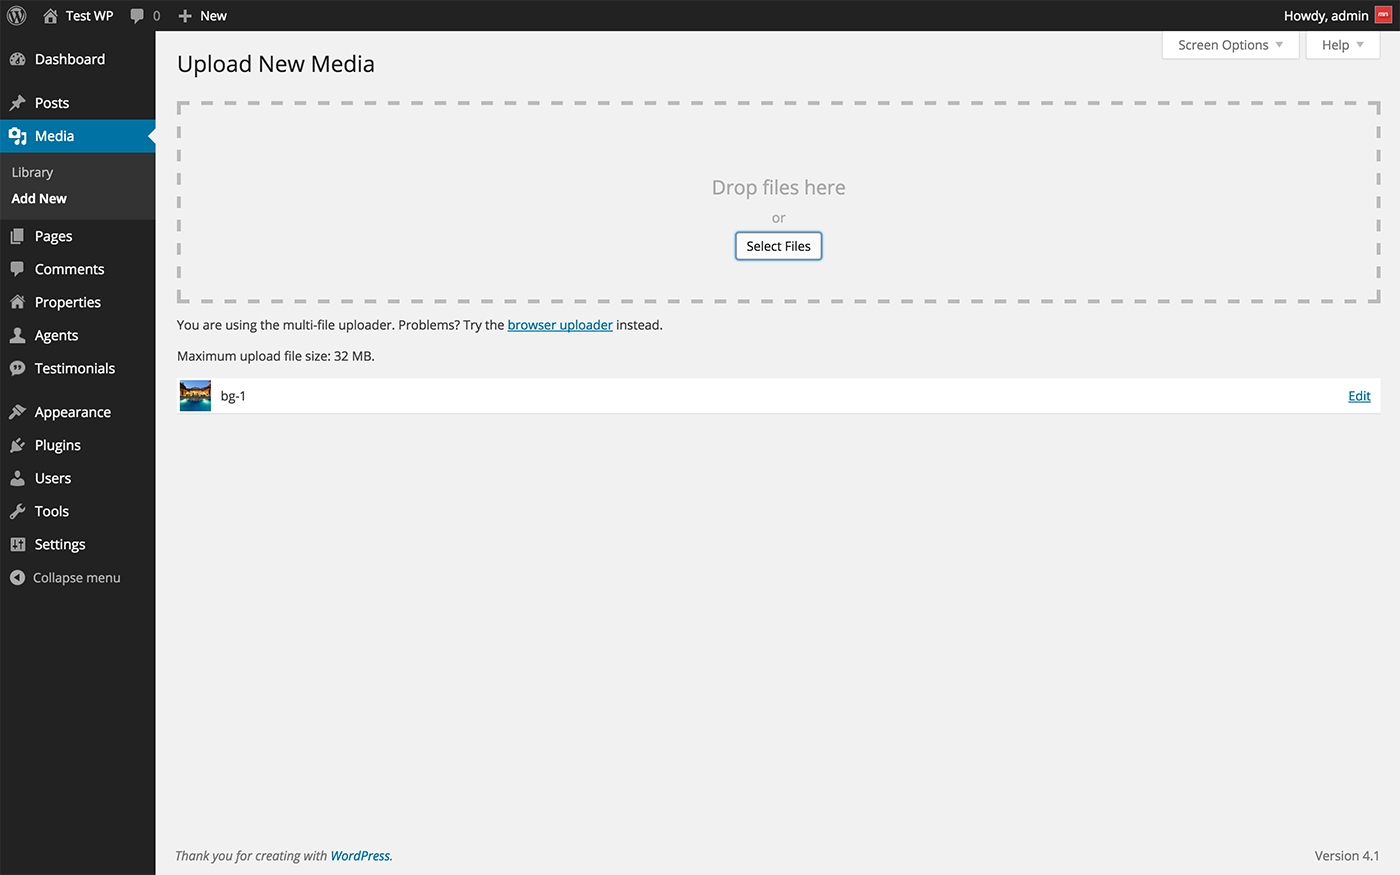
3. Click Edit and check Show in Slideshow option.
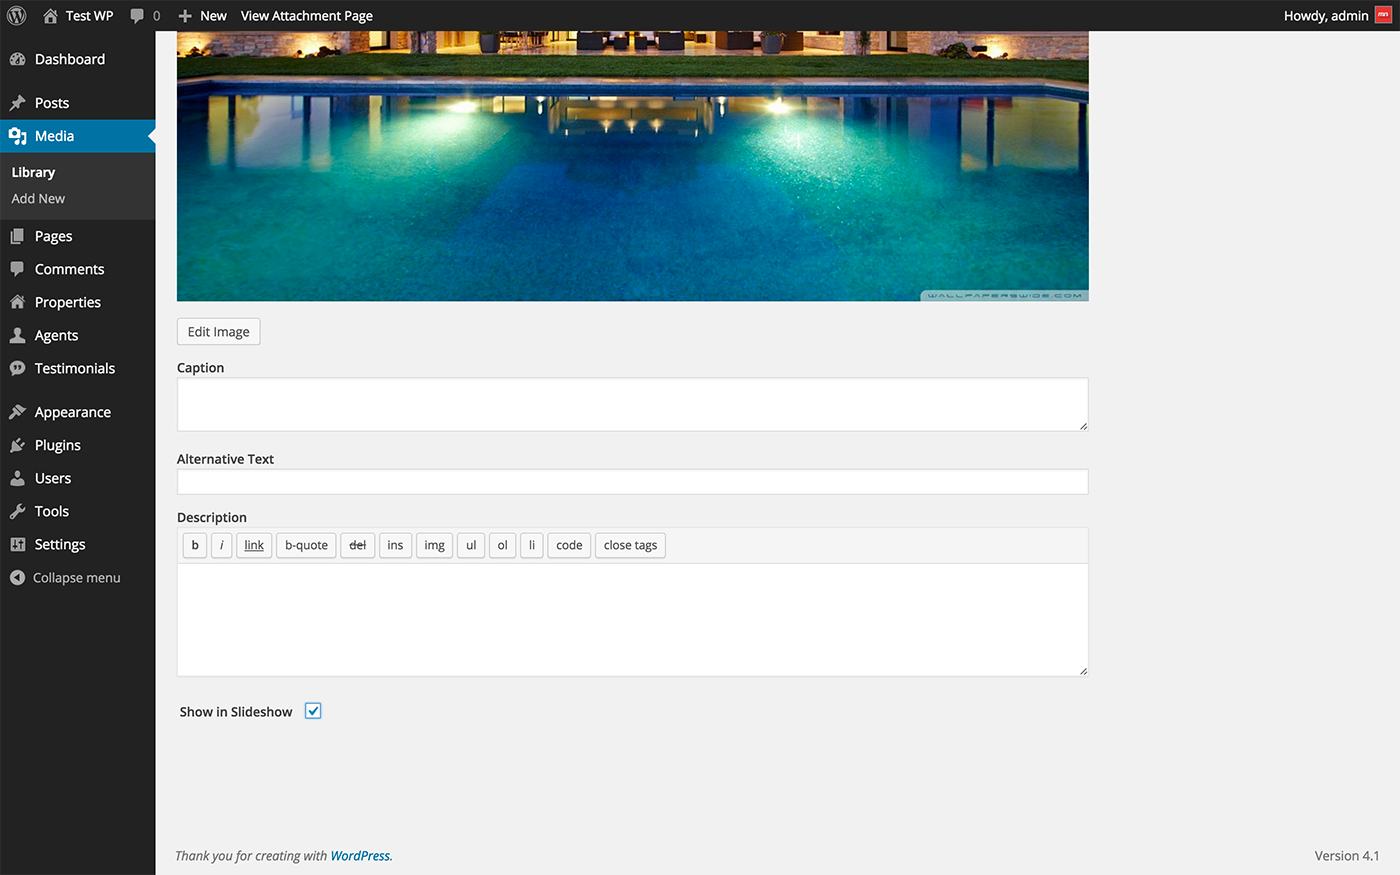
4. Click Update.
dsIDXpress plugin
dsIDXplugin plugin must be installed separately and it requires and account and monthly fee to be used.
Reales WP offers sdIDXpress plugin support, containing customized plugin widgets, pages, shortcodes.
NOTE: dsIDXpress plugin is optional and the properties created inside admin will not be displayed alongside with the ones imported by the plugin.
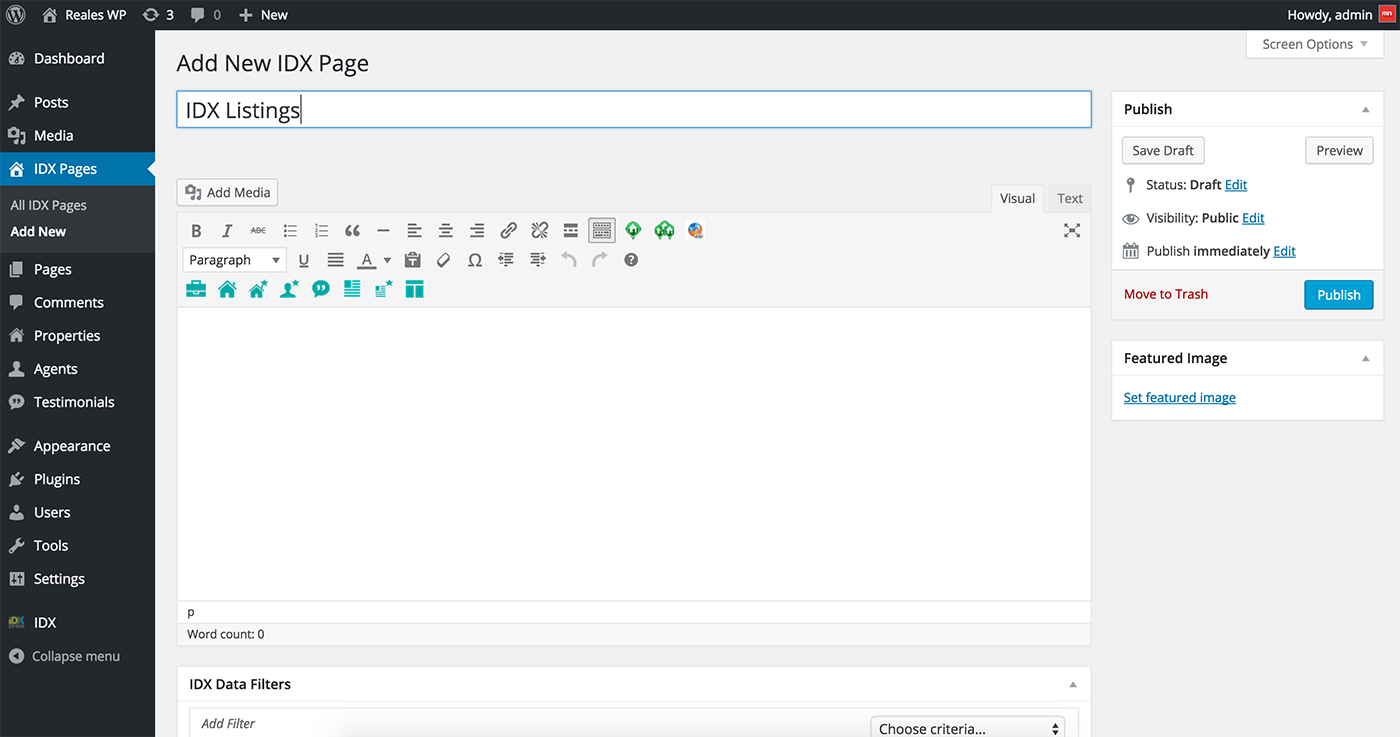
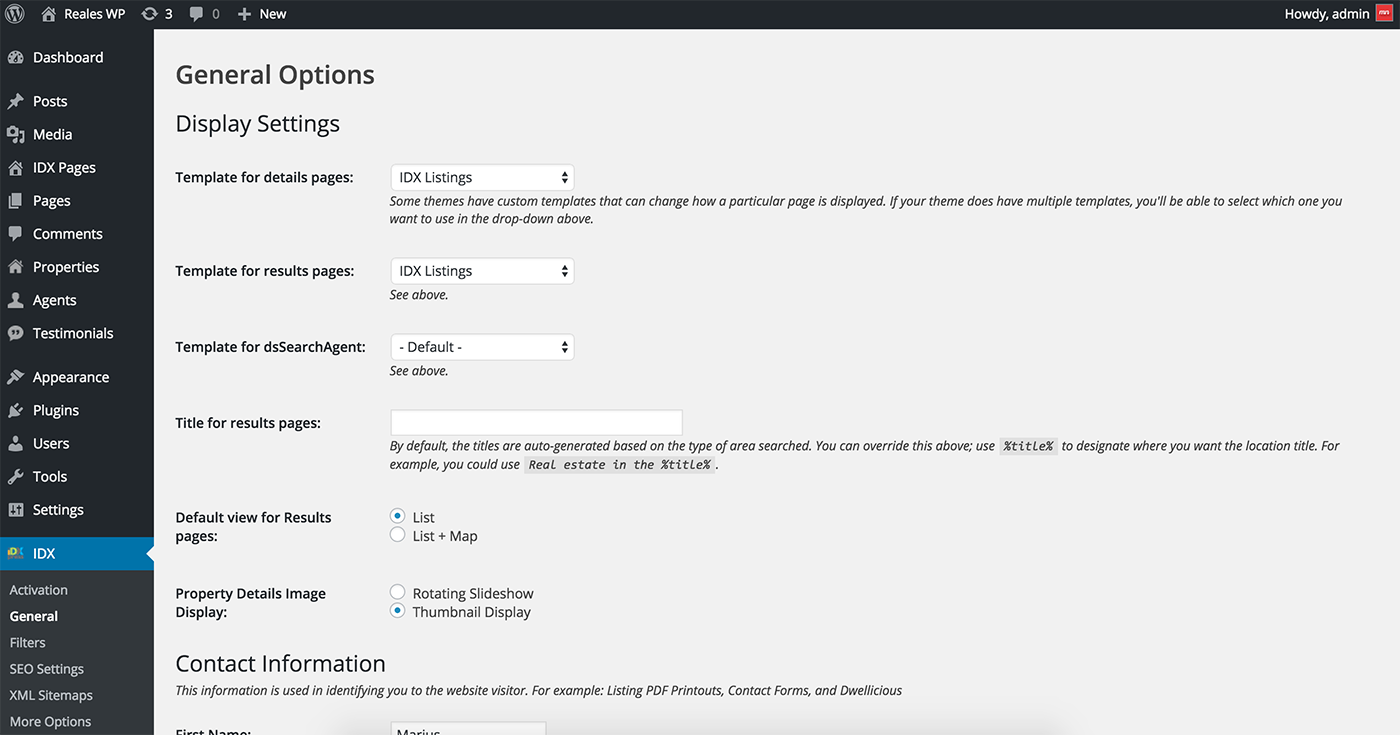
1. Setting the plugin pages templates: First you need to create an IDX Page that will display the listings. For this go to IDX Pages > Add New from admin main menu. You don't have to enter any content inside the content editor.
Next go to IDX > General from admin main menu and set the templates like in the image below:
2. Adding the IDX search form to the homepage: Go to Appearance > Widgets and add the IDX Quick Search widget to the IDX Homepage Search Widget Area and check the Horizontal option like in the image below:

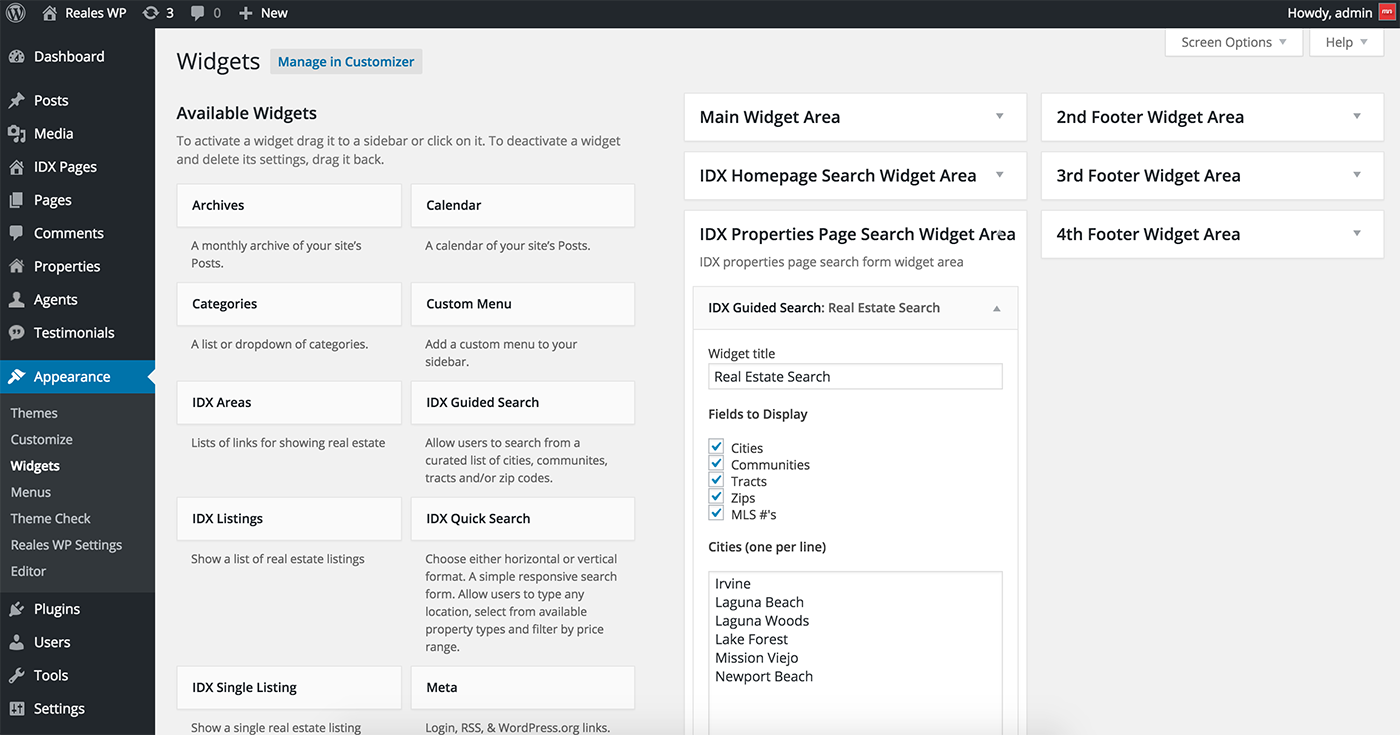
3. Adding the IDX search form to the listings pages: Go to Appearance > Widgets and add the IDX Guided Search widget to the IDX Properties Page Search Widget Area like in the image below:
Optima Express plugin
Optima Express plugin must be installed separately and it requires and account and monthly fee to be used.
Reales WP offers Optima Express plugin support, containing customized plugin widgets, pages, shortcodes.
NOTE: Optima Express plugin is optional and the properties created inside admin will not be displayed alongside with the ones imported by the plugin.
1. Setting the plugin pages templates. In order to have the best results, it's recommended to set the IDX Pages > Theme Template for each page like in the image below:

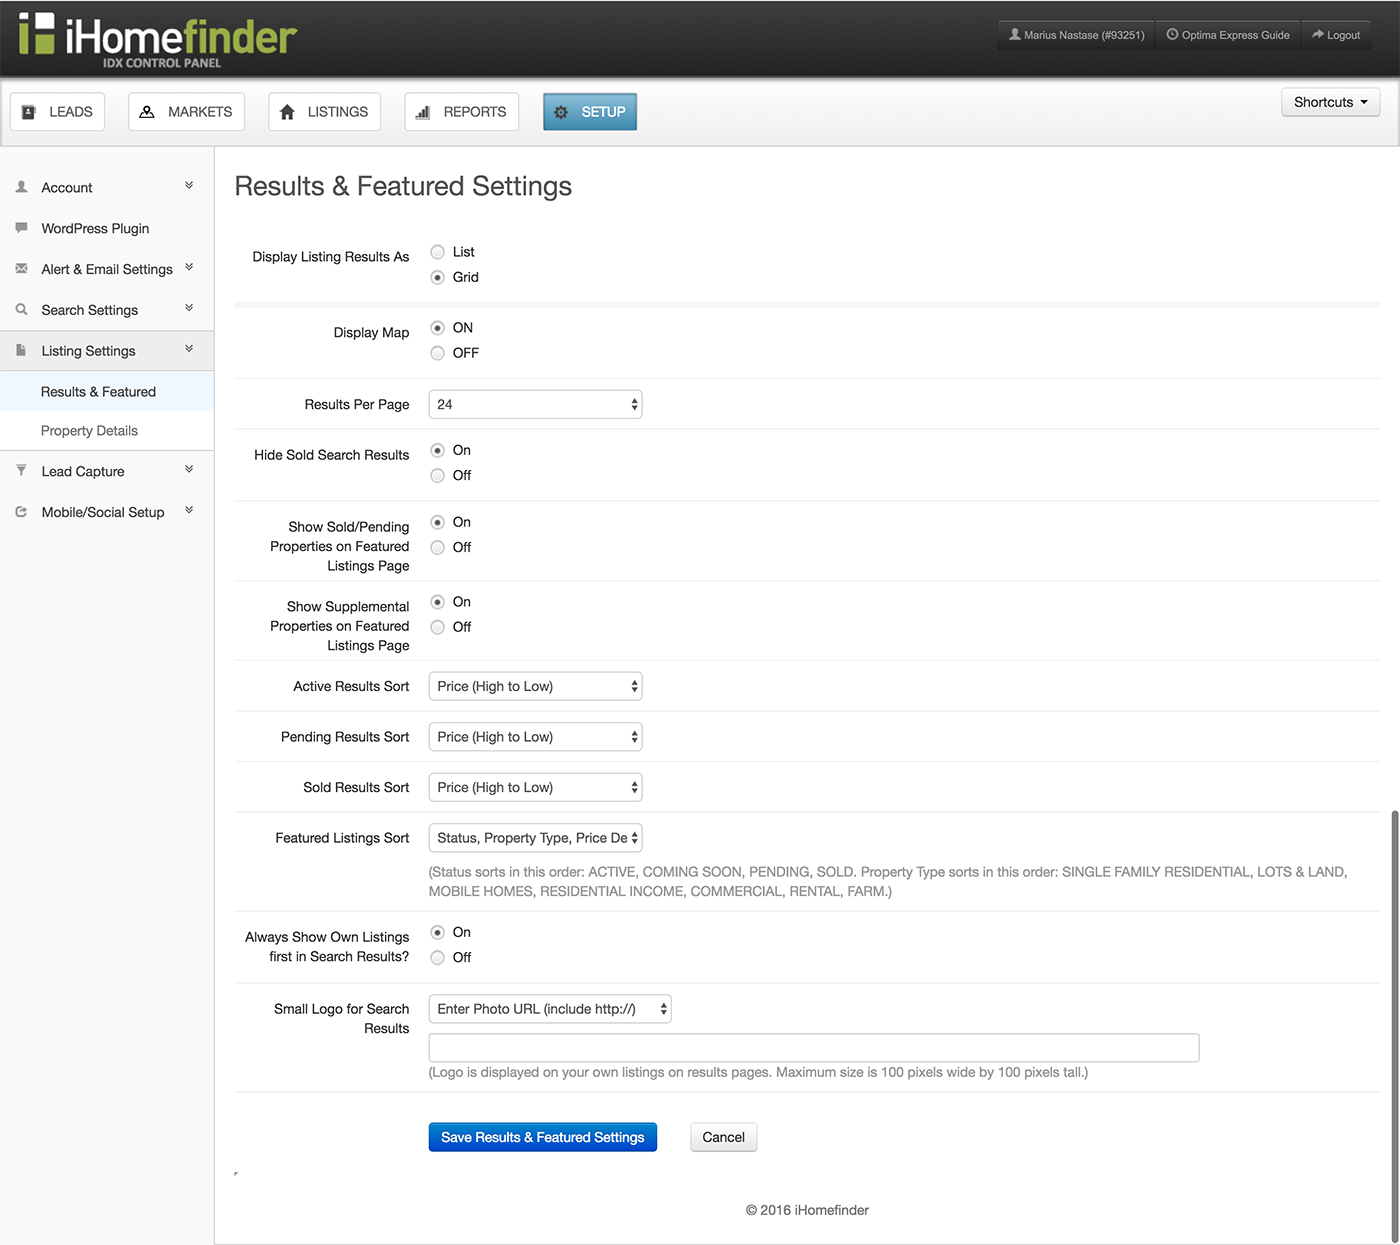
2. Go to Optima Express > IDX Control Panel and on the Control Panel of your IDX account go to Listing Settings > Results & Featured and set the Display Map to ON
3. In order to fix some incompatibility issues with the theme, you need to do the following:
- Follow the steps from this page: Theme Compatibility
-
Open this page: /plugins/optima-expess/iHomefinderEnqueueResource.php and comment/delete this line:
$this->enqueueScript("ihf-bootstrap", "js/bootstrap-libs/bootstrap.min.js");
CSS and Layout structure
Reales WP theme is based on Boostrap 3. For the bootstrap css and components, please check here
The main CSS file structure is presented below
Table of contents
[Homepage Layout]

* body
    + Hero / #hero-container
        - Slider / #slideshow
        - Header / .home-header
            - Navigation / .top-nav
        - Caption / .home-caption
        - Search Panel / .search-panel
    + Spotlight / .spotlight
    + Content / .page-content
    + Footer / .home-footer
[Blog Layout]

* body
    + Carousel / #carouselBlog
    + Header / .home-header
        - Navigation / .top-nav
    + Content / .page-content
    + Footer / .home-footer
[Application Layout]

* body
    + Header / #header
        - Navigation / .top-nav
    + Sidebar / #leftSide
        - Navigation / .leftNav
    + Map / #mapView
    + Content / #content
Javascript
Files
The application client side functionality is based on JQuery - See documentation
Javascript custom files included:
- ajax-upload.js
- main.js
- services.js
- shortcodes.js
- admin.js
- agent.js
- property.js
- testimonials.js
Plugins
- InfoBox
- jQuery UI Touch Punch - See documentation
- jQuery Tags Input - See documentation